What Is Sourdough Bread?
What is sourdough bread, and what makes it different from an ordinary loaf of bread?
Sourdough bread is made by fermenting dough with a sourdough starter: a living culture of flour, water, yeasts, and bacteria. Instead of relying only on packaged baker’s yeast for a quick rise, traditional sourdough uses this established culture to ferment the dough gradually.
During fermentation, the yeasts help the dough rise, while lactic acid bacteria produce acids and flavour compounds that influence the bread’s taste, aroma, texture, and keeping quality.
However, sourdough does not have to taste intensely sour. It does not have to contain enormous holes. It does not have to be shaped like a round artisan loaf, either.
Sourdough can be crusty or soft, white or whole grain, mild or tangy. It can become sandwich bread, focaccia, pizza, bagels, rolls, pancakes, cakes, and much more.
This guide explains what sourdough really is, how the starter works, what happens during fermentation, and what you need to know before baking your first loaf.
The simple definition: Sourdough bread is bread fermented with a sourdough culture containing yeasts and acid-producing bacteria.
What Makes Bread Sourdough?
Four things work together to make sourdough bread:
- A sourdough starter
- Flour and water
- Fermentation
- Time and temperature
Salt is also included in most bread recipes for flavour, dough strength, and fermentation control.
Traditional naturally leavened sourdough uses the starter as its primary leavening source. However, some bakeries and recipes combine sourdough starter with a small quantity of commercial yeast for speed or consistency.
Therefore, the presence of commercial yeast does not necessarily prove that no sourdough fermentation occurred. It does mean that the loaf may not be exclusively naturally leavened.
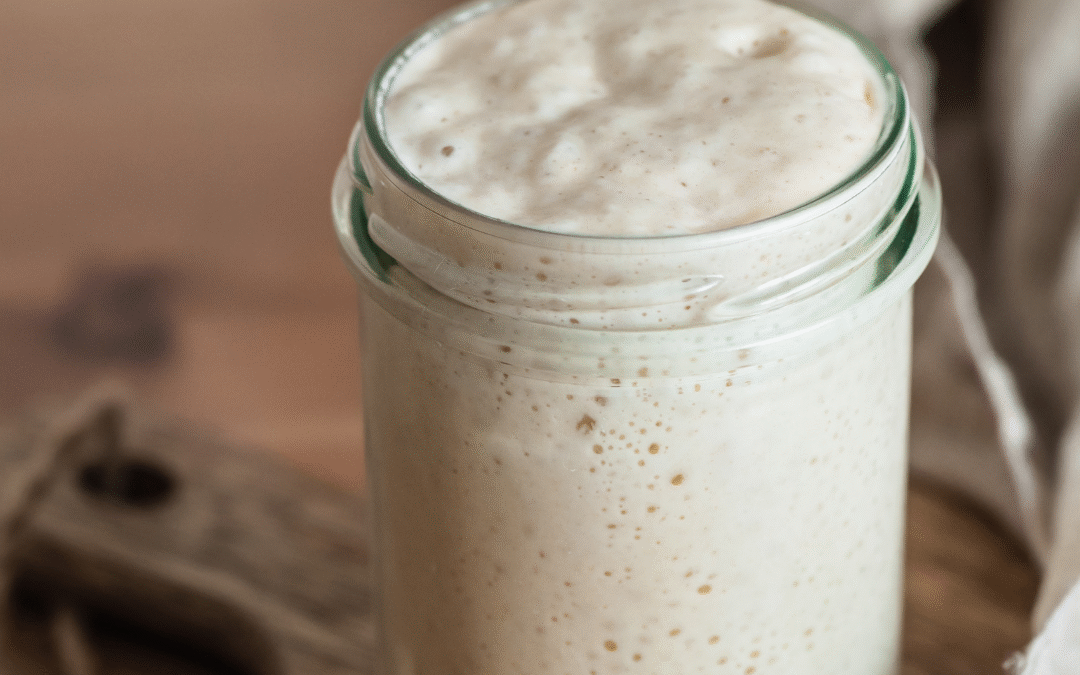
What Is a Sourdough Starter?
A sourdough starter is a fermented mixture of flour and water that supports a community of microorganisms, primarily yeasts and lactic acid bacteria.
It is both:
- A living culture that must occasionally be refreshed with flour and water
- An ingredient used to ferment and leaven bread dough
Once established, the starter contains microorganisms that consume carbohydrates in the flour and produce gases, acids, alcohols, and flavour compounds.
Research shows that sourdough starters contain diverse microbial communities. Flour is an important source of these microorganisms, although water, equipment, hands, air, geography, temperature, and feeding practices can also influence which organisms thrive.
👉 Create your Sourdough Starter with my Step-by-Step Recipe.

What does the yeast do?
Yeasts consume available sugars and produce carbon dioxide and ethanol.
The carbon dioxide becomes trapped within the dough’s structure, causing the dough to expand. In wheat-based bread, gluten helps hold those gas bubbles in place.
What does the bacteria do?
Lactic acid bacteria produce organic acids, including lactic and acetic acids.
These acids help create sourdough’s characteristic flavour. They also affect dough behaviour and may help slow certain forms of spoilage, although the exact effect depends on the starter, recipe, fermentation, and storage conditions.
Where do the microorganisms come from?
You will often hear that a starter “captures wild yeast from the air.” That is only part of the story.
Many microorganisms are already present on the grain and in the flour. Additional microorganisms may come from your hands, water, jar, utensils, and surrounding environment.
In other words, you do not have to leave your jar uncovered to catch yeast. In fact, a loose-fitting lid is generally preferable because it protects the starter while allowing gas to escape.
Starter, Levain, and Discard:
What Is the Difference?
These three terms are often used interchangeably, but they do not always mean exactly the same thing.
Sourdough Starter
Your starter is the ongoing culture you maintain over time. You keep a portion, feed it with flour and water, and use some of it whenever you bake.
It may also be called a mother starter, mother culture, chef, or culture.
Levain
A levain is usually a separate portion of starter that is fed specifically for one recipe.
For example, you might take 20 grams of your established starter and feed it with the exact flour and water needed for tomorrow’s loaf. Once that levain is ripe, the entire amount goes into the dough.
Not every recipe requires a separate levain. Some recipes simply use active starter directly from the main jar.
Sourdough Discard
Discard is the portion removed before feeding a starter.
Despite the name, it does not necessarily belong in the garbage. It can be used in pancakes, crackers, muffins, cookies, cakes, waffles, and many other recipes.
Discard may still contain living yeasts and bacteria. However, if it has not recently been fed and is no longer rising predictably, it should not automatically be treated as a strong bread-leavening starter.

What Is Sourdough Bread Made Of?
A basic artisan sourdough loaf can be made with four components:
- Flour
- Water
- Salt
- Sourdough starter
Because the starter itself contains flour and water, people will sometimes say sourdough contains only three ingredients: flour, water, and salt.
However, sourdough is not limited to plain white artisan bread. Depending on the recipe, it may also include:
- Whole wheat, rye, spelt, einkorn, or khorasan flour
- Milk, butter, eggs, or oil
- Honey, molasses, or other sweeteners
- Seeds, nuts, cheese, herbs, fruit, or chocolate
- Cooked grains, porridges, or potatoes
The defining feature is not a particular loaf shape or ingredient list. It is the use of sourdough fermentation.
How Does Sourdough Fermentation Work?
Fermentation begins as soon as the starter is mixed into the dough.
The microorganisms and enzymes begin transforming the available carbohydrates and other components in the flour. Meanwhile, the dough gradually becomes more aerated, acidic, elastic, and flavourful.
Several important things happen during this time:
The dough produces gas
Yeasts and some bacteria produce carbon dioxide. The developing dough structure holds that gas, allowing the dough to rise.
Acids accumulate
Lactic and acetic acids lower the dough’s pH and contribute flavour. The balance between those acids helps determine whether the finished bread tastes mild, creamy, fruity, sharp, or noticeably tangy.
Flavour develops
Fermentation creates far more than sourness. A well-fermented loaf may have nutty, wheaty, buttery, malty, fruity, toasted, or mildly fermented flavours.
The dough structure changes
Water hydrates the flour, gluten develops, enzymes act on starches and proteins, and fermentation changes how the dough stretches and holds gas.
This is why sourdough baking is controlled by more than the clock. Starter strength, flour, dough temperature, hydration, inoculation, and room temperature all influence how quickly the dough develops.

How Is Sourdough Bread Made?
Every recipe is slightly different, but most naturally leavened sourdough bread follows the same general process.
1. Prepare an active starter
Before making bread, the starter is usually fed and allowed to rise until it shows dependable fermentation activity.
A mature starter may expand, become filled with bubbles, develop a pleasantly fermented aroma, and reach a predictable peak after feeding.
However, doubling alone is not the only measure of starter health. Flour choice, hydration, jar shape, feeding ratio, and temperature all influence how much visible expansion occurs.
2. Mix the dough
The starter is combined with flour, water, and salt.
Some recipes begin with an autolyse, during which only flour and water are mixed and rested before the starter and salt are added. Other recipes mix everything together from the beginning.
Both approaches can produce excellent bread.
3. Develop dough strength
The dough may be strengthened through:
- Kneading
- Stretch and folds
- Coil folds
- Slap and folds
- Mixing with a stand mixer
- A combination of resting and folding
These methods help organize and strengthen the dough so it can retain the gas produced during fermentation.
4. Complete bulk fermentation
Bulk fermentation is the first main fermentation of the complete dough.
Importantly, bulk fermentation begins when the starter is mixed into the dough. It does not begin after the last stretch and fold.
During bulk fermentation, the dough rises, becomes smoother, develops bubbles, and often becomes lighter and more elastic.
The dough does not always need to double. The correct amount of expansion depends on dough temperature, flour, hydration, starter percentage, and whether the dough will later be refrigerated.
5. Preshape and shape
After bulk fermentation, the dough may be gently preshaped, rested, and then shaped into its final form.
Shaping creates surface tension and helps the dough hold its structure during proofing and baking.
6. Complete the final proof
Proofing is the final rise after shaping.
The dough may be proofed:
At room temperature
In the refrigerator
At room temperature followed by refrigeration
In a temperature-controlled proofing box
Refrigeration slows fermentation, but it does not immediately stop it.
7. Score and bake
Just before baking, the dough is usually scored with a razor or very sharp blade.
Scoring creates a controlled expansion point. Without it, the loaf may split wherever the pressure finds a weak area.
The loaf is then baked with steam, often inside a preheated Dutch oven. Steam keeps the surface flexible during the early part of baking, helping the loaf expand before the crust hardens.
8. Let the bread cool
Cooling is part of the baking process.
The crumb continues setting as the loaf cools. Cutting too early can compress the interior and make a properly baked loaf appear gummy.

What Is Bulk Fermentation?
Bulk fermentation is one of the most misunderstood sourdough stages.
It is the period after the starter enters the dough and before the dough is divided or shaped.
During bulk fermentation, you may perform stretches and folds. However, the folds are not separate from bulk fermentation; they happen within it.
The purpose of bulk fermentation is not simply to make the dough bigger. It also allows the dough to:
- Produce and retain gas
- Develop acidity and flavour
- Strengthen
- Become more extensible
- Prepare for shaping and proofing
Learning to recognize the dough’s development is eventually more dependable than following a fixed number of hours.
Does Sourdough Have to Taste Sour?
No. Sourdough describes the fermentation method, not a required level of sourness.
Some loaves have only a delicate fermented flavour. Others have a noticeable tang.
The final flavour can be influenced by:
- The starter’s condition
- The flour
- Fermentation time
- Dough and room temperature
- Starter percentage
- Starter hydration
- Feeding schedule
- Refrigeration
- The bacteria and yeasts present in the culture
Therefore, someone who dislikes strongly sour bread may still enjoy a mild sourdough sandwich loaf, brioche-style bread, focaccia, or same-day artisan loaf.

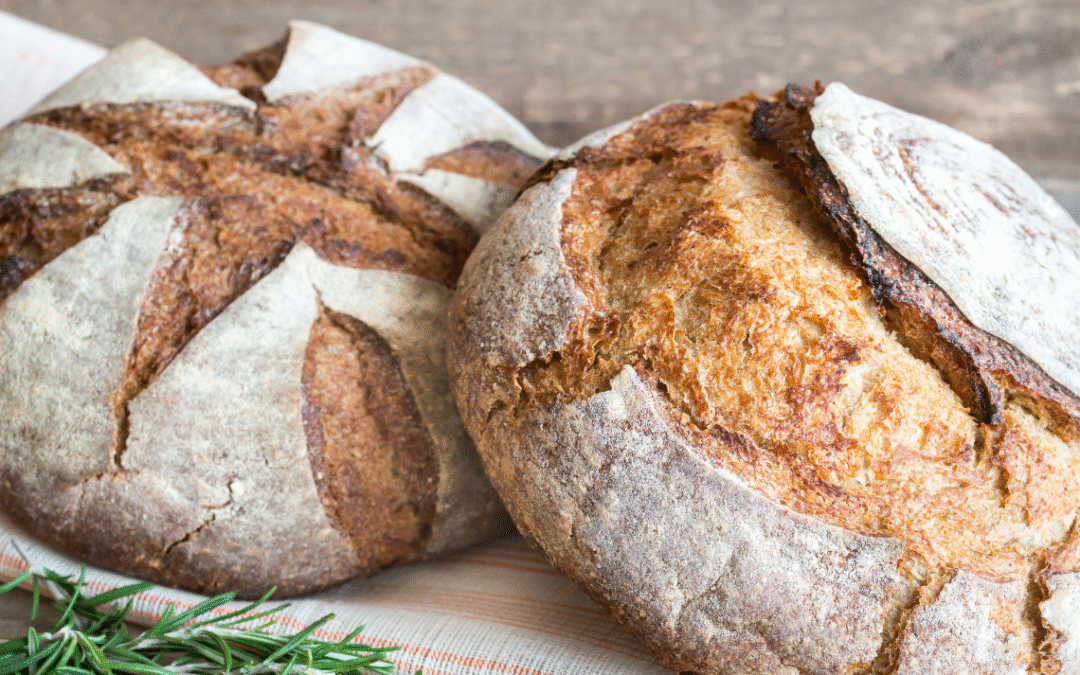
What Should Sourdough Bread Look Like?
There is no single correct sourdough appearance.
Social media often presents tall round loaves with dramatic scoring and enormous holes as the ideal. However, large holes are not proof that a loaf is superior, healthier, or better fermented.
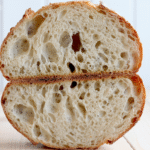
A good crumb should suit the bread’s purpose.
For example:
- An artisan loaf may have an irregular, moderately open crumb.
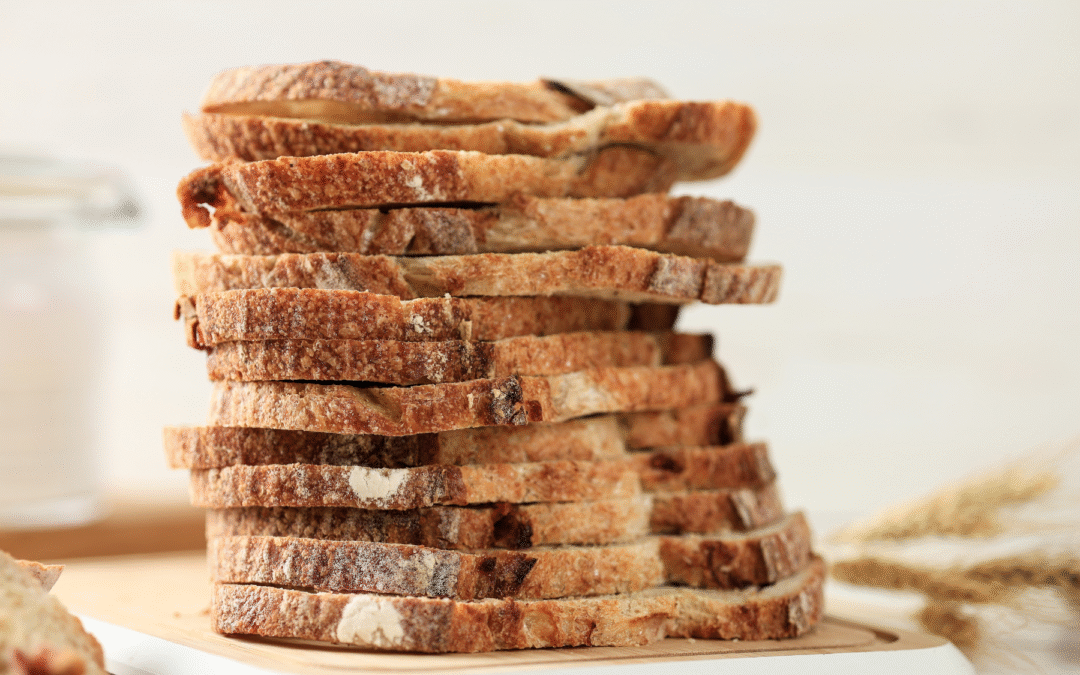
- Sandwich bread should usually have smaller, more even holes.
- Rye sourdough may have a close, moist crumb.
- Enriched sourdough can be soft, fine, and tender.
- Focaccia should be airy but strong enough to hold its toppings.
- Bagels should be chewy and relatively tight inside.
A loaf with smaller holes can be beautifully fermented. More importantly, it is far more practical for toast and sandwiches.
Is Sourdough Bread Healthier?
For many people, traditionally made sourdough can be the better choice, especially when you compare a simple homemade loaf (flour, water, salt, starter) to a highly processed store-bought loaf full of preservatives, dough conditioners, added flavours, and other additives.
But commercial yeast itself isn’t unhealthy. (Though many people say it leaves them more bloated.) The bigger difference is usually how the bread is made: how long it ferments, and what goes into it.
Sourdough ferments slowly, using the wild yeasts and beneficial bacteria in the starter. During that long fermentation, those microorganisms begin breaking down some of the carbohydrates and compounds in the flour, before the bread ever reaches your stomach.
That slower process may make sourdough:
- Easier to digest for some people
- Gentler on the gut than quickly made bread
- Better at supporting mineral absorption
- Less likely to cause a sharp blood sugar spike than some conventional white breads
- More flavourful, without artificial additives
That doesn’t mean every sourdough loaf is automatically healthy. A whole-grain sourdough will usually offer more fibre and nutrients than one made entirely with refined white flour. Ingredients, fermentation time, serving size, and your overall diet all still matter.
For the greatest benefit, look for a traditionally fermented sourdough made with simple ingredients and given enough time to ferment properly. You’ll usually find this from home bakers (often called cottage bakers) and small bakeries. Before you buy, always ask whether they use commercial yeast — some bakeries use both starter and yeast to save time.
Is Sourdough Bread Probiotic?
Not after it’s baked.
Your starter is full of living yeasts and bacteria, but the heat of the oven destroys most of them. So baked sourdough isn’t a probiotic food the way yogurt and other live-culture foods are.
The fermentation still matters, though. It changes the flour before baking, and the beneficial compounds it creates remain in the finished loaf, even though the live bacteria don’t survive the oven.
Is Sourdough Easier to Digest?
For many people, yes.
The long fermentation gives the yeasts and bacteria time to break down some of the starches, carbohydrates, and proteins in the flour. That’s one reason some people find traditionally fermented sourdough more comfortable to digest than quickly made commercial bread.
Everyone’s different, though. Sourdough may sit easier with you, but it isn’t a guaranteed fix for every digestive concern.
Want the full scoop? Head over to my next post: Why Sourdough Bread Is Better for Your Health (And Who Benefits Most).
Important Warning for People With Celiac Disease
Is Sourdough Bread Gluten-Free?
No. Ordinary sourdough made with wheat, rye, barley, spelt, einkorn, emmer, or khorasan is not gluten-free.
Fermentation may change or partially break down some of the proteins, but long fermentation does not make wheat sourdough safe for someone with celiac disease.
If you have celiac disease, use sourdough made with certified gluten-free flour and prepared with proper cross-contact precautions. Beyond Celiac is clear on this: wheat-based sourdough is not safe for people with celiac disease unless the product is genuinely gluten-free.
Start here: How to Make a Gluten Free Sourdough Starter and Easy Beginner Recipe Sourdough Gluten Free Bread.

Is Store-Bought Sourdough Really Sourdough?
Sometimes. Some store-bought sourdough is traditionally fermented. Some is made with sourdough culture plus commercial yeast. And some is formulated mainly to reproduce sourdough flavour.
The ingredient list may include:
| Sourdough starter or culture Flour Water Salt Commercial yeast |
Vinegar or other acids Sweeteners Dough conditioners Preservatives Natural flavours |
But the ingredient list can’t tell you the two things that matter most: how long the dough fermented, and how much active sourdough culture was actually used.
For a loaf closer to traditional sourdough, look for a bakery that can tell you:
- Whether it uses an established starter
- Whether the dough goes through meaningful fermentation
- Whether commercial yeast is added
- How long the bread ferments
- Which flours and other ingredients are used
Commercial yeast isn’t automatically a “bad” ingredient. The real question is what you want: traditional naturally leavened bread, a hybrid sourdough, or simply a loaf with sourdough flavour.
“Fake” isn’t a useful label. What matters is knowing what you’re actually buying, traditional, hybrid, or just sourdough-flavoured.

A Brief History of Sourdough
No one can confirm the precise person, place, or date of sourdough’s invention.
It likely developed wherever grain and water were mixed and left long enough for spontaneous fermentation to occur. Fermented and leavened breadmaking existed thousands of years before packaged baker’s yeast.
Ancient Egyptian breadmaking provides important evidence of early fermented bread traditions. However, it is more accurate to say that Egypt played a major role in sourdough history than to declare that one Egyptian baker definitively invented it.
Before modern commercial yeast became widely available, bakers maintained fermented doughs, saved pieces from previous batches, or used other established sources of yeast to leaven new bread.
Sourdough and the Gold Rush
Sourdough later became strongly associated with prospectors and settlers in the North American West.
During the Klondike Gold Rush, starter was useful because it could be maintained and used repeatedly in remote conditions. Sourdough foods became closely associated with the stampeders travelling toward the Klondike gold fields. Over time, “sourdough” also became a nickname for an experienced northern resident or old-timer, particularly in Yukon and Alaska.
San Francisco developed its own famous sourdough identity, but the California sourdough tradition and the Yukon or Alaska nickname should not be treated as exactly the same historical story.
So, What Does Sourdough Actually Taste Like?
Not all sourdough tastes sour. For example, a well-fed starter creates mild flavor, while longer fermentation creates a stronger tang.
- Mild sourdough: Soft tang, nutty and wheaty.
- Tangy sourdough: Stronger bite, deeper flavor, more “classic” sour taste.
Either way, sourdough has a depth of flavor you just don’t get from regular yeast bread.

Essential Sourdough Terms for Beginners
Active starter
Starter that has recently been fed and is showing dependable fermentation activity.
Autolyse
A rest traditionally involving flour and water before the starter and salt are added. Some recipes use the term more loosely, but technically the classic autolyse does not include starter or salt.
Baker’s percentage
A system that expresses each ingredient as a percentage of the total flour weight. Flour is always calculated as 100%.
Bulk fermentation
The first main fermentation of the complete dough, beginning when the starter is mixed in and ending when the dough is divided or shaped.
Crumb
The interior structure of bread.
Discard
Starter removed during maintenance or feeding. It can be used in many recipes, although it may not be strong enough to leaven bread reliably.
Fermentation
The broader microbial process through which yeasts and bacteria transform the dough.
Hydration
The amount of water relative to the flour, expressed as a percentage.
Inoculation
The amount of starter or levain added to the dough relative to the flour.
Levain
A portion of starter built for a specific recipe.
Oven spring
The rapid expansion that happens during the early stage of baking.
Proofing
The final rise after the dough has been shaped.
Scoring
Cutting the surface of the dough before baking to direct expansion.
Stretch and fold
A dough-strengthening method in which part of the dough is stretched and folded over itself.
Simple Tools You Will Need To Make Baking Easier
You don’t need a bakery setup to begin baking sourdough. With just a few simple tools, you’ll make your first loaves with less stress and more success. Here are my go-to essentials:
Affiliate Disclaimer: This post contains affiliate links. If you purchase through these links, I may earn a small commission at no extra cost to you. I only recommend products I personally use and love, and your support helps me keep sharing free sourdough recipes and resources.
- Digital kitchen scale – Baking is science, and flour can be surprisingly tricky to measure with cups. A scale gives you accuracy (and peace of mind).
- Glass jar with a loose lid for your starter – A clear jar lets you watch the bubbles and growth, which is half the fun. Add a rubber band around the jar to mark how much your starter has risen.
- Silicone spatula – Easy mixing and jar scraping with less waste. Flexible edges keep starter and dough where they belong instead of stuck to the bowl.
- Mixing bowl – A large, sturdy bowl makes mixing and folding dough easy. Bonus if it’s glass or ceramic so you can see how much your dough rises.
- Instant-read thermometer – Not essential, but incredibly helpful for checking dough and water temperatures. It takes the guesswork out of fermentation.
- Banneton (proofing basket) kit – Gives your dough support during the final rise and creates those beautiful spiral flour patterns. If you don’t have one yet, a bowl lined with a well-floured tea towel will do the trick.
- Bench scraper – Sticky dough is part of sourdough life. A bench scraper helps you handle it gracefully and keeps your counter neat.
- Dutch oven – A Dutch oven traps steam, creating that crackly crust and gorgeous oven spring. In fact, it’s one of the easiest ways to get bakery-quality bread at home. My absolute favorite that I use is Krustic Dutch Ovens.
👉 Want my full setup? Here’s my complete list of sourdough tools I recommend.

Frequently Asked Questions
About Sourdough Bread
Does sourdough bread always taste sour?
No. Its flavour can range from very mild to noticeably tangy. Fermentation time, temperature, starter condition, flour, and the recipe all affect the final flavour.
Does sourdough require commercial yeast?
Traditional naturally leavened sourdough does not require commercial yeast. However, some sourdough recipes and bakeries use both starter and commercial yeast.
Can beginners make sourdough?
Yes. However, sourdough involves learning how a living culture and fermenting dough respond to temperature, time, and flour. Your first loaf does not need to look like a professional bakery loaf to be successful.
How long does sourdough take?
A loaf may take most of a day or extend over two or more days, depending on the recipe. Much of that time is passive fermentation rather than hands-on work.
Why is my sourdough bread dense?
Common causes include a weak starter, insufficient fermentation, excessive fermentation, inadequate dough strength, unsuitable flour, or shaping that removes too much gas.
Why is my sourdough gummy?
Possible causes include underbaking, cutting the loaf before it cools, excessive hydration for the flour, insufficient fermentation, or excessive fermentation.
Is an open crumb better?
No. Crumb structure should suit the bread. A very open crumb can be beautiful, but an even crumb is often more useful for sandwiches, toast, butter, and spreads.
Does an old starter make better bread?
Not necessarily. A young but mature and well-maintained starter can make excellent bread. Starter age is less important than its current microbial activity, feeding routine, flour, and condition.
Can a starter live forever?
Potentially, yes. As long as a sourdough starter is regularly fed, properly cared for, and protected from mould or harmful contamination, it can continue living for generations.
This is why some families, bakeries, and historic collections have starters reported to be more than 100 years old, including starters whose lineages are said to date back to the Gold Rush era.
Of course, a 100-year-old starter does not contain the exact same flour, water, or individual microorganisms that were present on its first day. Every feeding replaces part of the old starter with fresh flour and water, and its microbial community can naturally adapt over time.
However, it is still considered the same starter because part of the established culture is continuously carried forward into every new feeding—much like an heirloom that has been carefully maintained and passed from one generation to the next.
Although the exact age of every historic starter cannot always be independently verified, a well-maintained sourdough starter can theoretically be kept alive indefinitely.
Do I have to feed a starter every day?
Not necessarily. How often you feed your starter depends on how often you bake, where you store it, and the flavour and strength you want from it.
If you bake frequently, keeping your starter at room temperature and feeding it daily helps it stay strong, active, and ready to use. Regular feedings also prevent too much acid from building up in the starter.
If you only bake once a week or less, storing your starter in the refrigerator may make more sense. The cold slows fermentation, so it does not need to be fed as often. However, long periods in the refrigerator can make a starter more acidic and temporarily reduce its strength. It may need one or more room-temperature feedings before it is ready to leaven bread well again.
Personally, I do not bake every day, but I bake often enough that I prefer to keep my starter at room temperature and feed it daily. I like keeping it strong, predictable, and less acidic because I am not personally fond of very sour bread.
Many frequent sourdough bakers, microbakeries, and sourdough educators also feed their starters once or even twice a day, especially when they need them to remain consistently active for regular baking.
A simple guideline is:
- Bake often: Keep your starter at room temperature and feed it daily.
- Bake professionally or several times a week: One or two daily feedings may help maintain consistent strength.
- Bake once a week or less: Refrigerate it and give it enough room-temperature feedings to become strong and active before baking.
Is the float test the best way to determine whether starter is ready?
No. Floating can be influenced by flour, hydration, gas retention, and how the sample is handled. Predictable rising, visible aeration, aroma, and performance after feeding provide more useful information together.
What Should a Beginner Make First?
Before attempting complicated inclusions or very wet dough, begin with a dependable recipe that teaches you how to observe fermentation.
A strong beginner path is:
- Learn how to feed and observe your starter.
- Bake a straightforward lower- or moderate-hydration loaf.
- Learn the signs of bulk fermentation.
- Practise shaping.
- Repeat the same recipe before making major changes.
- Keep notes about flour, temperature, timing, and results.
Sourdough becomes easier when you stop trying to memorize a perfect number of hours and begin understanding what the starter and dough are showing you.
Sourdough Is a Method, Not One Particular Loaf
Sourdough is often represented by a flour-dusted artisan boule with a dramatic ear and an open crumb. That is only one expression of it.
At its core, sourdough is a fermentation system.
Once you understand that system, the possibilities expand far beyond one crusty loaf. The same culture can help you make soft sandwich bread, whole-grain loaves, rye bread, focaccia, pizza, bagels, English muffins, enriched doughs, pastries, and countless discard recipes.
The starter may be alive, but it is not mysterious magic. It is a community of microorganisms responding to food, temperature, time, and care.
Learning sourdough means learning how those factors work together. Once that foundation makes sense, the process becomes far less intimidating—and far more rewarding.
Ready to bake your own? Start here: How to Make a Sourdough Starter (Step-by-Step) and My Easy Beginner Sourdough Bread Recipe here.