The Official Honeycloud Sourdough Sandwich Bread
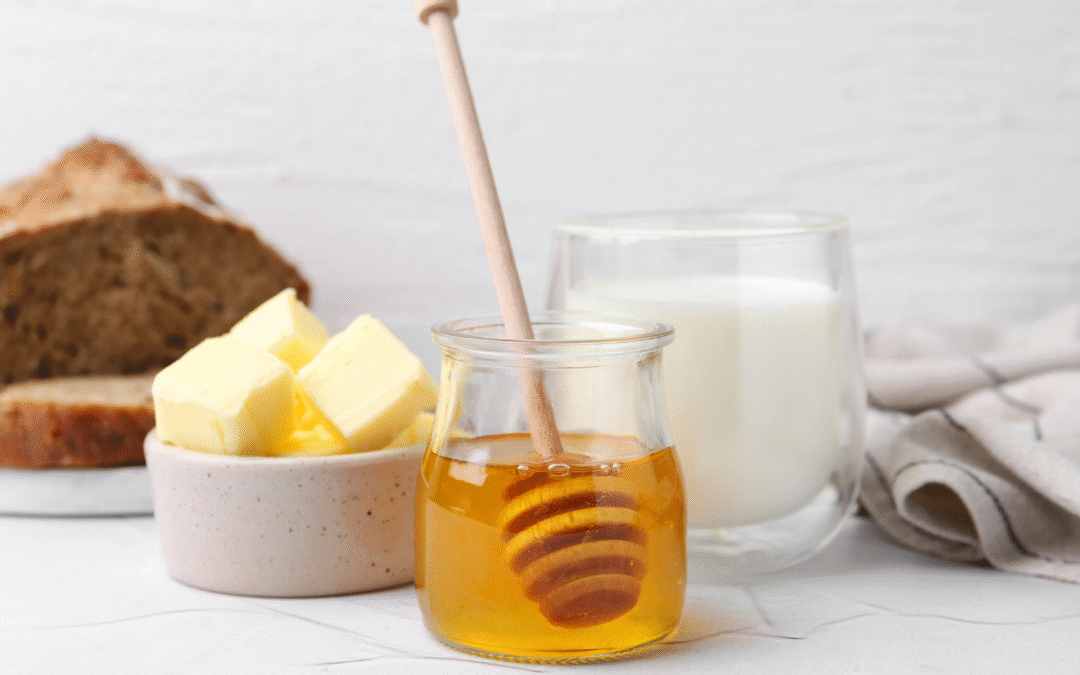
Honeycloud Sourdough Sandwich Bread is what happens when Japanese milk bread and French brioche have a baby. Soft, golden, and cloud-light with a whisper of honey and butter, this loaf is your elevated everyday sandwich bread.
It slices clean, stays soft for days, and makes everything from grilled cheese to peanut butter sandwiches taste luxurious. This is my softest sourdough loaf yet — naturally leavened, lightly enriched, and boosted with tangzhong for that signature pillowy crumb.
What Makes Honeycloud Sourdough Sandwich Bread Different From Brioche
Brioche is French, famously indulgent, and loaded with butter and eggs.
This Honeycloud sourdough loaf borrows brioche’s tenderness and aroma but keeps it lighter, easier to digest, and far more suitable for everyday eating.
- Classic brioche can contain nearly 50 percent butter by weight.
- Honeycloud uses just enough butter to make it silky, but not so much that it becomes dessert-like.
It sits beautifully between Japanese milk bread and light French brioche, especially when fermented overnight.
For my ultra-rich version, see: Classic Sourdough Brioche Loaf (coming soon)
Learn more about milk vs. water in bread.
Why Honeycloud Sourdough Sandwich Bread Works
Honeycloud is built on four pillars:
Tangzhong
A cooked flour-and-milk paste that allows the dough to hold more moisture. It’s the secret behind the soft, springy crumb and long shelf life.
Sweet Stiff Starter (SSS)
A low-hydration, lightly sweet levain that gives the dough gentle strength, mild flavor, and predictable fermentation.
Enriched Dough
Milk, honey, egg, and a touch of butter create a soft, custard-like interior without heaviness.
Overnight Fermentation
Deepens flavor, improves digestibility, and lets you bake with a fresh starter and a well-developed dough the next day.
Honeycloud isn’t brioche. It’s lighter, cleaner, and more cloud-like. Think Japanese milk bread meets Italian comfort with sourdough soul.

What Is Tangzhong
(And Why It Makes This Bread So Soft)
Tangzhong is a simple cooked mixture of flour and milk. Heating the starches transforms them into a gel that allows the dough to absorb and retain more moisture. This is the key to Honeycloud’s ultra-soft, cloud-like texture and impressive shelf life.
You can make tangzhong in two ways:
Stovetop method
Whisk flour and milk in a small saucepan, then cook over medium-low heat, stirring constantly, until thickened to a glossy, pudding-like paste (about 150–158°F).
Microwave method (my favorite)
In a microwave-safe bowl or mug, whisk the flour and milk together, then heat in 30-second intervals. Stir well between each burst until it reaches 150–158°F and becomes a thick, smooth paste.
Once cooked, cover the tangzhong to prevent a skin and let it cool to room temperature before mixing your dough.
Here’s what tangzhong does for your loaf:
Makes the crumb unbelievably soft
The gelatinized starch holds onto moisture, creating Honeycloud’s signature pillowy texture.
Keeps the bread fresh for days
It slows staling and allows the loaf to stay tender much longer than standard sourdough.
Improves structure without adding more fat
Tangzhong strengthens the dough naturally, so you get softness without needing extra butter.
Think of tangzhong as your “cheat code” for bakery-level sandwich bread. Once you use it, you’ll wonder how you ever baked enriched loaves without it.

Sweet Stiff Starter vs Liquid Levain
(Choose the one that fits your routine)
This Honeycloud Loaf is best with a Sweet Stiff Starter. This is a low-hydration, lightly sweet levain that creates a mild, clean flavor with beautiful fermentation strength. It produces:
✨ A tighter, more structured crumb
✨ Ultra-soft sandwich loaves
✨ Stronger gluten development
✨ A dough that is easier to handle (less stickiness)
✨ Less sourness overall
✨ Consistent proofing
If you prefer your sandwich bread mild, sweet stiff starter is the gold standard.
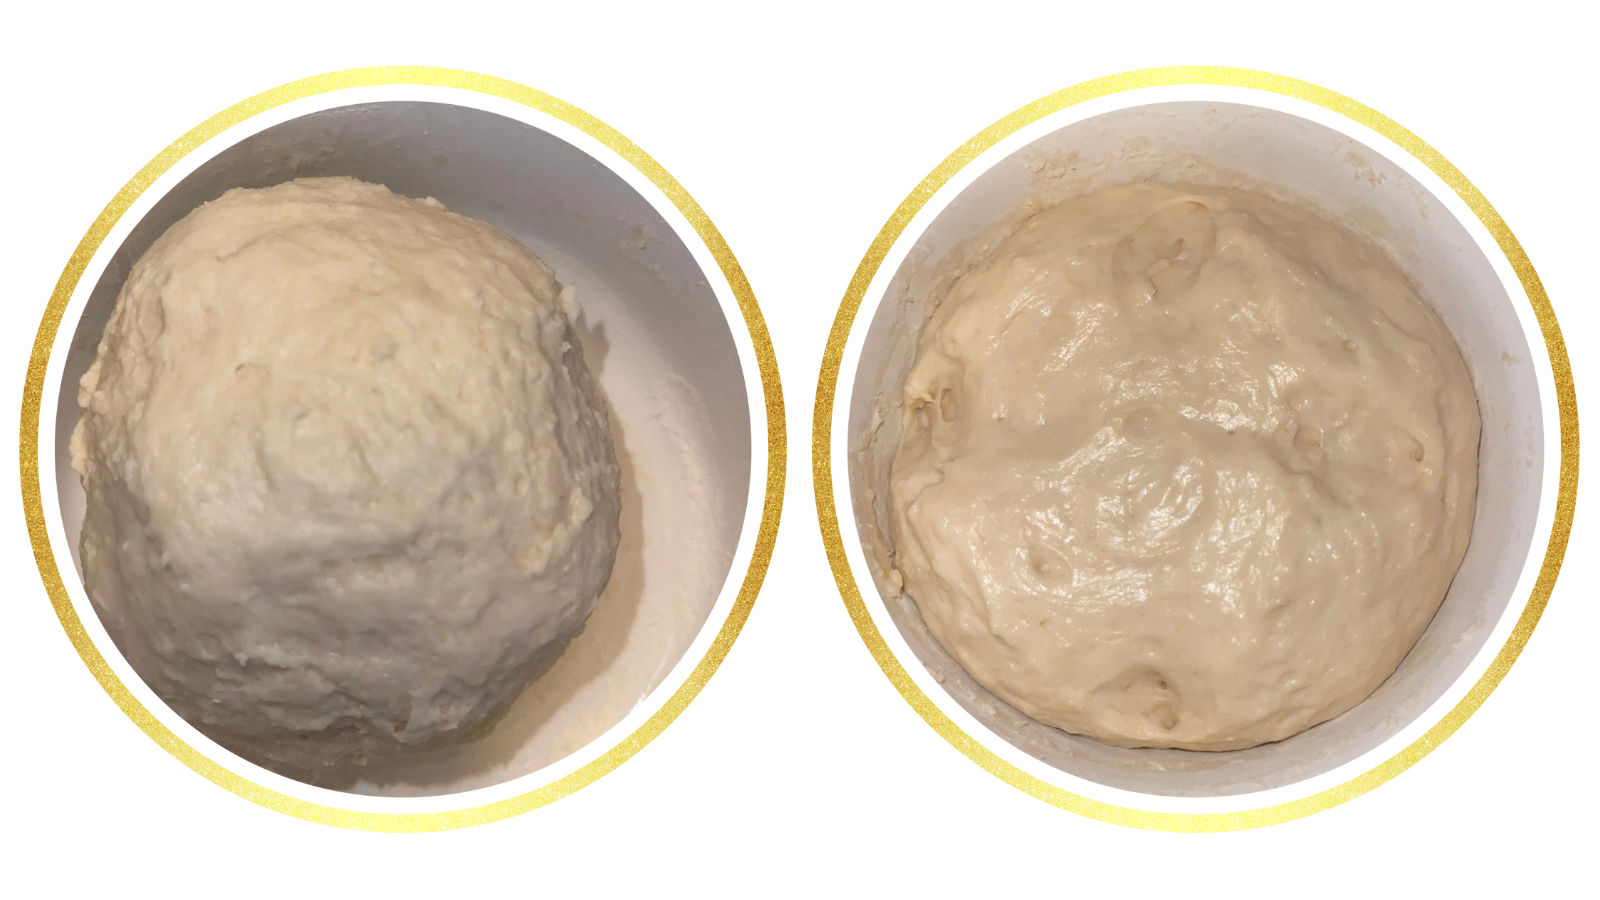 Left: freshly mixed sweet stiff starter before fermentation.
Right: fully fermented sweet stiff starter, domed and ready to use in Honeycloud dough.
Liquid Levain Option
If you maintain a 100 percent hydration starter, you can absolutely make Honeycloud using a liquid levain.
If using liquid levain:
✨ Expect slightly faster fermentation
✨ The dough may feel softer and slightly stickier
✨ Flavor will be a touch tangier
✨ A stickier dough: You may need to reduce the milk by 10 to 20 grams to compensate for the extra water in the levain
Both work beautifully — choose what fits your baking rhythm.
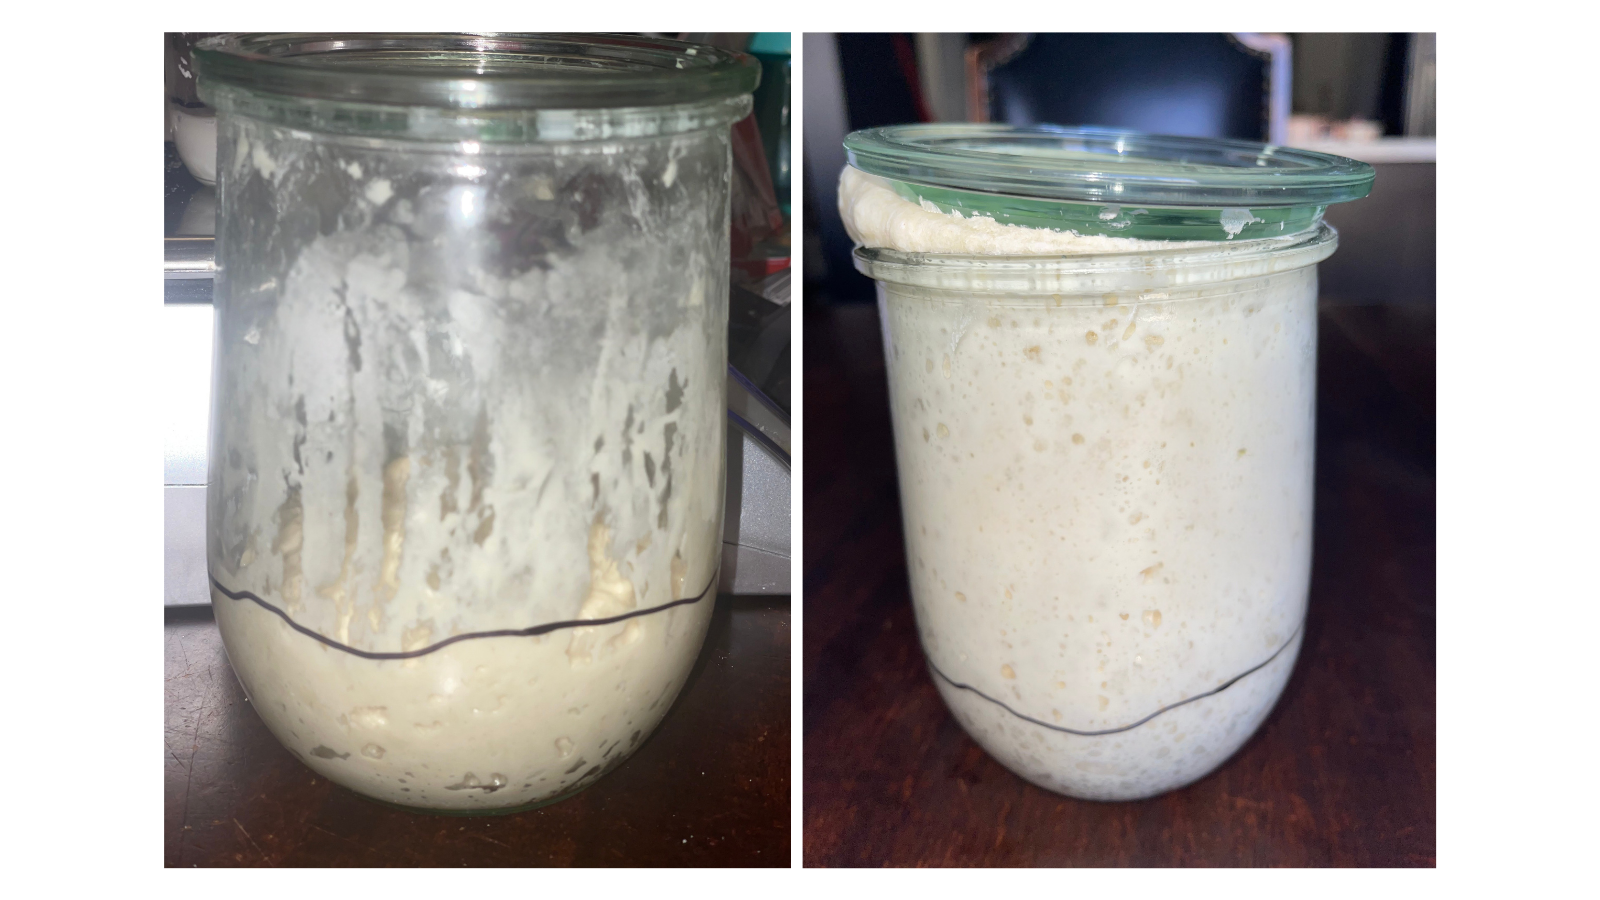 Left: A freshly mixed 100% hydration liquid sourdough starter at feeding.
Right: A fully active, bubbly, and overflowing starter at peak fermentation — happy, strong, and ready to bake with.
Affiliate Disclosure
This post contains affiliate links. As an Amazon Associate, I earn from qualifying purchases. I also partner with other trusted brands and may earn a small commission if you make a purchase through these links, at no additional cost to you. I only recommend tools and products I personally use, love, and trust in my sourdough kitchen. These small commissions help support Sourdoughpedia and allow me to continue creating free recipes, guides, and resources for you. Thank you for supporting my work.
Tools You’ll Need
Here’s what I use when baking Honeycloud:
- 9×5 inch loaf pan
- Stand mixer with dough hook
- Digital kitchen scale (grams are non-negotiable here)
- Small bowl or saucepan (for tangzhong)
- Mixing bowl or dough tub
- Dough scraper and spatula
- Thermometer (for tangzhong and internal loaf temperature)
- Plastic bowl covers or lid for bulk fermentation
- Pastry brush for butter or egg wash
- Cooling Rack
- Warming Mat (to speed up fermentation)
- Bread Slicer (optional but makes life easier to slice equal slices)
- Bread Knife (The best and most affordable knife I love)
Honeycloud Sourdough Sandwich Bread Ingredients
Yield: 1 loaf (about 950 g dough)
Pan: 9×5 inch
Tangzhong
- 15 g bread flour
- 75 g whole milk
Sweet Stiff Starter
- All of the SSS build (75 g)
Main Dough
- 260 g whole milk, lukewarm (about 95–100°F)
- 50 g egg (1 large egg)
- 45 g honey
- Tangzhong (all from above)
- Sweet stiff starter (all of it)
- 475 g bread flour
- 10 g milk powder (optional, but highly recommended for extra softness and flavor)
- 8 g fine sea salt
- 30 g unsalted butter, very soft not melted
Step-by-Step Instructions
1: Build Your Sweet Stiff Starter
For One Loaf of Honeycloud Sourdough Bread
Approx. 75 g total
- 13 g active sourdough starter
- 38 g bread flour
- 19 g water
- 5 g honey
1. Mix everything into a stiff dough ball. Knead briefly until smooth.
2. Place in a small jar or covered container, score the top with a cross if you like, and ferment:
- 4–6 hours at around 78–80°F, until domed
or - 1-2 hours at room temperature, then overnight in the fridge (8–12 hours)
3. Use it cold directly in your dough.
2. Make the Tangzhong
In a small microwave-safe bowl, mug, or saucepan, whisk together:
- 15 g bread flour
- 75 g whole milk
Why this amount works:
This rsoft sourdough sandwich bread recipe uses the classic 1:5 tangzhong ratio (flour to liquid). While it may look generous on paper, it represents just 3% of the total flour — the ideal amount for ultra-soft, stable sandwich bread.
You have two options to prepare the tangzhong:
Microwave method (fast and easy):
Heat flour + milk in 30-second bursts, whisking each time, until thick, glossy, and 150–158°F.
Stovetop method:
Add the flour and milk to a small saucepan, whisk until smooth, then cook over medium-low heat, whisking constantly, until thickened to a pudding-like paste (around 150–158°F).
Once thickened, cover the surface to prevent a skin, and let cool to room temperature before adding it to the dough.
3. Mix the Dough
In the bowl of your stand mixer, add:
- 260 g milk
- 50 g egg
- 45 g honey
- Cooled tangzhong
- All of your sweet stiff starter (tear it into smaller pieces)
Mix gently to start breaking up the SSS.
Add:
- 475 g bread flour
- 10 g milk powder
Mix on low speed just until there are no dry patches of flour. The dough will look rough and shaggy.
Cover the bowl and let it rest for 20–30 minutes (this is your fermentolyse).
4. Add Salt and Develop Gluten
Sprinkle 8 g salt over the dough and about 5 g of water or milk.
Mix on medium-low speed for about 6–8 minutes, until the dough begins to smooth out and cling to the hook. It should feel stronger and more elastic, but still soft.
5. Add the Butter
With the mixer on low, add 30 g very soft butter in 2–3 additions, allowing each portion to fully incorporate before adding more.
Once all the butter is in, increase to medium speed and knead another 3–5 minutes, or until:
- The dough feels silky and supple
- It pulls mostly cleanly from the sides of the bowl
- You can stretch a piece gently and it resists tearing (you don’t need an extreme panettone-style windowpane here, just good elasticity)
Note on hydration:
Honeycloud dough should feel soft and slightly tacky. This is normal and correct.
6. Bulk Fermentation
Transfer the dough to a lightly oiled bowl or container.
Let it ferment at room temperature for about 6–8 hours, or until:
- The dough has risen noticeably (around 60–80 percent)
- The surface looks smoother and slightly domed
- It feels airy and jiggly when you gently shake the bowl
You don’t want it doubled or on the verge of collapsing, but it should feel light and well-fermented.
Note: BF may be shorter if your kitchen is warm or your starter is very active. Use visual cues, not just time.
7. Shape and Cold Proof
Lightly oil your counter or chop board and gently turn the dough out (you might not need to since the oil from the bowl should be enough on the dough).
Press it into a rough rectangle, pressing out any very large gas bubbles but not smashing it flat. I use a rolling pin.
Roll the dough up into a snug log, tucking the sides and ends in as you go to create a smooth surface and good surface tension.
Place seam-side down into pan. Cover the pan well and place it in the refrigerator overnight for a cold proof. This helps develop flavor and strength in the dough.
8. Final Rise (After Cold Proof)
The next day, take the pan out of the fridge and let the dough finish proofing at room temperature in the pan on the counter.
Bake when the dough reaches the rim of the pan or rises about ½ inch above it at the center, with a soft dome and a slow-springing poke.
This usually takes about 3–4 hours depending on your kitchen temperature and starter strength.
9. Bake Your Honeycloud Sourdough Loaf
Preheat your oven to 375°F (190°C) for at least 25–30 minutes.
Optional: Brush the top of the loaf with a little beaten egg or milk for shine.
Bake in two stages for the best rise, color, and softness:
1. Bake at 375°F for 20 minutes
This sets the structure and gives the loaf a strong, even rise.
2. Reduce heat to 325°F and bake for another 15–20 minutes
This prevents over-browning while allowing the inside to finish baking gently.
If the top is browning too quickly at any point, tent loosely with foil.
Your loaf is done when:
- The top is a deep golden brown
- The internal temperature is 195–200°F
Note: For enriched doughs, 190–200°F is considered fully baked.
My preferred target is 200°F, which gives the loaf a cloud-soft interior without risk of gumminess.
10. Finish the Crust
For an extra-soft, tender sandwich loaf:
- Brush the hot loaf with melted butter, or
- Lightly mist the top with water, or
- Cover loosely with a clean kitchen towel or tent with foil for 5–10 minutes as it cools.
This keeps the crust supple and enhances that signature Honeycloud softness.
Remove from the pan and cool on a wire rack for 1–2 hours before slicing.
I know it’s hard to wait, but slicing too early will compress that beautiful cloud crumb.

Pan Size Guide
For best results, match your dough weight to your pan size:
- 9×5 inch loaf pan (this recipe): about 950 g dough
- 8.5×4.5 inch loaf pan: 750–800 g max dough
- 9×4×4 Pullman pan (no lid): 900–950 g dough
- 9×4×4 Pullman pan (with lid): 1,050–1,100 g dough
- Large 12×5 inch loaf pan: 1,350–1,450 g dough
- Mini loaf pans: 200–250 g dough per pan
Sample Baking Schedule
Here’s a realistic schedule:
Day 1 – Evening
👉 Build your Sweet Stiff Starter
👉 Make the tangzhong (can also do in the morning and let cool before mixing dough)
Day 2 – Morning
👉 Mix the dough
👉 Bulk Ferment at room temperature for 6-8 hours
Day 2 – Evening
👉 Shape the loaf and place it in the pan
👉 Cover and refrigerate overnight (cold proof)
Day 3 – Morning or Early Afternoon
👉 Bring the pan out and let the loaf finish proofing at room temp for about 3–4 hours
👉 Bake, cool, slice, and enjoy
You can flip this depending on when you like fresh bread (morning vs evening).
Tip: Always bake to visual cues and internal temperature rather than strictly by the clock.
How to Store Honeycloud Sourdough Sandwich Bread
Store Honeycloud in a bread bag or airtight container at room temperature for up to 3–4 days.
For longer storage, slice and freeze. Toast directly from frozen.
This bread makes incredible:
👉 French toast
👉 Grilled cheese
👉 Breakfast sandwiches
👉 Fancy peanut butter and honey sandwiches
It’s basically your “upgrade everything” loaf.

Ready to Make Your Own Honeycloud Sourdough Sandwich Bread?
When you bake this loaf, your kitchen will smell like pure comfort — and when you slice into it, you’ll understand why it’s become a favorite in my home. If you decide to give it a try, I’d love to see your results. Have a question, need help with the dough, or want feedback on your crumb? Leave a comment or reach out anytime. I’m here to help you bake your softest, dreamiest loaf yet.
When you bake this loaf, share your results with the hashtags #HoneycloudSourdoughBread and #BakeHoneycloudSourdough — and tag me at @sourdoughpedia. I love seeing your bakes, sharing them, and cheering you on.
The Official Honeycloud Sourdough Sandwich Bread
Equipment
- Warming Mat to speed up fermentation
- Extra Large Plastic Covers for Large Bowls
Ingredients
Build the Sweet Stiff Starter (see notes for overnight or same day)
Tangzhong
- 15 g flour Bread Flour or White Wheat Flour
- 75 g whole milk
Main Dough (1 Standard 9×5 Sandwich Loaf)
- 75 g Sweet Stiff Starter
- 90 g Tangzhong
- 260 g whole milk (warm 95–100°F) I prefer to use whole or homo milk but a lower fat milk is fine too. You may need additional milk while mixing if too dry.
- 1 Large Whole Egg
- 45 g honey
- 475 g bread flour
- 10 g dry whole milk powder (or skim) Optional but I always use it.
- 8 g Sea Salt (or whatever salt you prefer)
- 30 g unsalted butter softened not melted
Finish the Crust (brush immediately after baking)
- brush with melted unsalted butter or mist lightly with water
Instructions
Build Your Sweet Stiff Starter - For One Loaf
- Mix everything into a stiff dough ball. Knead briefly until smooth.
- Place in a small jar or covered container, score the top with a cross if you like, and ferment:4–6 hours at around 78–80°F, until domed or 1-2 hours at room temperature, then overnight in the fridge
- Use it cold directly in your dough.
Make the Tangzhong
- In a small microwave-safe bowl, mug, or saucepan, whisk together:15g bread flour and 75g whole milk
- You have two options to prepare the tangzhong:Microwave method (fast and easy): Heat flour + milk in 30-second bursts, whisking each time, until thick, glossy, and 150–158°F.Stovetop method: Add the flour and milk to a small saucepan, whisk until smooth, then cook over medium-low heat, whisking constantly, until thickened to a pudding-like paste (around 150–158°F).
- Once thickened, cover the surface to prevent a skin, and let cool to room temperature before adding it to the dough.
Mix the Dough
- In the bowl of your stand mixer, add:260 g milk50 g egg45 g honeyCooled tangzhongAll of your sweet stiff starter (tear it into smaller pieces)
- Mix gently to start breaking up the SSS.
- Once mixed in add:475 g bread flour10 g milk powder
- Mix on low speed just until there are no dry patches of flour. The dough will look rough and shaggy.
- Cover the bowl and let it rest for 20–30 minutes (this is your fermentolyse).
Add Salt and Develop Gluten
- Sprinkle 8 g salt over the dough and about 5 g of water or milk.
- Mix on medium-low speed for about 6–8 minutes, until the dough begins to smooth out and cling to the hook. It should feel stronger and more elastic, but still soft.
Add the Butter
- With the mixer on low, add 30 g very soft butter in 2–3 additions, allowing each portion to fully incorporate before adding more.
- Once all the butter is in, increase to medium speed and knead another 3–5 minutes, or until:🌟 The dough feels silky and supple🌟 It pulls mostly cleanly from the sides of the bowl🌟 You can stretch a piece gently and it resists tearing (light windowpane)
- Note on hydration: Honeycloud dough should feel soft and slightly tacky. This is normal and correct.
Bulk Fermentation (6+ hours)
- Transfer the dough to a lightly oiled bowl or container.
- Let it ferment at room temperature for about 6–8 hours, or until:👉 The dough has risen noticeably (around 60–80 percent)👉 The surface looks smoother and slightly domed👉 It feels airy and jiggly when you gently shake the bowlYou don’t want it doubled or on the verge of collapsing, but it should feel light and well-fermented.
- Note: BF may be shorter if your kitchen is warm (longer if your kitchen is cooler) or your starter is very active. Use visual cues, not just time.
Shape & Cold Proof (Overnight)
- Lightly oil your counter or chop board and gently turn the dough out (you might not need to since the oil from the bowl should be enough on the dough).
- Press it into a rough rectangle, pressing out any very large gas bubbles but not smashing it flat. I use a rolling pin.
- Roll the dough up into a snug log, tucking the sides and ends in as you go to create a smooth surface and good surface tension.
- Place seam-side down into pan. Cover the pan well and place it in the refrigerator overnight for a cold proof. This helps develop flavor and strength in the dough.
Final Rise (After Cold Proof)
- The next day, take the pan out of the fridge and let the dough finish proofing at room temperature in the pan on the counter.Proof until:🌟 The dough has risen to just above the rim of the pan (1/2 to 1 inch above the pan from the center of the dome)🌟 The top is softly domed🌟 A gentle poke springs back slowly, leaving a light indentationThis usually takes about 3–4 hours depending on your kitchen temperature and starter strength.
BAKE
- Preheat your oven to 375°F (190°C) for at least 25–30 minutes.
- Optional: Brush the top of the loaf with a little beaten egg or milk for shine.
- Bake in two stages for the best rise, color, and softness:1. Bake at 375°F for 20 minutesThis sets the structure and gives the loaf a strong, even rise.2. Reduce heat to 325°F and bake for another 15–20 minutesThis prevents over-browning while allowing the inside to finish baking gently.If the top is browning too quickly at any point, tent loosely with foil.
- Your loaf is done when:👉 The top is a deep golden brown👉 The internal temperature is 195–200°F (I prefer closer to 200°F for enriched dough)
Finish the Crust (Optional but Recommended)
- For an extra-soft, tender sandwich loaf:✨ Brush the hot loaf with melted butter, or✨ Lightly mist the top with water, or✨ Cover loosely with a clean kitchen towel or tent with foil for 5–10 minutes as it cools.This keeps the crust supple and enhances that signature Honeycloud softness.
Final Step
- Remove from the pan and cool on a wire rack for 1–2 hours before slicing.I know it’s hard to wait, but slicing too early will compress that beautiful cloud crumb.
Notes
Nutrition will vary based on ingredient brands and slice thickness. Based on a 16-slice loaf, each slice contains approximately 120 calories, with 4 g protein, 3–4 g fat, and 19–21 g carbohydrates.
Nutrition
Frequently Asked Questions
Can I skip the tangzhong?
Can I use regular sourdough starter instead of SSS?
Is this bread very sweet?
No. It’s gently sweet from honey, more in the “comforting sandwich bread” zone than dessert.
Why didn’t my loaf rise as high as yours?
Common causes: weak or underfed starter, dough too cold, under-proofing, or cutting bulk fermentation too short. If you ever want help, send me a crumb photo and your timeline and I can troubleshoot with you.
Can I make this dairy free?
You can experiment with plant-based milk and butter substitutes, but the texture won’t be identical. Whole milk and real butter give the best result.