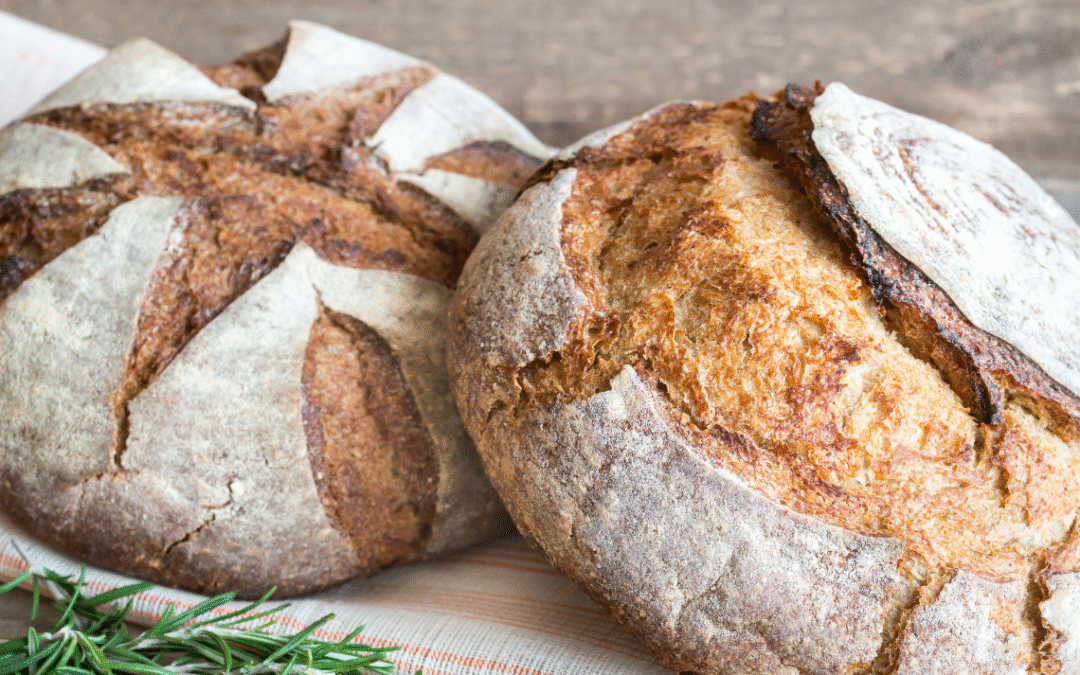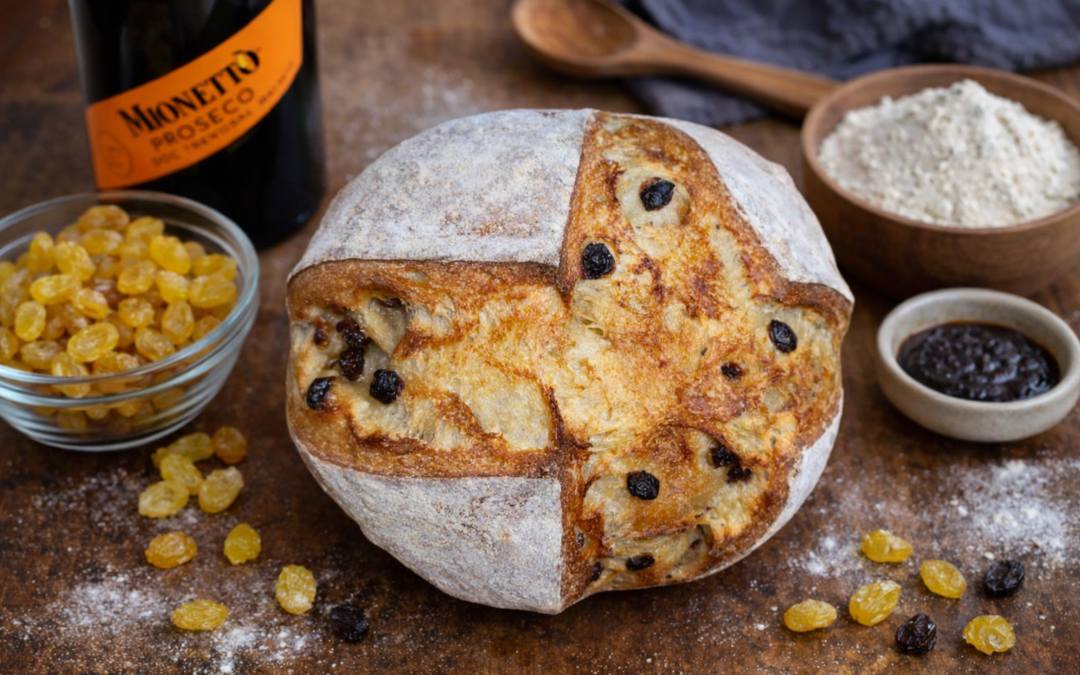
Sourdough Champagne Bread with Golden Raisins
Champagne bread wasn’t something I planned to make — I didn’t even know it was a real thing.
I was feeding my sourdough starter at the kitchen table when I noticed a bottle of champagne nearby. My sister had bought it for New Year’s Eve the next day, and without overthinking it, the question popped into my head: what would happen if I used champagne in my sourdough bread for New Year’s Eve?
So I did what I always do when an idea sticks. I started researching.
What I Found (and What I Didn’t)
There wasn’t much out there on champagne bread made with sourdough. I did come across a few yeasted bread recipes that use champagne in a similar way to how beer is sometimes used in dough — for aroma, acidity, and character — but I couldn’t find anything that explored the idea using a natural sourdough starter.
In that search, I also came across pain de campagne, a traditional French country bread made with flour, water, salt, and natural leavening — not champagne. King Arthur Baking has a classic pain de campagne recipe on their site and I also found a yeasted Champagne French Bread recipe that uses champagne in place of some of the liquid. What I didn’t find was anyone approaching the idea through sourdough fermentation.
That gap was enough for me.
Turning Champagne Into a Sourdough Ingredient
I wasn’t trying to recreate a traditional recipe — I wanted to see if champagne could behave in sourdough the way beer does in some breads, fermenting properly, building structure, and producing a loaf that felt intentional and repeatable.
I treated the champagne like an ingredient, not a novelty. I degassed it, adjusted hydration, and watched fermentation closely until the dough behaved like dough, not a science experiment.
What Champagne Bread Actually Tastes Like
The result was a sourdough champagne bread that actually tastes like champagne when freshly baked, with a soft, aromatic crumb.
I added raisins soaked in champagne and a touch of vanilla powder to bring in a bit of sweetness, but nothing overpowering. The bread still tastes like real sourdough, just a little more special.
This isn’t a “you can barely taste it” situation. The champagne flavor is unmistakable on day one, then softens overnight into a lightly sweet, well-rounded loaf that’s incredible toasted with good-quality butter or whipped honey butter.

Can You Get Intoxicated From Champagne Bread?
Alcohol doesn’t instantly cook off. How much remains depends on heat and cooking time. This loaf baked for about 45 minutes and reached an internal temperature of 205–206°F.
Sourdough fermentation naturally produces small amounts of alcohol, much of which escapes before and during baking. Any alcohol already present in the champagne is further reduced by the heat of the oven, leaving only trace amounts.
I’m not a doctor or a scientist, and this is shared for general information only. If you are pregnant, taking medication, avoiding alcohol, or planning to serve this bread to children, please do your own research or check with your healthcare provider before making or serving it.
A Message to Beginner Sourdough Bakers
This champagne bread recipe is best suited for bakers who already have a few sourdough loaves under their belt.
You’ll enjoy this recipe if you:
- Are comfortable reading dough instead of chasing strict timelines
- Understand stretch and folds and cold fermentation
- Want an artisan loaf that feels elevated but not sweet
- Prefer balance and structure over aggressive sourness
If you’re brand new to sourdough, start with a simple country loaf first. This champagne bread rewards intuition and restraint more than rigid rules.
Choosing the Sparkling Wine for This Recipe
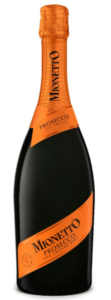
For this recipe, I used a dry Brut Prosecco, which behaves similarly to Champagne in dough and is more affordable.
 Best options:
- Brut Champagne
- Brut Prosecco (what I used)
- Brut Cava
Avoid:
- Demi-sec or sweet sparkling wine
- Flavored sparkling wine
Tip: Expensive champagne is not necessary. Dry and crisp is what matters.
Why I Degas the Champagne First
Because champagne is carbonated, I chose to degas it before mixing. Using it while still fizzy can make dough behave unpredictably, and I wanted the fermentation and gluten development to stay calm and controlled from the start.
Quick tip: Pour the champagne into a bowl or measuring jug and whisk gently for 2–3 minutes, then let it rest briefly before using. In the photo below, the image on the left shows the champagne during degassing, while the image on the right shows it after 2–3 minutes once the carbonation has settled.

Why I Used Vanilla Powder and Which Raisins Work Best
This champagne bread is not meant to taste sweet, so every add-in needs to stay subtle and intentional.
For vanilla, I use vanilla powder or vanilla paste, not liquid vanilla extract. Liquid extract is fully liquid and alcohol-based, which can slightly affect hydration and fermentation timing in sourdough. Powder or paste adds warmth and aroma without changing the dough’s structure in any meaningful way, especially since it’s used in such a small amount.
When it comes to raisins, golden raisins are my first choice. They’re softer, lighter, and slightly more floral, which pairs especially well with champagne. They also blend into the crumb more gently, both in flavor and appearance.
For this batch, I didn’t have enough golden raisins on hand, so I mixed in some darker raisins as well. The bread still turned out great, but next time I’ll stick with all golden raisins for a cleaner flavor and more consistent look.
Raisins are added once the dough has started to build strength. I like to fold in half during the second stretch and fold, then add the remaining raisins during the third stretch and fold. Adding inclusions too early can weaken gluten, while spacing them out helps maintain structure and an open crumb.
Ingredient Swap Notes
- No vanilla powder or paste? You can skip the vanilla entirely. Avoid liquid vanilla extract if possible.
- Only dark raisins available? They work, but the flavor will be richer and less delicate than golden raisins.
- Mixed raisins: Totally fine if that’s what you have — just know golden raisins give the cleanest result with champagne. I didn’t have enough golden raisins so I had to mix with darker raisins too.

What This Dough Feels Like (and Why That’s Normal)
One important thing to know before you get your hands in this dough: it may feel a bit different than your typical country loaf.
Because champagne contains dissolved CO₂ and organic acids, the dough can feel slightly more structured than a simple water-and-flour dough. However, the biggest factor in how the dough feels comes down to temperature and timing.
In my case, I mixed this dough late at night. Honestly, I was too tired to wait for the bulk fermentation to finish properly, so I improvised. Instead of shaping the loaves and putting them in the fridge (which is what I recommend in the recipe below), I put the entire bowl of dough into the fridge to finish its bulk fermentation overnight.
The next morning, I shaped the dough straight from cold, then let it proof on the counter for about 90 minutes before baking.
Why Cold Shaping & Counter Proofing Matters
If you follow my lead and shape cold dough, it will feel much tighter in your hands. The seams take a bit more effort to stick together, and they may want to relax open slightly as they sit on the counter. During that 90-minute proofing period, the dough slowly warms up and the structure softens.
In this photo, the dough doesn’t look especially pretty after I tried stitching the seam together—and it continued to relax and open as it proofed. But just before baking, I was able to gently close the seam again, transfer it onto parchment, and score it.
Once the loaves hit the Krustic Dutch ovens, everything settled beautifully. The enclosed steam and strong oven spring did their job. The seams held, the structure set properly, and the bread baked up with a clean finish and excellent crumb.
The Takeaway: The recipe below is written for a standard Cold Proof (shaping then refrigerating), which is the most common way to get that great sourdough flavor. But if you get stuck late at night like I did, know that you can put the bulk container in the fridge, shape it cold the next day, and give it a nice long proof on the counter before baking.

Tools I Used
You don’t need anything fancy to make this champagne sourdough bread, but having the right tools makes the process smoother and more enjoyable.
Affiliate Disclaimer: This post may contain affiliate links. If you click through and make a purchase, I may earn a small commission at no extra cost to you. I only recommend tools and products I personally use and genuinely love. Thank you for supporting my work and helping keep Sourdoughpedia going.
Digital kitchen scale
Essential for accuracy, especially when working with hydration and inclusions.
Large mixing bowl
For mixing, resting, and bulk fermentation.
Dough scraper (bench scraper)
Helpful for handling and shaping slightly stiffer dough.
Bannetons
Used for shaping and proofing the dough before baking.
Parchment paper
Makes transferring the dough into the Dutch oven much easier, especially when seams are a bit stubborn.
Bread lame or sharp blade
For scoring just before baking.
Krustic Dutch Oven
This is the Dutch oven I used, and it baked these loaves beautifully. The heat retention and steam environment helped the dough open properly and set structure, even though the seams were a little tricky to close. And I never burn the bottom of my loaves. It’s awesome.
Wire cooling rack
Important for allowing the crumb to fully set after baking.
Champagne Sourdough Bread Recipe (1 Loaf)
The recipe below reflects my preferred method, even though the photos show a slightly different workflow.
Ingredients
Levain
5 g sourdough starter
50 g flour
50 g water
Dough
- 450 g bread flour
- 50 g all purpose flour
- 265 g degassed champagne or sparkling wine
- 65 g water
- 100 g active sourdough starter (100% hydration)
- 10 g fine sea salt
Raisin Inclusion
- 100 g golden raisins
- Champagne for soaking (discard soaking liquid)
- ½ teaspoon vanilla powder or vanilla paste
METHOD
1. Mix the Levain
You’ll need 100 g active levain (100% hydration) at peak for this recipe.
Overnight Levain (What I Used)
- 5 g mature sourdough starter
- 50 g flour (bread flour or all-purpose)
- 50 g water
Mix until smooth, cover loosely, and let ferment overnight at room temperature (around 70–75°F / 21–24°C).
The levain is ready when it has doubled or slightly domed, smells lightly sweet and fermented, and shows bubbles throughout.
Use 100 g in the dough.
Same-Day Levain Option
If you prefer a same-day bake:
Build the levain using 1:2:2 ratio (20 g starter, 40 g flour, 40 g water).
Keep it in a warmer spot if possible (around 78–80°F / 25–27°C).
At warmer temperatures, this levain typically reaches peak in about 3–5 hours.
Levain Tip:
Use the levain at or just after peak — when it looks airy and domed, not collapsed. A strong, well-timed levain is especially important for this dough since champagne behaves differently than water.
2. Degas the Champagne
Pour the champagne into a bowl or measuring jug. Whisk gently for 2–3 minutes to release excess carbonation, then let it sit briefly until most of the bubbles have settled. This step stabilizes the liquid so it behaves like water in the dough while keeping the aroma and acidity of the champagne.
3. Soak the Raisins
In a small bowl, combine the raisins with enough champagne to cover. Add the vanilla powder or vanilla paste and stir gently to coat.
- Let the raisins soak for 20 minutes, then drain thoroughly and discard the soaking liquid.
- Pat the raisins dry with a paper towel to remove any excess moisture.
Set aside. The raisins will be added later during the stretch and folds, once the dough has developed strength.
4. Mix (Fermentolyse)
In a large bowl, combine the flour, degassed champagne, water, and sourdough starter. Mix until no dry flour remains and the dough looks shaggy and fully hydrated.
Cover and let rest for 30 minutes.
This fermentolyse allows the flour to hydrate fully and jump-starts fermentation without salt, helping the dough develop extensibility and flavor early on.
5. Add Salt
Sprinkle the salt evenly over the dough. Using wet hands, gently pinch and fold until the salt is fully incorporated. The dough will feel slightly tighter at this stage.
Cover and rest for 30 minutes to allow the gluten to relax before strengthening.

6. Strengthen the Dough (Stretch & Folds)
Perform 3–4 sets of stretch and folds, spaced 30 minutes apart.
With each set, the dough should feel progressively smoother, stronger, and more elastic. By the final fold, it should hold its shape between folds and feel cohesive rather than slack.
7. Add the Raisins (Gradually)
Once the dough has clearly developed strength, begin adding the raisins.
- Fold in half of the drained raisins during the second stretch and fold
- Add the remaining raisins during the third stretch and fold
Adding inclusions gradually prevents the gluten from tearing and helps distribute the raisins evenly without deflating the dough.

8. Bulk Fermentation
After the final stretch and fold, let the dough continue bulk fermenting. Bulk fermentation usually takes 3.5–5+ hours total from the start of mixing, depending on your starter strength, dough temperature, and room temperature.
Instead of watching the clock, focus on how the dough looks and feels.
Signs Bulk Fermentation Is Complete
Your dough is ready to move on when it shows most of the following:
- Noticeable but not doubled volume increase (about 30–50%)
- A slightly domed surface with a relaxed, aerated feel
- Dough feels lighter and pillowy, not dense or tight
- Small bubbles visible along the sides or bottom of the dough
- When gently shaken, the dough has a soft, subtle jiggle
If the dough feels tight, flat, or resistant, it needs more time. If it feels overly loose or fragile, bulk has gone too far.
9. What to Do Next: Same-Day vs Overnight Cold Proofing
Once bulk fermentation is complete, you have two good paths forward depending on timing, flavor, and digestion.
Option 1: Same-Day Bake (Faster, Lighter Flavor)
- Pre-shape the dough
- Rest 20 minutes
- Final shape
- Proof on the counter for 60–90 minutes, 2 hours max
- Bake once the dough slowly springs back when gently pressed
This option keeps the flavor bright and subtle, with a softer champagne note on day one.
Option 2: Overnight Cold Proof (Deeper Flavor + Better Digestion)
For deeper flavor development and added gut-friendly benefits, refrigerate the dough after shaping.
- Pre-shape and final shape
- Place in a floured banneton
- Cover and refrigerate 8–16 hours
- Bake straight from the fridge the next day
Cold fermentation slows yeast activity while allowing bacteria to continue working. This enhances flavor complexity, improves digestibility, and often results in better structure and scoring.
Which Option I Prefer
For this champagne bread, I recommend shaping and then the overnight cold proof. The extra time allows the champagne aroma to mellow and integrate, while the raisins and vanilla become more rounded and balanced.
Both methods work — choose based on your schedule and preference.


10. Bake
Preheat a Dutch oven to 450°F (232°C).
Carefully transfer the dough to parchment, score, and load into the hot Dutch oven.
- Bake 30 minutes covered
- Remove lid, then bake 15-18 minutes uncovered until deeply golden
The loaf is done when the internal temperature reaches 205–206°F (96–97°C).

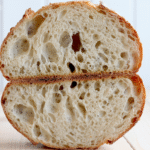
11. Cool
Transfer the bread to a wire rack and let cool for at least 60+ minutes before slicing. This allows the crumb to fully set and the flavors to stabilize. I was in a rush and ended up cutting it half hour in. Still great but a little longer would have been better.

Why Sourdough Champagne Bread Is Worth Making
If you love sourdough and enjoy experimenting with flavor, this champagne bread is absolutely worth making. It’s perfect for New Year’s, birthdays, anniversaries, holidays, or any moment that calls for something a little special. It feels celebratory without turning into dessert.
I started with raisins because I wasn’t sure what would complement champagne, but I knew they’d work. In my cinnamon raisin bread, I soak raisins in Grand Marnier, and that hint of alcohol always pulls out deeper flavor. Same idea here. I baked two loaves, shared one with a friend, and it disappeared fast.
If you make this, slice it warm, add good butter, and don’t overthink it.
That’s where this bread shines.
👉 If you try this champagne sourdough, leave a comment, tag me, or save the recipe for your next celebration — I’d love to see how you make it your own.
Some loaves are made to feed people. This one is made to be remembered.
Sourdough Champagne Bread with Golden Raisins
Ingredients
Levain
- 5 Starter
- 50 Water
- 50 Flour
Dough
- 450 g bread flour
- 50 g all purpose flour
- 265 g degassed champagne or sparkling wine
- 65 g water
- 100 g active sourdough starter (100% hydration)
- 10 g fine sea salt
Raisin Inclusion
- 100 g golden raisins
- Champagne for soaking (discard soaking liquid)
- 1/2 tsp vanilla powder or vanilla paste
Instructions
Step 1. Mix the Levain
- You’ll need 100 g active levain (100% hydration) at peak for this recipe.5 g mature sourdough starter50 g flour (bread flour or all-purpose)50 g water
- Mix until smooth, cover loosely, and let ferment overnight at room temperature (around 70–75°F / 21–24°C).The levain is ready when it has doubled or slightly domed, smells lightly sweet and fermented, and shows bubbles throughout.
Degas the Champagne
- Pour the champagne into a bowl or measuring jug. Whisk gently for 2–3 minutes to release excess carbonation, then let it sit briefly until most of the bubbles have settled. This step stabilizes the liquid so it behaves like water in the dough while keeping the aroma and acidity of the champagne.
Soak the Raisins
- In a small bowl, combine the raisins with enough champagne to cover. Add the vanilla powder or vanilla paste and stir gently to coat.Set aside. The raisins will be added later during the stretch and folds, once the dough has developed strength.Let the raisins soak for 20 minutes, then drain thoroughly and discard the soaking liquid.Pat the raisins dry with a paper towel to remove any excess moisture.
Mix (Fermentolyse)
- In a large bowl, combine the flour, degassed champagne, water, and sourdough starter. Mix until no dry flour remains and the dough looks shaggy and fully hydrated.Cover and let rest for 30 minutes.This fermentolyse allows the flour to hydrate fully and jump-starts fermentation without salt, helping the dough develop extensibility and flavor early on.
Add Salt
- Sprinkle the salt evenly over the dough. Using wet hands, gently pinch and fold until the salt is fully incorporated. The dough will feel slightly tighter at this stage.Cover and rest for 30 minutes to allow the gluten to relax before strengthening.
Strengthen the Dough (Stretch & Folds)
- Perform 3–4 sets of stretch and folds, spaced 30 minutes apart.With each set, the dough should feel progressively smoother, stronger, and more elastic. By the final fold, it should hold its shape between folds and feel cohesive rather than slack.
Add the Raisins (Gradually)
- Once the dough has clearly developed strength, begin adding the raisins.Adding inclusions gradually prevents the gluten from tearing and helps distribute the raisins evenly without deflating the dough.Fold in half of the drained raisins during the second stretch and foldAdd the remaining raisins during the third stretch and fold
Bulk Fermentation
- After the final stretch and fold, let the dough continue bulk fermenting. Bulk fermentation usually takes 3.5–5+ hours total from the start of mixing, depending on your starter strength, dough temperature, and room temperature.
Overnight Cold Proofing
- For deeper flavor development and added gut-friendly benefits, refrigerate the dough after shaping.Pre-shape and final shapePlace in a floured bannetonCover and refrigerate 8–16 hoursBake straight from the fridge the next day
FAQs
Can I really use champagne instead of water in sourdough bread?
Yes. In this recipe, degassed champagne replaces the water entirely. Once the carbonation is removed, champagne behaves like a slightly acidic liquid, similar to how beer is sometimes used in bread dough. It contributes aroma and subtle flavor without preventing proper fermentation when handled correctly.
Do I have to degas the champagne first?
Yes — this step matters. Champagne is highly carbonated, and using it straight from the bottle can make the dough feel tight and unpredictable. Degassing removes excess CO₂ while keeping the acidity and aroma, allowing the dough to ferment and develop gluten normally.
Does champagne bread taste alcoholic?
No. The bread does not taste alcoholic. When freshly baked, it has a noticeable champagne aroma and flavor, but not alcohol heat. That flavor softens by the next day into a gently sweet, well-balanced loaf.
Is there alcohol left in the finished bread?
Sourdough fermentation naturally produces small amounts of alcohol, and most of it escapes during fermentation and baking. This loaf bakes for about 45 minutes and reaches an internal temperature over 205°F, which further reduces alcohol. However, trace amounts may remain. If you are pregnant, avoiding alcohol, taking medication, or serving children, use your discretion and consult a healthcare professional if needed.
Can I make this bread without raisins?
Yes. The raisins are optional. Without them, the loaf will be drier, more wine-forward, and closer to a savory country loaf with champagne aroma rather than a lightly sweet bread.
Why do you recommend golden raisins instead of dark raisins?
Golden raisins are softer, lighter, and slightly more floral, which pairs better with champagne’s delicate notes. Dark raisins work, but they create a richer, heavier flavor that can overpower the champagne aroma.
Why not use liquid vanilla extract?
Liquid vanilla extract adds both extra moisture and alcohol, which can subtly affect hydration and fermentation in sourdough. Vanilla powder or alcohol-free vanilla paste provides warmth and aroma without changing the dough’s structure.
Does this dough feel different from regular sourdough?
Yes. This dough is slightly stiffer and less stretchy than a classic country loaf. Champagne’s acidity and composition affect extensibility, especially when the dough is shaped cold. This is normal and expected.
Can I shape the dough straight from the fridge?
Yes. This recipe works well when shaped cold, then proofed on the counter before baking. Cold dough will feel tighter and seams may be harder to seal, but oven spring and steam in the Dutch oven help everything set properly.
Should I bake this the same day or cold proof overnight?
Both options work.
- Same-day bake: Brighter, lighter flavor with more pronounced champagne notes.
- Overnight cold proof: Deeper, more rounded flavor, better digestibility, and improved structure.
Choose based on your schedule and flavor preference.
Is this recipe suitable for beginners?
This bread is best for bakers who already have some sourdough experience. It requires reading the dough rather than following strict timelines. Beginners may want to start with a basic country loaf before attempting this recipe.
Can I use Prosecco or Cava instead of Champagne?
Yes. Any dry (Brut) sparkling wine works well. Avoid sweet or flavored sparkling wines. Expensive champagne is not necessary — dry and crisp is what matters.
Why is the champagne flavor stronger on day one?
Aromatic compounds are most noticeable when the bread is freshly baked. As the loaf rests, those aromas mellow and integrate into the crumb, which is normal and expected.