There’s something magical about nurturing life in your kitchen. When I first started baking sourdough, I remember hovering over a jar of flour and water, checking for bubbles as if it were a newborn baby. Some days I wondered if it was working at all. Other days, it overflowed the jar like a science project gone wild.
That’s the beauty of a sourdough starter: it’s alive, unpredictable, and uniquely yours. And once it’s thriving, it becomes the heart of every loaf you bake, a living link to tradition and to bakers who’ve been doing this for centuries.
But here’s the truth most people won’t admit: it’s not a sin to buy a starter instead of making one. Many beginners struggle in the first few weeks, and sometimes it can take up to a month before a starter is really strong. That’s why I share my 140+ year-old heritage starter, a culture that’s been bubbling for generations. With it, you can start baking amazing bread in days, not weeks.
Still, if you’d love the experience of cultivating your own, let’s walk step by step through how to make a sourdough starter from scratch.
What Is a Sourdough Starter?
Understanding how to make a sourdough starter is the first step toward baking real bread without commercial yeast.
A sourdough starter is a living culture made from just flour and water. Over several days of regular feedings, it captures wild yeast and beneficial lactic acid bacteria from the flour and your environment.
The yeast produce carbon dioxide, which makes dough rise, while the bacteria produce acids that give sourdough bread its complex flavor and natural keeping quality. Together, they transform a simple jar of flour and water into a natural leavening agent that replaces commercial yeast entirely.
Think of it as the beating heart of sourdough baking — once established, you can keep it alive indefinitely with regular feedings. Some starters are decades or even centuries old, passed down like family heirlooms. Mine, for example, is over 140 years old and has been bubbling for generations.
My Starter Story
When I first tried to create my own starter, I kept restarting whenever I doubted the process (perfectionist problems). Eventually, I was lucky enough to receive a thriving starter from a local micro bakery owner — it was beautiful, bubbly, fruity, and sweet. When I baked my first loaves with it, the bread came out quite sour.
Why My First Loaves Were Too Sour
I started piecing things together and realized why: I remembered she kept her starter in the fridge and only fed it when she needed it. This encourages more acetic acid, which leads to sharper sourness.
There’s absolutely nothing wrong with sour bread — lots of people love it and even push fermentation to make it as sour as possible. Personally, I prefer a milder taste. I’ve heard from a few reputable bakeries around the world that true sourdough isn’t actually supposed to be very sour. In practice, a well-cared-for starter (fed at least daily at room temperature, not kept in the fridge) tends to produce bread with a gentler, more balanced tang. Cold proofing can deepen sourness, but it’s optional, that’s a whole conversation for another day.
How Daily Feedings Changed Everything
When I began caring for that same starter myself, I switched to daily room-temperature feedings. Over time, the flavor stayed fruity while the acidity balanced out. That experience taught me something I’ll never forget: how you care for a starter shapes its personality.
Sourdough Starter Tools You’ll Need
You don’t need a professional bakery setup, but these tools make life so much easier (and cleaner):
Affiliate Disclaimer: This post may contain affiliate links. If you purchase through these links, I may earn a small commission at no extra cost to you. I only recommend products I personally use and love. Thank you for supporting my work! As an Amazon Associate I earn from qualifying purchases.
Digital Kitchen Scale – My Weigh KD-8000 Digital (accurate, easy to clean)
Glass Jars – My favorite are Weck Tulip Jars (see-through walls = easy bubble/rise tracking)
Silicone Jar Spatula – Saves every bit of starter
Instant-Read Thermometer – Starters thrive around 24–26°C / 75–78°F
Brita Water Filter Pitcher – If you don’t have access to filtered water or don’t want to use bottled water.
Bread Warming Mat – Use a warming pad to proof your dough and keep your starter warm. It can also be used to ferment yogurt, keep food warm, such as cookies, fried chicken etc.
Want to see all my exact picks? See: My Favorite Sourdough Tools →

Ingredients for your Sourdough Starter
Flour
- Easy Route: Use your choice of whole grain, organic unbleached all-purpose, or bread flour from start to finish.
- Two-Flour Route: Use whole wheat or rye for Days 1–3, then gradually transition to all-purpose or bread flour once your starter is active and bubbly. (See notes after the step-by-step instructions for details on how to transition flours.)
- Can’t decide which flour to use? Don’t overthink it. Whole wheat tends to get things moving faster, while all-purpose keeps things simple — just stay consistent. The best flour for your starter is organic, unbleached flour, ideally the flour you bake with (or plan to bake with) most often. Personally, I use organic, unbleached all-purpose for maintaining my starter and bread flour for baking most loaves, and it works beautifully. Sourdough is flexible, so choose what fits your baking style.
Water
- Filtered, bottled spring, or dechlorinated tap water. If using tap water, leave it on the counter or in a filtered pitcher (like a Brita) for several hours so the chlorine dissipates. Some bakers use tap water without issues, while others find it affects their starter — it really depends on your local water supply. To play it safe, I recommend filtered or spring water.
- Use water at 24–26°C (75–78°F) for best results. If your kitchen is cool, gently warm it to 26–30°C (78–86°F). Avoid hot water above 40°C (104°F), as it can harm the yeast and bacteria.
That’s it — two ingredients.
Easy Recipe: How to Make a Sourdough Starter (From Scratch)
Prep time: 5 minutes per day
Fermentation time: 5–10 days (cool kitchens may take 10–12+)
Yield: ~1 cup active starter
Tip: Aim for thick pancake-batter consistency.
Flour Note: I use organic unbleached all-purpose flour or organic unbleached bread flour. The photos in this post use Boreal Organic Unbleached All-Purpose Flour (Costco Canada). In the U.S., a great equivalent is King Arthur Organic Unbleached Bread or All-Purpose Flour.
Before You Begin:
Weigh your empty jar first and note the weight. Each day, mark the level of your starter with a rubber band or sharpie marker. This makes it easy to track whether it’s growing.
💧 Water Temperature for Your Starter
Use room temperature water (around 24–26°C / 75–78°F) whenever possible.
If your kitchen is cool (below 21°C / 70°F), warm the water slightly so the mix lands in that 24–26°C sweet spot.
To do this, heat your water gently until it feels just warm to the touch — about 26–30°C (78–86°F) is perfect. I use a digital thermometer instead of guessing. The one I use can be found on Amazon here.
Avoid hot water (over 40°C / 104°F) because it can harm the yeast and bacteria.
Room Temperature: Too cold = slower growth. Try a warm spot like inside the microwave with the door cracked open, or a proofing box.
Consistency tip: Starter should look like thick pancake batter or plain yogurt after mixing.
Why Do We Discard Starter?
Discarding isn’t wasteful — it’s essential to keep your starter healthy and balanced. If you just kept adding more flour and water without removing some, your jar would grow huge in just a few days and the yeast-to-food ratio would get weaker. By discarding, you give the remaining culture a fresh meal, helping it grow stronger, faster, and more predictable.
👉 Once your starter is active and mature, you can save discard for recipes like waffles, crackers, brownies, and pancakes. But during the first couple of weeks, it’s best to throw it out or compost it until your starter is strong enough for baking.
⚠️ Discard Note: Continue to discard and feed daily. Do not keep the discard for recipes until your starter is strong, predictable, and baking great bread.
Do You Need a Clean Jar Every Day?
While building your starter (first 7–14 days):
Change your jar at every feeding for the first 7 days.
After your starter is established:
You do not need to switch to a fresh jar at every feeding. Just scrape down the sides after you feed and keep using the same jar. This preserves the developing micro-ecosystem and makes it easier to see progress.
Many bakers move their starter into a clean jar every few feedings (some do it weekly) just to keep things tidy. I do it every 2-3 days unless the jar overflows or is too dirty.
When to switch jars:
- If the jar gets messy with lots of dried starter crusting up the sides
- If you see any residue that might harbor mold
- About once every few days, transfer to a clean jar just for freshness
Step-by-Step Instructions
Day 1 – Mix the Starter
- Mix 60 g flour of choice + 60 g water in a clean jar. Stir well.
- Cover loosely (lid, cloth, or plastic wrap) and rest at 24–26°C (75–78°F) for 24 hours.
If your home is cool, keep the jar above the fridge, in a proofing box, or on a low-temp warming mat, this is what I bought from Amazon.
⚠️ Warm Spot Warning
If you’re keeping your starter in the oven with the light on, be careful — ovens can get hotter than you realize, and I’ve actually cooked a starter this way before. Always keep the oven door cracked open so the heat doesn’t build up.
Another option is to place the jar in your microwave with the door closed and a mug of warm water inside. This creates a cozy, slightly humid environment without overheating.
👉 Ideal starter temperature: 24–26°C (75–78°F). Anything over 40°C (104°F) can kill your starter.
Expect: Thick pancake-batter or yogurt consistency. Neutral flour smell, no bubbles yet.

Day 2 – Discard and Feed
- First, transfer to a clean jar: Move 60 g of starter to a new clean jar; discard the rest.
- Then feed: Add 60 g flour + 60 g water, mix well, and scrape down the sides. Mark the level.
- Cover loosely (lid, cloth, or plastic wrap) and rest at 24–26°C (75–78°F) for 24 hours.
Expect: A few small bubbles; light grassy or fruity smell. If you see “hooch” (dark liquid), pour it off before feeding—your starter is hungry.
Day 3 – Discard and Feed
- Transfer 60 g to a clean jar; discard the rest.
- Feed: Add 60 g flour + 60 g water, mix, scrape down, and mark the level.
- Cover loosely (lid, cloth, or plastic wrap) and rest at 24–26°C (75–78°F) for 24 hours.
Expect: More bubbles; stretchier texture; tangier aroma. A rise and slump is normal.
Day 4 – Keep Feeding
- Transfer 60 g to a clean jar; discard the rest.
- Feed: Add 60 g flour + 60 g water, mix, scrape down, and mark the level.
- Cover loosely (lid, cloth, or plastic wrap) and rest at 24–26°C (75–78°F) for 24 hours.
Expect: A stronger bubble network, streaks on the glass, yogurt/green-apple notes. If switching toward more white flour, growth may appear to slow briefly—this is normal adjustment.
Day 5 – Building Strength
- Transfer 60 g to a clean jar; discard the rest.
- Feed: Add 60 g flour + 60 g water, mix, scrape down, mark the level.
- Cover loosely (lid, cloth, or plastic wrap) and rest at 24–26°C (75–78°F) for 24 hours.
Expect: A predictable rise, often close to doubling in 6–10 hours; pleasant, clean tang.
👉 Feeding Frequency: If your starter is rising and peaking quickly (within 4–6 hours), it’s time to begin feeding twice per day, about 12 hours apart. This keeps it strong and prevents it from running out of food.
Day 6 – Signs of Life
- Transfer 60 g to a clean jar; discard the rest.
- Feed: Add 60 g flour + 60 g water, mix, scrape down sides.
- Cover loosely (lid, cloth, or plastic wrap) and rest at 24–26°C (75–78°F) for 24 hours.
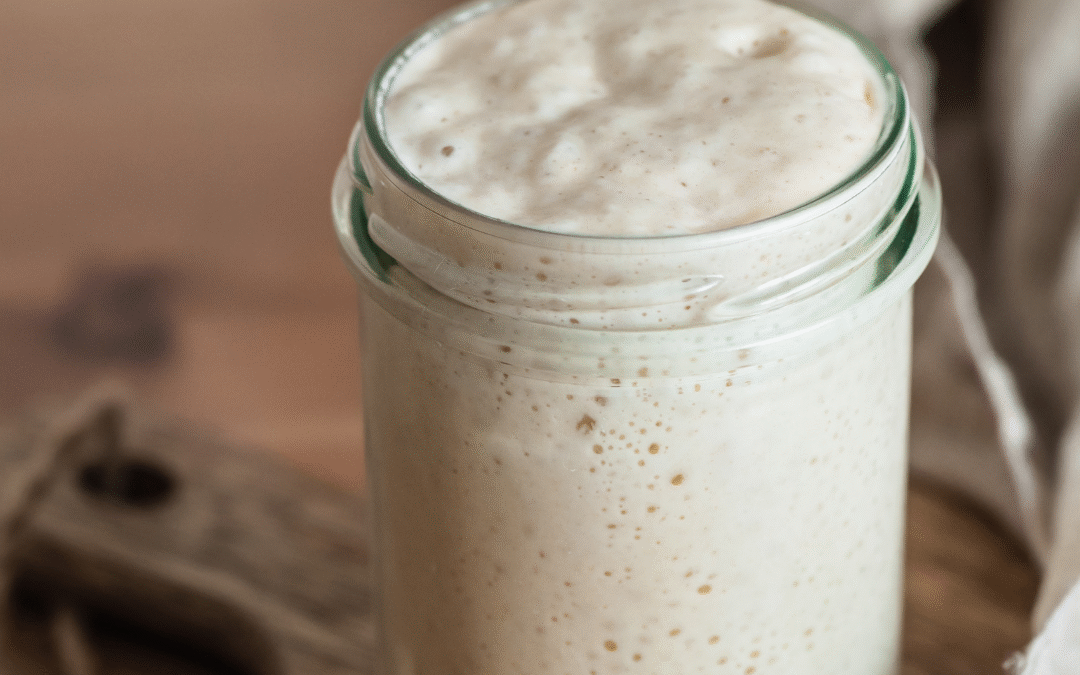
Expect: Doubling in 4–8 hours; domed top; fine bubbles along the jar wall; fruity-tangy aroma.
If you haven’t increased frequency yet: Start twice-daily feedings (~12 hours apart) once peak occurs in 4–6 hours.
Day 7+ – Approaching Stability
- Transfer 60 g to a clean jar; discard the rest.
- Feed: Add 60 g flour + 60 g water, mix, scrape down, mark the level, and cover loosely. Keep at warm room temperature (24–26°C).
Expect: A repeatable rhythm. Once your starter doubles or triples in 4–8 hours after each feeding for 3–4 consecutive days, with a clean, fruity-tangy aroma and a smooth domed top at peak, it’s bake-ready.
👉 Pro Tip: If your starter is sluggish after Day 10–14, use 25–50% whole wheat or rye for a few feedings, and continue 12-hour feedings.
Ready to Bake!
Once your starter is peaking reliably within 4–6 hours after feedings for several days in a row, you’re ready to bake. Continue feeding twice daily to build its strength. To reduce waste, you can switch to small maintenance ratios, e.g., 1:2:2 (5 g starter : 10 g water : 10 g flour). If feeding once per day, increase the ratio to 1:5:5 (5:25:25) or 1:10:10 (5:50:50) to keep it satisfied. You don’t need to change your jar every feeding—every 2–3 days is fine, or sooner if it’s messy.
A Note About the Float Test
You may have heard of the float test (drop a spoonful of starter in water; if it floats, it’s “ready”). My own starter doesn’t always float — and it still bakes fantastic bread. The float test can give false negatives if the starter is a bit too stiff or wet, just past peak, or recently stirred down.
Trust these signs instead:
- Consistent doubling in 4–8 hours
- Smooth domed top at peak
- Fine bubbles along the jar wall
- Clean, fruity-tangy aroma
Every Starter Deserves a Name (How to Make It Personal)
One of the best traditions in sourdough baking is giving your starter a name. Think of it as welcoming a quirky new roommate or even a kitchen pet — after all, you’ll be feeding and caring for it daily.
Some bakers go playful with names like “Bubbles,” “Doughy,” or “Crumbelina.” Others choose something sentimental, like naming it after a grandparent, a favorite musician, or even the bakery that inspired them.
👉 Why bother? Because naming your starter makes the process fun, memorable, and helps you connect with the tradition. You’re not just tending flour and water — you’re carrying on something bakers have done for centuries, and giving it personality keeps you engaged.
💡 Tip: If you’re building your starter with kids, let them choose the name. It’s a guaranteed way to make feeding time exciting and get them involved in the baking journey.
So once your starter is bubbly, happy, and showing signs of stability, give it a name that makes you smile every time you grab the jar.
🚨 How to Know If Your Starter Has Gone Bad
Most starters are resilient, but there are a few clear warning signs:
- Pink or orange streaks → bad bacteria, not safe.
- Fuzzy mold (white, green, or black) → discard immediately.
- Rotten or putrid smell (beyond tangy or cheesy) → unsafe, start over.
If you see any of these, throw it out, clean your jar thoroughly, and begin again.

Troubleshooting (Quick Fixes)
Nail-polish remover smell: Too hungry → feed earlier or more often.
No bubbles by Day 3: Increase warmth; use whole wheat/rye for the next two feedings.
Rises then collapses before you see it: It peaked → feed earlier tomorrow so you catch peak.
Pink/orange spots or fuzzy mold: Contamination → discard, scrub jar, restart.
Too thick to bubble: Add 5–10 g water per feeding until it resembles thick pancake batter.
Starter died suddenly: It may have overheated. If you kept it in the oven with the light on, the temperature could have spiked and cooked your starter. Always crack the oven door, or use the microwave-with-a-warm-mug method instead.

How to Store and Maintain Your Starter
If you bake often, the easiest method is to keep your starter at room temperature and feed it once or twice a day to keep it active. If you only plan to bake occasionally, store your starter in the fridge and feed it once a week to maintain its strength. And here’s a simple tip: when storing your starter in the fridge, you don’t need to let it come back to room temperature before feeding. Just give it fresh flour and water, then place it right back in the fridge until you’re ready to bake again.
Make sure your jar has enough room for the starter to triple in size. Not all starters behave the same, but mine regularly triples. Depending on the temperature and where you position it, your starter can still grow a lot, even in the fridge. If there isn’t enough headspace, you could end up with a sticky mess, and yes… I’ve even heard stories of jars cracking in the fridge from pressure buildup. You don’t want a sourdough science experiment in your fridge!
Freezer Backup
Want a safety net in case your jar goes bad? You can freeze your starter for long-term storage.
- Feed your starter and let it become nice and bubbly.
- Spoon portions into ice cube trays and freeze until solid.
- Pop out the cubes and transfer to a freezer bag or airtight container.
When you’re ready to use it again, thaw one cube and give it 2–3 feedings at room temperature. It should bounce back strong.

Dehydrated Starter
Dehydrating is another great way to store a starter long-term or send it to friends.
- Feed your starter and let it peak.
- Spread a thin layer on parchment paper.
- Let it dry completely (this may take 2–3 days depending on humidity).
- Once crisp, break into flakes or grind in a blender, food processor, or even a dedicated coffee grinder (I bought one just for my starter).
- Store the flakes in a glass jar or airtight bag.
To revive, soak a spoonful of flakes in water until soft, then begin regular feedings. In a few days, you’ll have a lively starter again.

Have Questions About Making a Sourdough Starter?
Congratulations, now you know exactly how to make a sourdough starter and keep it thriving. Whether you decide to nurture one yourself or adopt a heritage starter, you’ve taken the first step toward baking real, flavorful sourdough bread.
👉 I’d love to hear from you:
Have you tried making your own starter yet?
Did you run into any surprises or struggles along the way?
Do you prefer your sourdough mild or tangy?
Drop your questions or experiences in the comments below. I read every one and will do my best to help you troubleshoot or celebrate your wins.
Once your starter is strong and ready, you’ll want to put it to the test. Start with something simple like my Beginner Sourdough Loaf Recipe.
FAQs
🔹 Is buying a starter cheating?
No. Many bakers adopt a strong culture to save time. Creating your own is rewarding; adopting one is efficient. Both are valid.
🔹 If the float test isn’t reliable, how do I know it’s ready?
Look for reliable doubling in 4–8 hrs, a domed top at peak, fine bubbles on the glass, and a clean fruity-tangy aroma.
🔹 Why start with whole wheat or rye, then switch to white?
Whole grains energize early fermentation; white flour stabilizes once the culture is strong.
🔹 Can I use only one flour from the beginning?
Yes. Whole wheat moves faster; all-purpose is steadier. Choose one and stick with it.
🔹 My kitchen is cool — what now?
At 20–22°C (68–72°F), things move slower. Use a warmer spot (oven light, proofing box) and expect 10–14 days.
🔹 How often should I feed my sourdough starter?
In the beginning, feed your starter once every 24 hours. Once it becomes active and bubbly, you may need to feed it every 12 hours. After it’s mature, you can keep it at room temperature and feed daily, or refrigerate and feed weekly.
🔹 Should I use warm or cold water for sourdough starter?
Room temperature water (24–26°C / 75–78°F) is ideal. If your kitchen is cool, gently warm your water to 26–30°C (78–86°F). Avoid hot water over 40°C (104°F) as it can damage the natural yeast and bacteria.
🔹 Do I need to clean the jar every time I feed my starter?
No. You can keep feeding in the same jar and just scrape down the sides. Transfer to a clean jar only if it gets messy, crusty, or after several days to keep things fresh.
🔹 How long before I can bake with my sourdough starter?
Most starters are strong enough after 10–14 days. Look for 3–4 consecutive days of consistent doubling or tripling after feedings before baking your first loaf.
🔹 Can I change the flour I use in my starter?
Yes. If you want to switch flours, do it gradually: feed 25% new flour on Day 1, 50% on Day 2, then 100% by Day 3. This helps your starter adjust without losing strength.
🔹 What is the best way to store sourdough starter long-term?
For short breaks, store in the fridge and feed weekly. For longer storage, freeze starter in cubes or dehydrate into flakes. Both can be revived with 2–3 feedings.