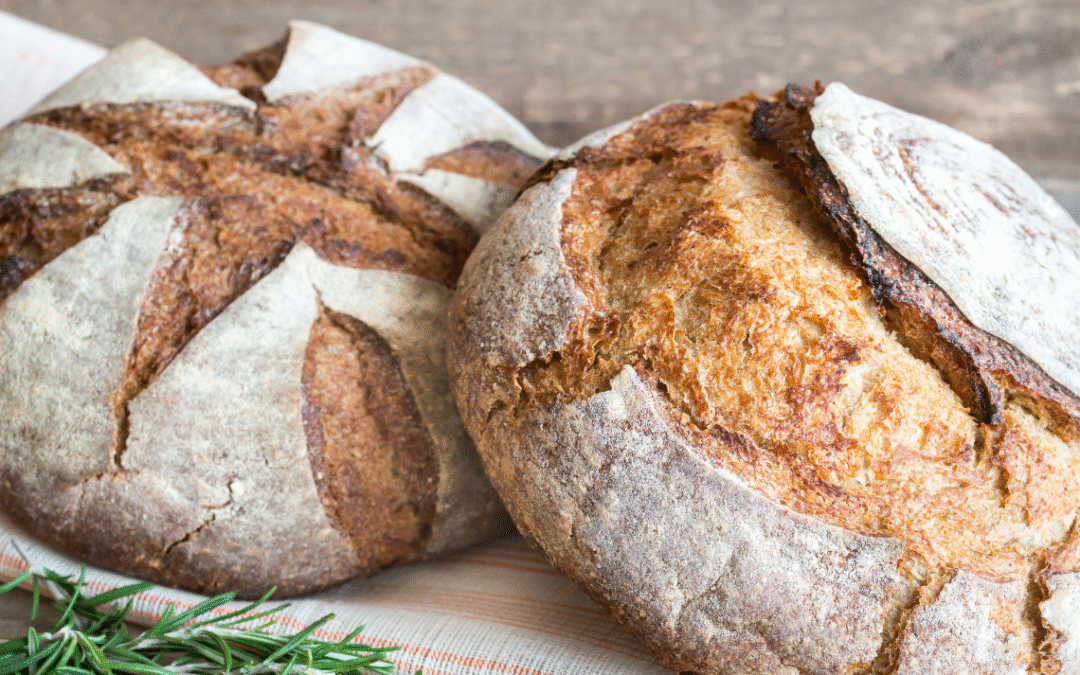
If you are searching for the best Beginner Sourdough Bread Recipe, you have just found it. This recipe walks you through each step with confidence and gives you a loaf that looks beautiful, tastes incredible, and teaches you the fundamentals of artisan sourdough baking.
When I first started, I had no idea what words like high hydration or low hydration even meant. I followed recipes from influencers that made it look effortless, but all I ended up with was sticky dough clinging to my hands and loaves that never resembled the pictures.
Eventually, I learned the simple truth: hydration is just the ratio of water to flour. Higher hydration doughs are wetter, stickier, and much harder to handle, while lower hydration doughs are easier to shape and far more forgiving for beginners. Once I discovered this lower hydration recipe, it felt like a match made in heaven. The dough finally behaved, shaping became manageable, and for the very first time I pulled a loaf from the oven that looked and tasted like real artisan sourdough.
This recipe is designed to teach you how sourdough behaves, not to rush you or overwhelm you. If something feels unfamiliar at first, that’s normal, you’re learning a skill, not following a script.
Why This Beginner Sourdough Bread Recipe Works
This is the recipe I wish I had when I started. It works because it keeps things simple: just flour, water, salt, and starter. The hydration is low enough (325 g water to 500 g flour) to make the dough easy to handle, yet still high enough for a beautiful open crumb. Strength is built gradually through gentle stretch and folds rather than heavy kneading, which keeps the process beginner-friendly. You also have flexible proofing options — either bake the same day or let it rest overnight in the fridge for more flavor. And by baking in a Dutch oven, you trap steam naturally, which guarantees great oven spring and that signature golden crust.
This dough gives you room to learn because it responds well even if your timing isn’t perfect or your folds aren’t textbook.
Ready to make your sourdough starter? Read my article: How to Make a Sourdough Starter (Step-by-Step Guide From Scratch).
Tools You’ll Need
This post contains affiliate links. If you purchase through these links, I may earn a small commission at no extra cost to you. I only recommend products I personally use and love, and your support helps me keep sharing free sourdough recipes and resources. You can also visit my Amazon store front for all my baking and sourdough essentials.
You do not need every tool listed here to make great sourdough. These simply make the process easier and more consistent as you learn.
- Digital kitchen scale
- Starter Jars
- Large mixing bowl and dough scraper
- Banneton basket or a bowl lined with a floured towel
- Parchment paper or bread sling
- Bread Lame for scoring
- Wire cooling rack
- Dutch oven or heavy pot with lid: My favorite is Krustic. It bakes evenly, produces a golden crust, and prevents the burnt bottoms many people complain about. Use Coupon Code “SERENA” for 10% off.
- Mixer optional: My all-time favorite is the Ooni Halo Pro. It makes dough development easier and saves your hands when you want consistency. The Ooni Halo Pro is specialized for mixing dough. You can read my review here.

Ingredients (One Loaf)
Levain
- 5 g starter
- 50 g filtered or spring water
- 50 g flour
👉 This build makes about 100 g of levain. Use all of the levain in the dough. Any extra few grams usually remain stuck to the jar, and that small difference will not affect the recipe.
Dough
- 100 g active levain (at peak)
- 325 g filtered or spring water at room temperature to slightly warm (75–78°F / 24–26°C). Reserve 25 g for mixing in the salt
- 500 g bread flour (you can use all-purpose if that’s all you have, but bread flour is more beginner-friendly; once you’re confident, try mixing them for different results — see flour notes below)
- 10 g fine sea salt
This recipe uses 325 g water which makes the dough easier to handle. Once you are comfortable, try 350 g for a more open crumb.
👉 Sourdough is flexible. Small variations in water, flour brand, or starter strength will not ruin your bread — they simply change how the dough behaves.
Flour Choice: Bread Flour vs. All-Purpose
For your very first loaves, stick with 100% bread flour. Bread flour has higher protein, which means stronger gluten, more reliable rise, and a structure that is forgiving while you are learning. Read King Arthur’s guide on flour protein content for more details.
Once you’ve mastered this beginner loaf, you can start experimenting with mixing different flours. Such as:
- Bread flour provides strength and elasticity (helps dough rise and hold shape).
- All-purpose flour adds extensibility (makes dough stretch more easily, improves shaping, and can lead to a more open crumb).
Ratios to try once you are ready:
- 75% bread flour / 25% all-purpose → strong yet flexible dough, slightly softer crumb.
- 50/50 blend bread flour / all-purpose→ lighter crumb, more extensibility, but requires extra folds.
- Whole grain flours (wheat, rye, spelt) and other flours such as Khorasan, Einkorn, etc.
👉 Once you are comfortable, explore other flours too. Try them in my other sourdough recipes once you have perfected this beginner recipe. I call this recipe beginner but it’s my go-to recipe that I use and everyone loves.
Step-by-Step Instructions

Step 1. Build Your Levain
For this beginner sourdough recipe, we use a simple overnight levain. This method is forgiving, predictable, and easy to plan, making it ideal when you are learning how sourdough behaves.
The night before baking, mix:
5 g active sourdough starter
50 g flour
50 g filtered or spring water
This is a 1:10:10 feeding ratio. Cover loosely and let ferment overnight at room temperature for 12–16 hours.
Once the levain is ready, use all of the levain in the dough.
Levain Readiness Cues
Your levain is ready to use when:
-
It has more than doubled in size (often close to tripled)
-
The surface looks domed with visible bubbles
-
It smells lightly sweet and yeasty, not sharp
-
It feels airy and light when stirred
This higher feeding ratio slows fermentation and reduces excess acidity, giving you a wider, more forgiving window to use your levain without worrying about perfect timing.
If your levain rises faster or slower than expected, that’s completely normal. What matters most is how it looks and smells, not the exact number of hours.
👉 If your levain has collapsed well below its peak or smells sharp or alcoholic, refresh it before baking.

Step 2. Mix Dough (Fermentolyse)
Whisk the levain into 300 g filtered or spring water at room temperature to slightly warm (70–78°F / 21–26°C). Avoid chlorinated tap water, as chlorine can inhibit fermentation and slow starter activity.
Add 500 g flour and mix until no dry flour remains. The dough will look rough and shaggy at this stage, and that’s exactly what you want. This marks the start of bulk fermentation, so note the time. Cover and rest for 30 minutes.
👉 This recipe uses a fermentolyse method, which means flour, water, and starter are mixed first, and the salt is added later. I prefer this approach because it allows me to use the levain right at peak activity without worrying about it falling during a longer rest.
A Quick Note on Mixing Methods (So You’re Not Confused)
Before mixing, it helps to understand these terms:
Autolyse: Flour and water are mixed and rested first, then the starter and salt are added later. This method improves extensibility and flavor.
Fermentolyse (used in this recipe): Mixing flour, water, and starter, resting, then adding salt later. Gluten begins developing while fermentation is already underway.
All-in Mix (sometimes called straight mix): It’s simple and works well… Add flour, water, starter, and salt all at once, then mix. It’s simple and effective, but you don’t get the same gluten-strengthening benefit of a rest.
👉 No matter which mixing method you use, you can still make great bread. Fermentolyse simply offers a nice balance of structure, flavor, and flexibility while you’re learning.
Step 3. Add Salt
Sprinkle 10 g salt evenly over the dough along with the reserved 25 g water. Pinch, fold, and squeeze the dough until the salt and water are fully incorporated and no dry or salty spots remain.
By hand:
The dough should feel tacky but cohesive and slightly smoother than before. If it feels messy at first, keep folding — it will come together within a minute or two.
With a mixer:
Mix on low speed until the salt and water are fully incorporated and the dough looks uniform. Transfer the dough to a clear bowl or container so you can easily monitor fermentation during bulk.
Step 4. Strengthen the Dough (Stretch & Folds)
Over the next 2 hours, perform 3–4 sets of folds, every 30 minutes:
Stretch & Fold:
With a slightly damp hand, lift one side of the dough, stretch it gently upward, and fold it over itself. Rotate the bowl and repeat on all sides until the dough begins to resist.
Coil Fold (optional):
Lift the dough from the center with both hands, allowing the ends to tuck underneath as you set it back down. Rotate the bowl and repeat once or twice.
What to Look For:
With each set of folds, the dough should become smoother, stronger, and easier to handle.
If the dough still feels sticky after the first fold, that’s completely normal. Stickiness does not mean failure — it simply means the gluten is still developing.
Stop folding when the dough tightens and begins to resist stretching. At that point, it has enough strength and needs time to rest, not more handling.
Busy baker tip:
If you have a busy life, don’t worry — you can absolutely use a stand mixer instead of doing stretch and folds. Mix the dough on low to medium speed for about 10–15 minutes, or until you reach the windowpane stage (when the dough stretches thin without tearing).
This builds enough gluten strength that you can skip the stretch and folds if needed. While stretch and folds are still the best way to gently strengthen dough and connect with it, you don’t have to let sourdough control your life. Use the method that fits your schedule and still brings you joy in baking.

Step 5. Bulk Fermentation (4+ Hours)
Cover the dough and let it rest at room temperature. This stage develops flavor, gas, and structure.
Bulk fermentation is the main rise that happens after mixing. No matter which mixing method you use, bulk begins the moment flour and starter come into contact. During this time, the dough grows, bubbles form, acids develop, and flavor builds.
Cues to Watch For
- Dough rises about 50–75% in volume
- Surface looks smooth and slightly domed
- Small bubbles appear along the sides of the bowl
- Dough jiggles like Jell-O when the bowl is gently nudged
- A gentle poke springs back slowly
If your dough feels like it’s taking forever, you’re not doing anything wrong. Cooler kitchens move slower and warmer ones move faster. Watch for the visual signs above and let the dough finish when it’s ready, not when the clock says so.
Why This Recipe Uses Fermentolyse
While autolyse and fermentolyse are often considered ideal for gluten development, they are not required to make great bread. You can mix everything together at once and still get excellent results.
I prefer fermentolyse because it allows me to use the starter right at peak activity. If I waited through a long autolyse, the starter could begin to fall. Fermentolyse offers a reliable balance of structure, flavor, and flexibility, which makes it especially beginner-friendly. Whichever method you choose, you can still bake a beautiful loaf.
Step 6. Pre-Shape and Rest
Turn the dough out onto a lightly floured surface. Gently shape it into a loose round, using just enough tension to bring it together without tightening it too much.
Let the dough rest uncovered for about 20 minutes. During this rest, the surface will relax and the dough may spread slightly — this is expected and a sign the gluten is loosening and preparing for final shaping.
Step 7. Final Shape
Flip the dough seam side up onto a lightly floured surface. Gently stretch the dough into a rough rectangle, then fold the sides inward and roll the dough into a tight round or oval, building surface tension as you go.
You should feel the outer surface tighten slightly and smooth out. If the dough starts to resist strongly or tear, stop and let it rest for a few minutes before continuing — tension comes from patience, not force.
Once shaped, place the dough seam side up into a well-floured banneton.
Step 8. Proof
Cover the shaped dough and refrigerate for an overnight proof. This is the recommended method for beginners because it improves flavor, makes scoring easier, and helps produce better oven spring.
Let the dough cold proof in the refrigerator for 8–12 hours. Avoid extending the cold proof beyond 48 hours.
Optional Same-Day Bake:
If you need to bake the same day, let the dough proof at room temperature for about 1–2 hours, until it looks slightly puffy and slowly springs back when gently pressed.
Step 9. Bake
Preheat the oven with the Dutch oven inside at 450°F (232°C). For best results, letting the Dutch oven heat for 30–60 minutes helps maximize oven spring, but for everyday baking, I often bake as soon as the oven is fully preheated and still get great results.
Carefully invert the dough onto parchment paper or a bread sling. Score the dough confidently with a sharp knife or bread lame. One clean slash is enough — perfection is not required. Add a couple of ice cubes to the Dutch oven or lightly spray the dough with water to create extra steam.
- Bake for 30 minutes covered at 450°F (232°C).
- Remove the lid and continue baking for 15 minutes, until the crust is a deep golden brown.
The bread is done when the internal temperature reaches 205–210°F (96–99°C).

Step 10. Cool
Transfer the loaf to a wire rack and let it cool for at least 1 hour (2 hours is even better) before slicing. Cooling allows the crumb to finish setting and the steam inside the loaf to redistribute.
Cutting too early traps moisture inside and can lead to a gummy texture — even though the bread smells incredible and the temptation is very real.
Storage
Store the loaf at room temperature in a paper bag for several days, or keep it cut side down on a cutting board for 1–2 days. Avoid airtight containers at room temperature, as they can soften the crust.
For longer storage, slice the bread and freeze it in a freezer-safe bag. Toast slices straight from frozen for the best texture and flavor.
💡Good to know: Freezing bread can actually improve its health benefits by lowering its glycemic impact. Read more in my article: Freezing Bread Improves Health Benefits

Nutrition Information
This is based on bread flour averages (USDA values). Actual numbers will vary slightly depending on flour brand, bake time (more/less water loss), and slice thickness/density.
Whole Loaf (about 780 g baked)
- Calories: ~2002 kcal
- Protein: ~66 g
- Carbohydrates: ~418 g
- Fat: ~5.5 g
- Fiber: ~16.5 g
- Sugar: ~1.7 g (naturally from flour)
- Sodium: ~3930 mg
Per Slice (55–60 g)
- Calories: ~143 kcal
- Protein: ~4.7 g
- Carbohydrates: ~30 g
- Fat: ~0.4 g
- Fiber: ~1.2 g
- Sugar: ~0.1 g
- Sodium: ~281 mg
Troubleshooting
Dense loaf
Likely causes include an inactive starter or a bulk fermentation that was too short. Make sure your starter is reliably doubling and continue bulk fermentation until you see bubbles along the sides and a gentle jiggle when the bowl is nudged.
Flat loaf
This usually happens when the dough is overproofed or shaped too loosely. Try stopping bulk fermentation a bit earlier and focus on building more surface tension during final shaping.
Gummy crumb
Most often caused by slicing the bread too soon or underbaking. Let the loaf cool fully before cutting and ensure it reaches a full bake.
Pale crust
The oven may not have been hot enough, or the uncovered portion of the bake was too short. Allow the bread to bake uncovered until the crust reaches a deep golden brown.
Burnt bottom
This can happen with thinner or overly conductive Dutch ovens. Using a heavier Dutch oven (like Krustic) helps, or place a baking sheet on the rack below to diffuse heat. You can also add a layer of uncooked rice or pie weights to the bottom of the Dutch oven under the parchment paper.
Your First Artisan Sourdough Loaf Is a Win
If this is your first sourdough loaf, take a moment to appreciate what you just did. You built a levain, learned how dough behaves, practiced patience, and baked real artisan bread from scratch. That alone puts you ahead of where most people ever start.
No sourdough loaf is perfect, and it’s not supposed to be. Every bake teaches you something new about timing, texture, and fermentation. Even loaves that aren’t picture-perfect still taste incredible, and they’re all part of the learning process.
This beginner sourdough recipe is one you can return to again and again. As you get more comfortable, you can experiment with hydration, flour blends, shaping styles, or longer cold ferments. But there’s no rush. Mastering the fundamentals is what builds confidence.
If you’re ready to keep going, explore my other sourdough guides and recipes here on Sourdoughpedia. I’m baking right alongside you, and I’ll guide you through every next step.
Happy baking.
Beginner Sourdough Bread Recipe – Easy Artisan Loaf
Equipment
- Banneton basket or a bowl lined with a floured towel
- Bread Lame For scoring
- Dutch oven or heavy pot with lid I recommend Krustic. It bakes evenly, prevents burnt bottoms, and produces beautiful crust.
- Optional: Mixer My favorite is the Ooni Halo Pro. It saves time and effort, especially if you bake often.
Ingredients
LEVAIN (Overnight Build – Use All)
- 5 grams starter
- 50 grams water (75–78°F / 24–26°C)
- 50 grams flour All Purpose or Bread Flour
- This build yields about 100 g of levain. Use all of it. Any extra grams usually stay stuck to the jar and won’t affect the recipe.
DOUGH
- 100 grams Active Levain (at peak)
- 325 grams Warm Water (75–78°F / 24–26°C) filtered or spring water, room temperature to slightly warm (75–78°F / 24–26°C), reserve 25 g for salt
- 500 grams Bread Flour (or substitute all-purpose; see blog notes)
- 10 grams Fine Sea Salt
Instructions
Build the levain (night before):
- Mix starter, flour, and water. Cover loosely and ferment overnight at room temperature for 12–16 hours, until domed, bubbly, and airy.
Mix dough (fermentolyse):
- Whisk levain into 300 g water. Add flour and mix until no dry flour remains. Cover and rest 30 minutes.
Add salt:
- Sprinkle salt over the dough with the reserved 25 g water. Pinch and fold until fully incorporated.
Strengthen the dough:
- Over the next 2 hours, perform 3–4 sets of stretch and folds every 30 minutes, until the dough becomes smoother and stronger.
Bulk fermentation:
- Let dough rest until it rises about 50–75%, shows bubbles along the sides, and jiggles when the bowl is nudged
Pre-shape:
- Turn dough onto a lightly floured surface. Shape loosely into a round and rest 20 minutes.
Final shape:
- Shape into a tight round or oval and place seam side up in a floured banneton. Cover.
Bake:
- Preheat oven with Dutch oven inside to 450°F (232°C).Score dough and transfer to the pot. Add steam if desired.Bake 30 minutes covered, then 15 minutes uncovered until deep golden brown.
Cool
- Cool on a wire rack for at least 1 hour (preferably 2) before slicing.
Notes
- Internal bread temperature should reach 205–210°F (96–99°C)
- Overnight cold proofing improves flavor and scoring ease
- Store bread in a paper bag or cut-side down for 1–2 days
- Slice and freeze for longer storage
- Read the full blog post above for visual cues, shaping tips, and troubleshooting
Nutrition
Frequently Asked Questions
Can I use all-purpose flour instead of bread flour?
Yes, but reduce water slightly and build more dough strength with folds. Bread flour gives better rise, AP gives more tenderness.
How long does bulk fermentation take?
At 75°F, usually 4–5 hours. Cooler kitchens may need 6–8 hours. Always watch the dough, not the clock.
Do I have to cold proof overnight?
No. You can proof same-day for 1–2 hours, but cold proofing makes scoring easier and improves flavor.
Why is my bread dense?
Your starter may not be active or bulk was too short. Make sure starter doubles consistently and dough shows signs of fermentation.
How sour will my bread be?
Same-day loaves are mild. Cold proofing 12–24 hours adds tang. Do not exceed 48 hours.
What oven temperature is best?
Preheat Dutch oven at 450°F. Bake 30 minutes covered, 15 minutes uncovered until deep golden.
Affiliate Disclaimer: This post contains affiliate links. If you purchase through these links, I may earn a small commission at no extra cost to you. I only recommend products I personally use and love, and your support helps me keep sharing free sourdough recipes and resources.