
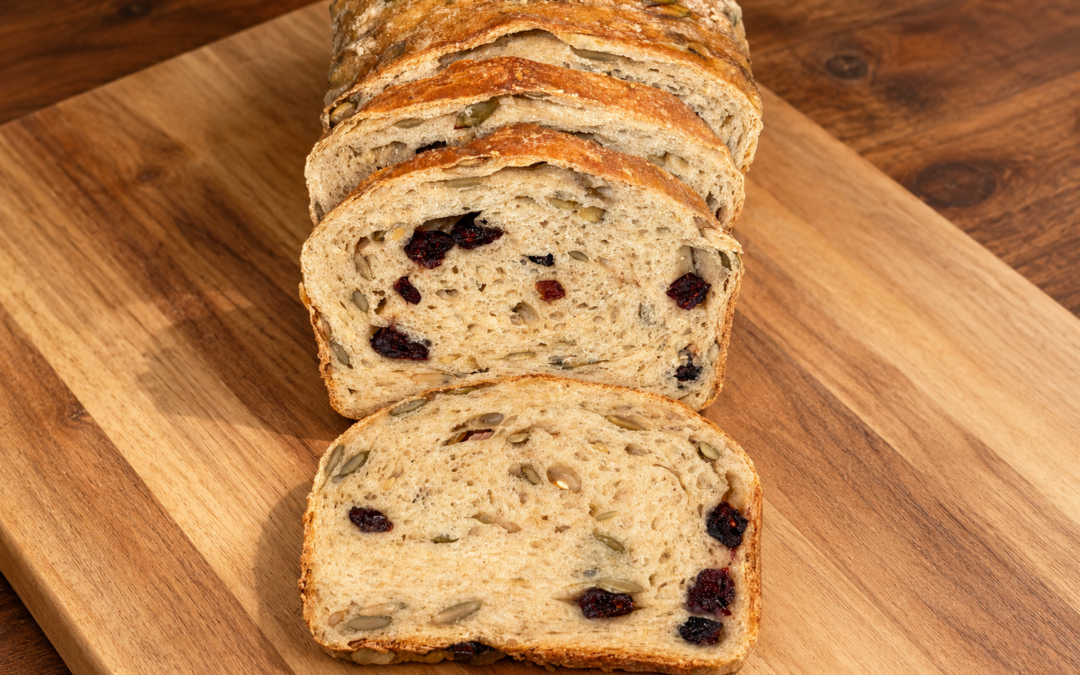
There are plenty of cranberry pumpkin seed breads out there, and I’ve seen this combination used many times in rustic artisan sourdough.
But what I wanted was completely different.
I wanted a soft Cranberry Pumpkin Seed Sourdough Sandwich Bread.
A loaf that could be sliced thin enough for sandwiches, but still soft enough for toast. Slightly sweet from honey and cranberries, with the savoury crunch of pumpkin seeds and the deeper flavour that comes from sourdough fermentation.
And the idea for this bread had actually been sitting in the back of my mind for about four years.
If you love soft sourdough sandwich loaves, you may also want to try my Honeycloud Sourdough Sandwich Bread, which has an incredibly soft, fluffy crumb.
Why I Created This Cranberry Pumpkin Seed Sourdough Sandwich Bread
The Tuna Sandwich That Inspired It
About four years ago, we were celebrating my niece’s birthday.
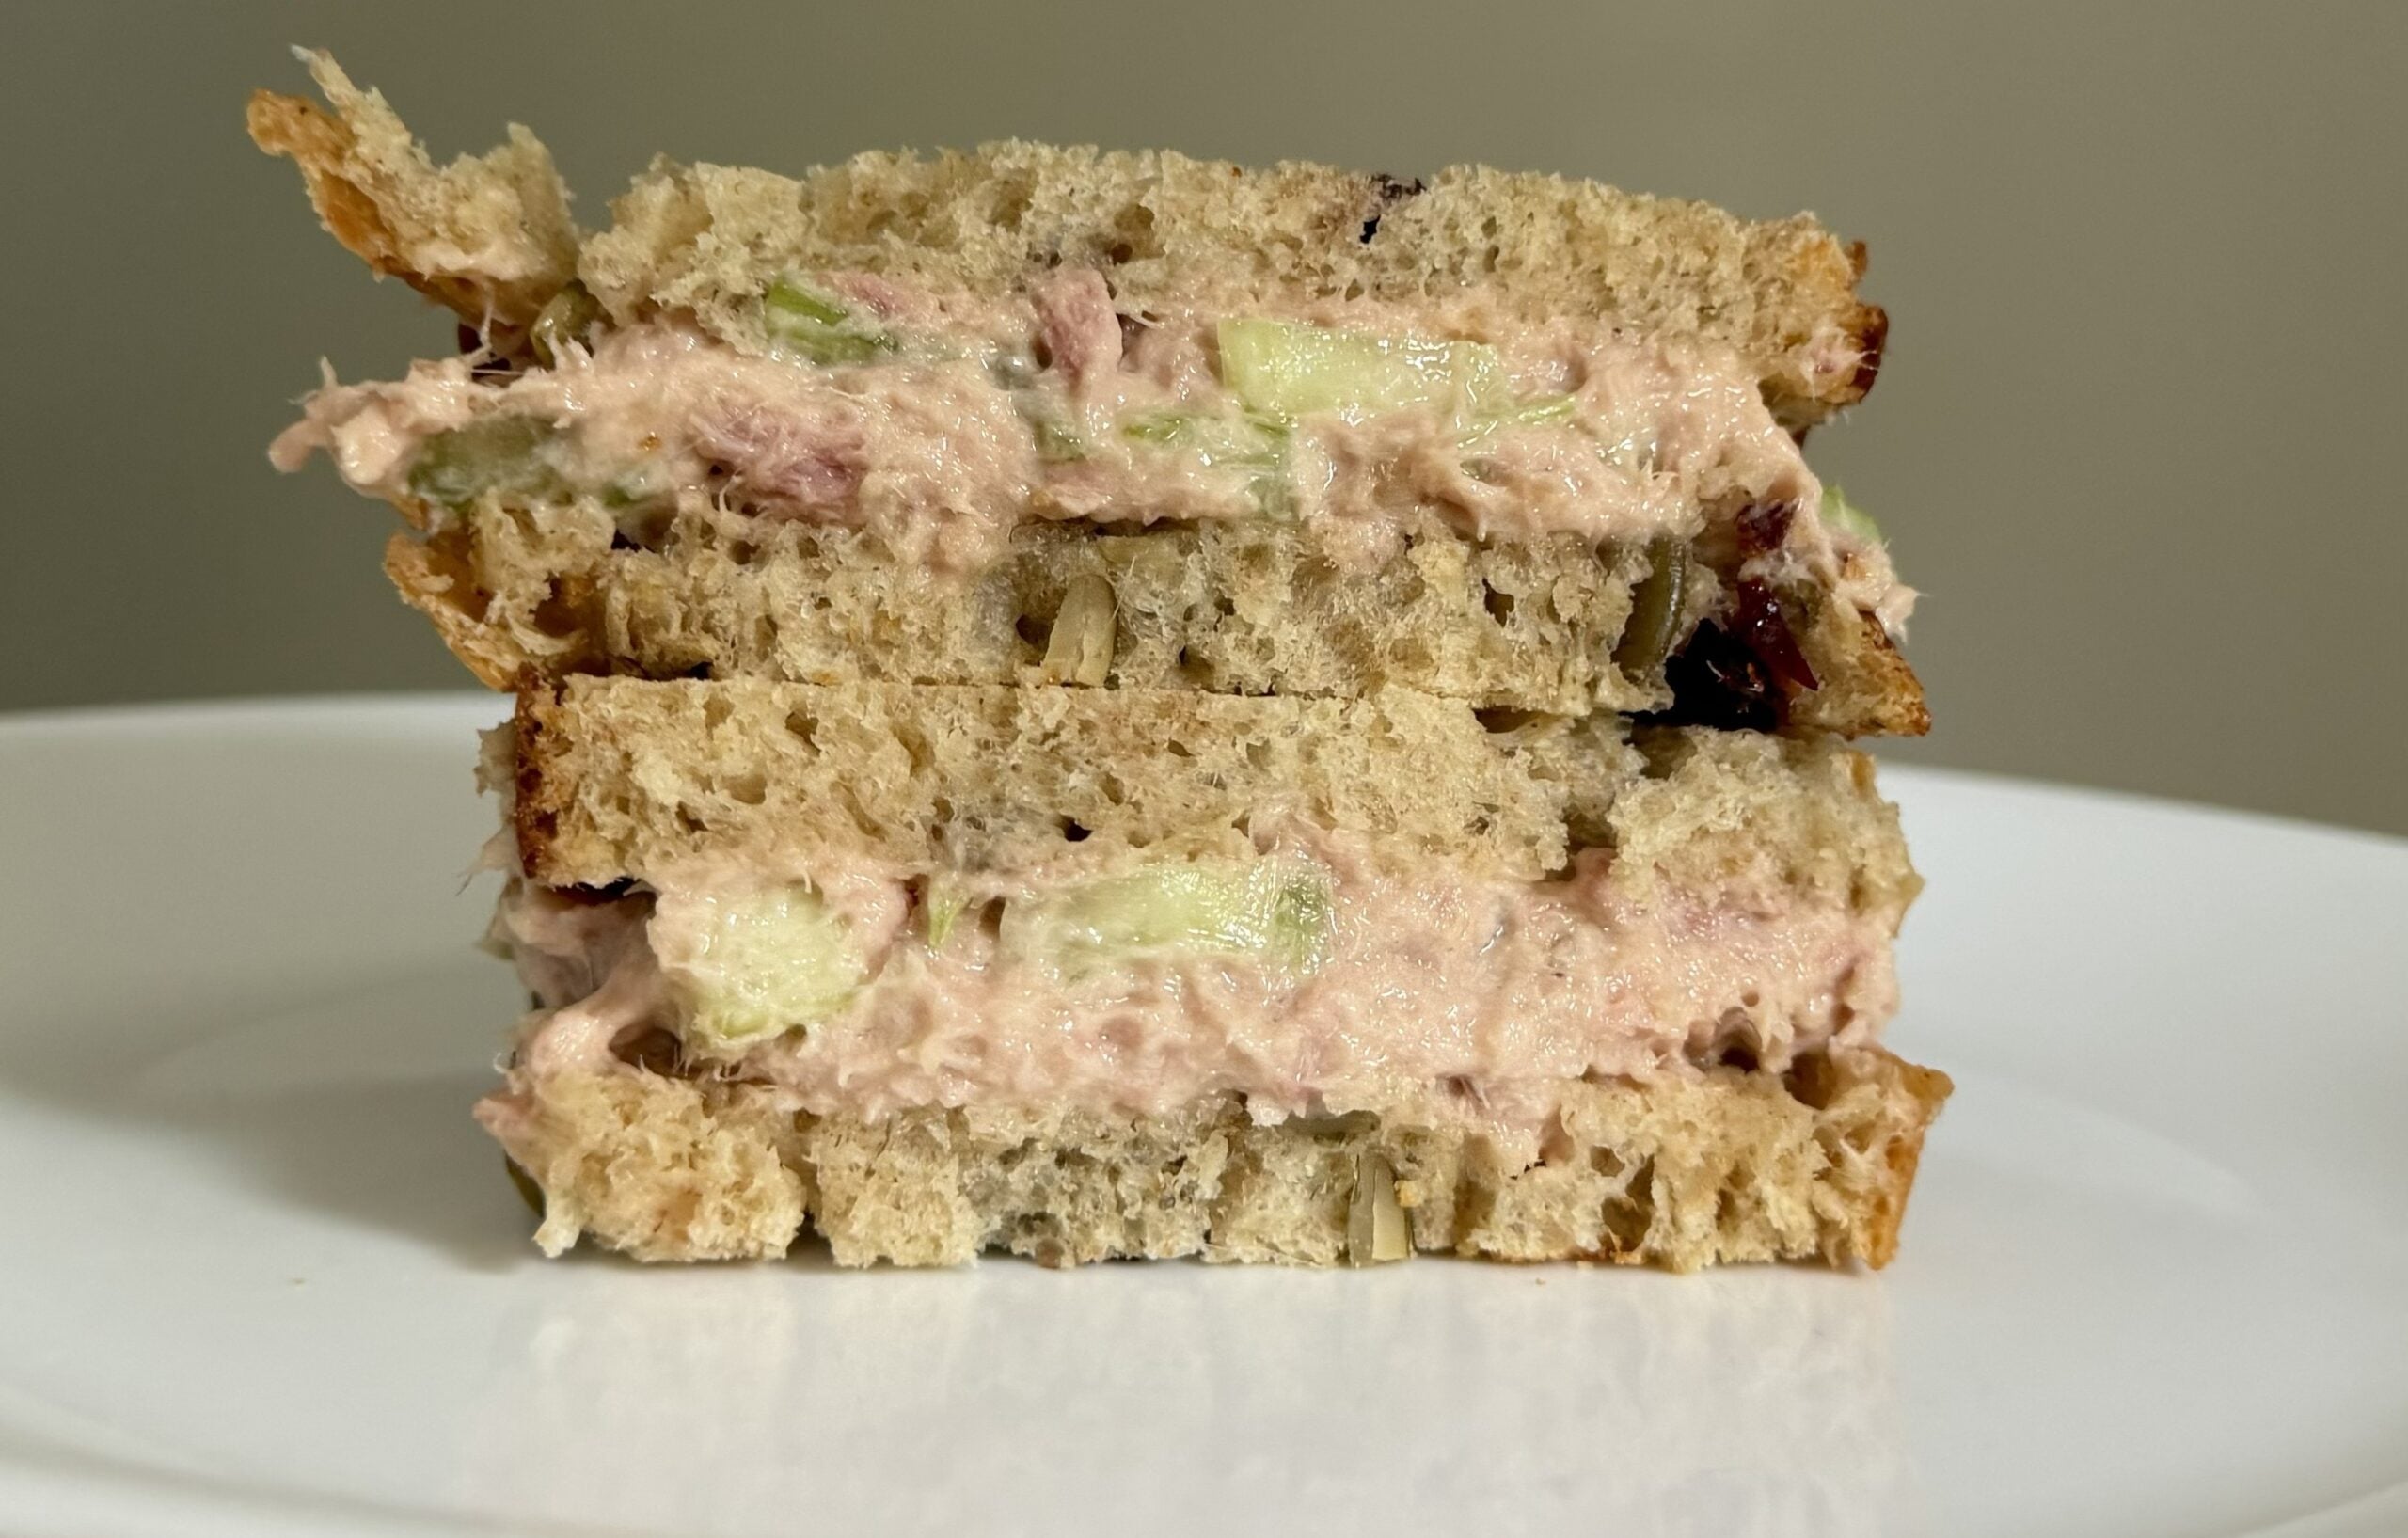
My sister had ordered pizza and a tray of sandwiches from Fortinos, (canadian grocery store) and one of the sandwiches was tuna served on cranberry pumpkin seed bread.
I tried it and immediately thought:
Why is this combination so good?
The slightly sweet cranberries with the savoury tuna and nutty pumpkin seeds just worked.
I never forgot that sandwich, and neither did some of the other guests.
I assume the bread may have been Stonemill Cranberry Pumpkin Seed Bread because Fortinos carries it, but I can’t confirm that was the exact bread used that day. Fortinos currently lists Stonemill Cranberry Pumpkin Seed Bread in its bakery selection.
Years later, when I finally decided to make my own cranberry pumpkin seed sourdough, I noticed something.
Most of the recipes I was finding were for rustic artisan loaves.
I didn’t want another boule.
I wanted a soft sandwich bread.
So I created my own.
Why This Cranberry Pumpkin Seed
Sourdough Is Different
This isn’t simply an artisan sourdough recipe baked in a loaf pan.
I developed the dough specifically to behave like sandwich bread.
That means a softer crumb, finer structure, tender crust and enough strength to hold the cranberries and pumpkin seeds without becoming dense.
The dough uses a three-flour blend:
- Bread flour for strength and rise
- Whole wheat flour for flavour and character
- Rye flour for additional depth
Technically, these represent two grains, wheat and rye, but three different flours.
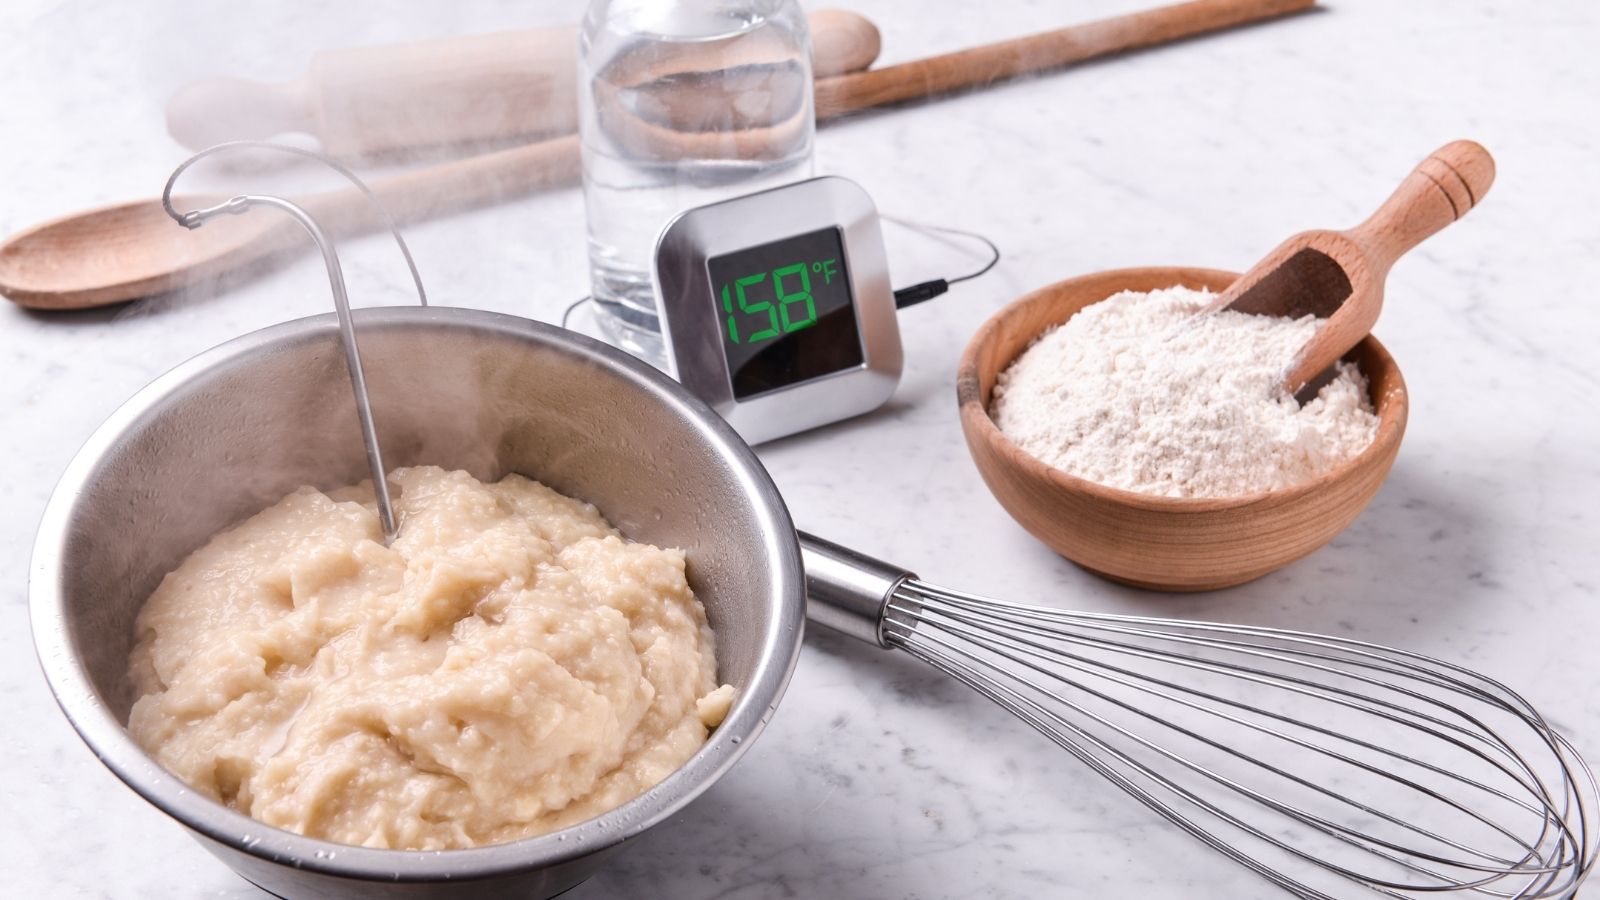
I also use a tangzhong, which is a small portion of flour and milk cooked into a thick paste before being added to the dough.
Tangzhong is commonly used in very soft breads because cooking some of the flour and liquid before mixing changes how that portion of the dough holds moisture. King Arthur Baking uses the method in its Japanese milk bread and cooks the mixture until thick enough that the whisk leaves visible lines.
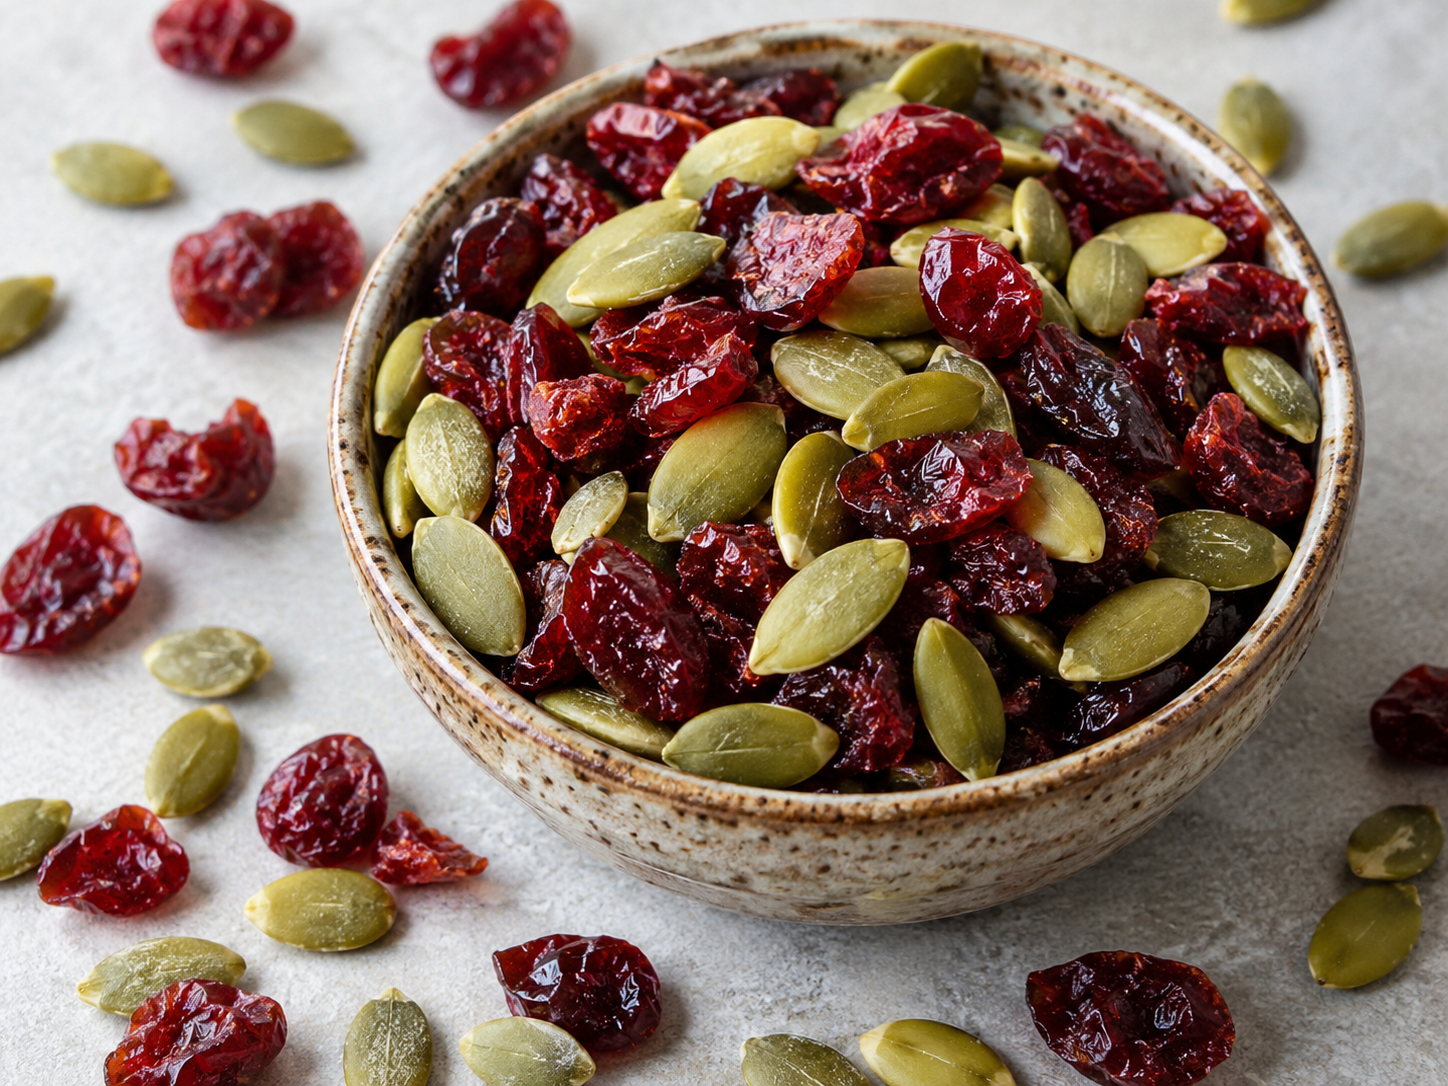
Then we add whole milk, milk powder, butter, honey, dried cranberries, and pumpkin seeds.
The result is somewhere between a hearty seeded loaf and an incredibly soft sourdough sandwich bread.
Why You’ll Love This Cranberry
Pumpkin Seed Sourdough Bread
This bread is:
- Naturally leavened with sourdough starter
- Made without commercial yeast
- Sweetened in the dough with honey rather than refined sugar
- Soft enough for sandwiches
- Made with bread flour, whole wheat, and rye
- Filled with dried cranberries and toasted pumpkin seeds
- Easy to mix by hand or with a stand mixer
- Cold fermented overnight
- Wonderful toasted
- Especially good with savoury sandwich fillings
- Freezer-friendly
- Made in a standard 9 × 5-inch loaf pan
A quick note about the cranberries: many commercially dried cranberries contain added sugar. If avoiding refined sugar entirely is important to you, check the ingredient list on your package.
Before You Begin:
Get Your Sourdough Starter Ready
This recipe uses 100 g active sourdough starter at 100% hydration.
Because sourdough starter is the only leavening in this bread, this is one step I don’t recommend rushing. A strong, active starter will give you a better rise and a lighter sandwich-bread crumb.
This is also an enriched dough. It contains milk, butter, honey, whole grains, cranberries, and seeds, so it has more weight for the starter to lift than a basic flour-water-salt artisan loaf. You want your levain to be strong, bubbly, well risen, and at or near peak when you mix the dough.
How I Build My Levain for This Recipe
If I’m building my levain the same day I plan to mix the dough, I usually feed it at least 1:2:2.
For one loaf, that could look like:
- 25 g mature sourdough starter
- 50 g water
- 50 g bread flour
This gives you approximately 125 g of active levain.
The recipe calls for 100 g, so you can weigh out exactly 100 g, or use the full 125 g if that is how you prefer to bake. Just keep in mind that using more starter can make the dough ferment a little faster.
If I’m building my levain the night before, I usually use a much larger feeding, typically 1:10:10. The larger feeding gives the starter more food and a longer fermentation window so it can develop overnight without peaking too early.
Your exact timing will still depend on the temperature of your kitchen and the strength of your starter, so always watch the levain rather than relying only on the clock.
The Flour I Use for My Starter and Levain
I keep a separate mother starter, so when I build a levain for a recipe I can usually use the entire levain rather than having to save some to maintain my starter.
For my regular sourdough starter, I use organic unbleached all-purpose flour.
When I build a levain for bread, I prefer unbleached bread flour. The bread flour I currently use isn’t organic simply because I haven’t found an organic unbleached bread flour locally in Canada that I regularly use.
If you’re in the U.S. and have access to it, King Arthur Organic Bread Flour is one option. I wish King Arthur flour were as easy for me to find here in Canada!
How to Know Your Levain Is Ready
Don’t judge your starter only by the clock.
Look for several signs together.
Your starter should:
- At least double in volume
- Have bubbles throughout the jar
- Look light and aerated
- Have a rounded or slightly domed top near peak
- Smell pleasantly fermented
- Rise predictably after feeding
I highly recommend marking the level of your freshly fed starter with a rubber band or washable marker. It makes it much easier to see exactly how much it has risen.
For this bread, starter strength matters more than hitting an exact number of hours. Use your levain when it is active and at or near its peak.
Do You Need the Float Test?
No.
I don’t rely on the float test to decide whether my starter is strong enough to bake with.
A starter can be active and perfectly capable of raising bread without floating, particularly if some gas has been knocked out while handling it.
The rise, bubbles, structure, and predictable activity of the starter tell you much more.
Cranberry Pumpkin Seed Sourdough Baking Schedule
One of the reasons sourdough can feel confusing is that fermentation never happens on exactly the same clock every day.
Your starter strength, kitchen temperature, dough temperature, refrigerator temperature, and even the season affect how quickly things move.
Use this as a sample schedule, not a deadline.
Day One
Morning: Feed your starter.
When starter is at or near peak: Make the tangzhong and mix the dough.
30 minutes after mixing: First stretch and fold.
30 minutes later: Second fold and add cranberries and pumpkin seeds.
30 minutes later: Third fold.
Optional 30 minutes later: Fourth fold if the dough still needs more strength.
Continue bulk fermentation until the dough has increased approximately 30–40% and shows the fermentation cues described later in this post.
Shape.
Place into the loaf pan.
Cover.
Refrigerate overnight.
Day Two
Remove the shaped loaf from the refrigerator.
Allow it to finish proofing at room temperature until it is very puffy and approximately 1 to 1½ inches above the rim of the pan at the centre.
Bake.
The most important rule:
Watch the dough, not just the clock.
Cranberry Pumpkin Seed Sourdough Sandwich Bread Recipe
Yield: 1 large 9 × 5-inch loaf
Approximate dough weight: about 1,000 g
Method: Hand mixed or stand mixer
Fermentation: Same-day bulk + overnight cold fermentation + next-day final proof
Bake temperature: Start at 375°F / 190°C, covered, for 20 minutes and then uncover and reduce the temperature to 350°F / 177°C for another 20–25 minutes
Finished internal temperature: approximately 205°F / 96°C
Tangzhong
- 20 g bread flour
- 100 g whole milk
Main Dough
- 280 g bread flour
- 60 g whole wheat flour
- 20 g rye flour
- 100 g active sourdough starter, 100% hydration
- 145 g milk
- 30 g water
- 40 g honey
- 15 g milk powder
- 8 g fine sea salt if using unsalted pumpkin seeds
- 7 g fine sea salt if using normally salted pumpkin seeds
- 40 g unsalted butter, very soft
- all of the cooled tangzhong
Inclusions
- 75 g dried cranberries
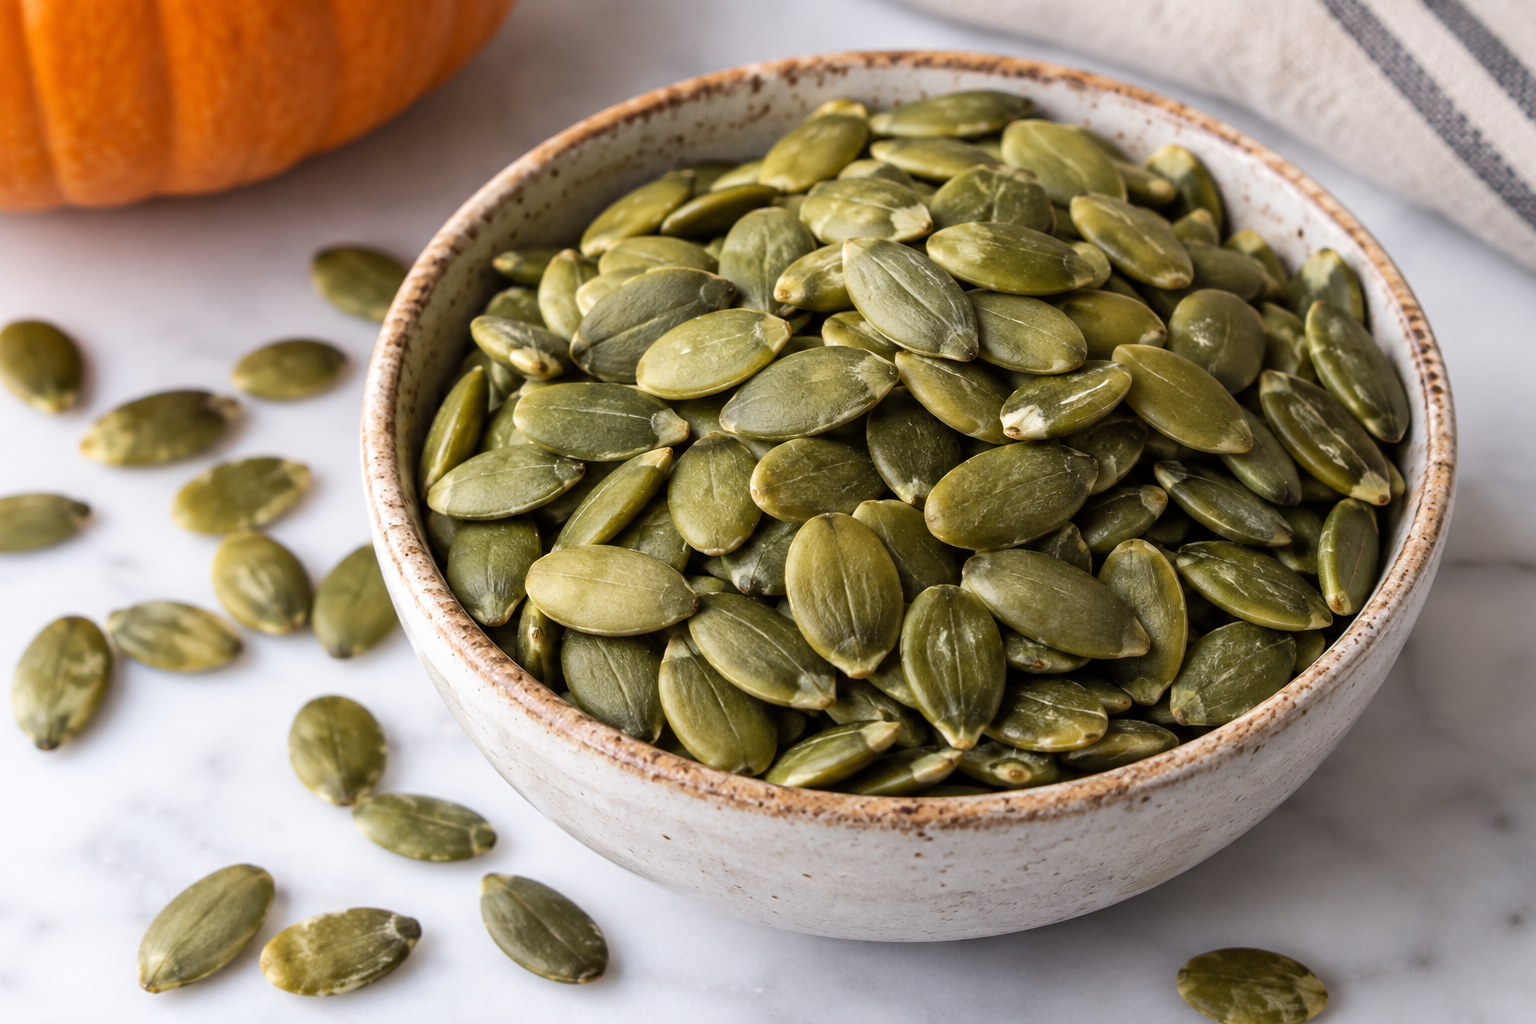
- 70 g unsalted pumpkin seeds/pepitas, toasted
Optional Inclusions:
- 10 g Whole Flax Seeds
- 3 g Finely Grated Orange Zest
I don’t use the orange zest, but a little zest can brighten the cranberry without turning this into an orange-cranberry bread.
Ingredient Notes
Understanding what the ingredients are doing makes it much easier to troubleshoot sourdough.
Bread Flour
Bread flour makes up the majority of this recipe because we need enough gluten strength to support the fruit and seeds while still creating a tall sandwich loaf.
Whole Wheat Flour
The whole wheat contributes more flavour and a little more character without taking over the loaf.
Rye Flour
There isn’t enough rye here to make this taste like rye bread.
It simply brings another layer of flavour and makes the finished loaf taste more interesting than plain white sandwich bread.
Active Sourdough Starter
Use starter that has been recently fed and is at or near peak.
Milk
Milk is part of what moves this loaf away from rustic sourdough and toward soft sandwich bread.
Milk Powder
Milk powder is one of my favourite additions to soft sandwich bread.
It adds milk solids without requiring us to dramatically increase the liquid in the dough.
Honey
I use 40 g honey.
It’s enough to complement the cranberries and pumpkin seeds and give the bread a gentle sweetness without turning it into a sweet breakfast loaf.
Butter
Use very soft unsalted butter.
It should be soft enough that your finger easily leaves an indentation, but it shouldn’t be hot or oily.
Dried Cranberries
If your dried cranberries are soft and pliable, use them straight from the package.
If they’re very dry or hard, soak them in warm water for 5–10 minutes, drain extremely well, and pat them completely dry before adding them.
Pumpkin Seeds / Pepitas
I recommend toasted unsalted pumpkin seeds for the published recipe because they give you better control over the salt level.
My first batch was actually made with toasted salted pumpkin seeds because I had them in the house and wanted to use them up.
They worked beautifully.
I simply lowered the salt in the dough.
Whole Flax Seeds
The optional 10 g whole flax seeds can go directly into the initial dough mix.
I prefer whole flax in this recipe.
Ground flax absorbs considerably more liquid and would require a hydration adjustment.
Orange Zest
Add the optional 3 g orange zest during the initial mix as well.
Equipment You’ll Need
You do not need a kitchen full of specialty sourdough equipment to make this loaf.
I recommend:
– Digital kitchen scale
– Large mixing bowl
– 9 × 5-inch loaf pan
– Parchment paper
– Dough scraper
– Instant-read thermometer
– Pastry brush
– Cooling rack
Optional:
– Stand mixer
– Second loaf pan to use as a cover during baking
If you don’t have a second loaf pan, you can create a loose domed foil tent instead.
Step 1: Make the Tangzhong
Combine the 20 g bread flour and 10 g whole milk in a small saucepan or bowl.
Before you choose your cooking method: Cook until the tangzhong thickens into a smooth, pudding-like paste and reaches approximately 150–160°F (65–71°C).
Stove top method: Cook over medium-low heat while whisking constantly.
As it heats, the mixture will thicken into a smooth paste.
Remove it from the heat once it resembles a thick pudding or paste.
Microwave Method: Whisk the flour and milk together in a microwave-safe bowl until smooth. Microwave in 30-second intervals, whisking well after each interval, until the mixture thickens into a smooth paste, usually 60–90 seconds total.
Let the tangzhong cool before adding it to your dough.
Step 2: Mix the Dough by Hand or Mixer
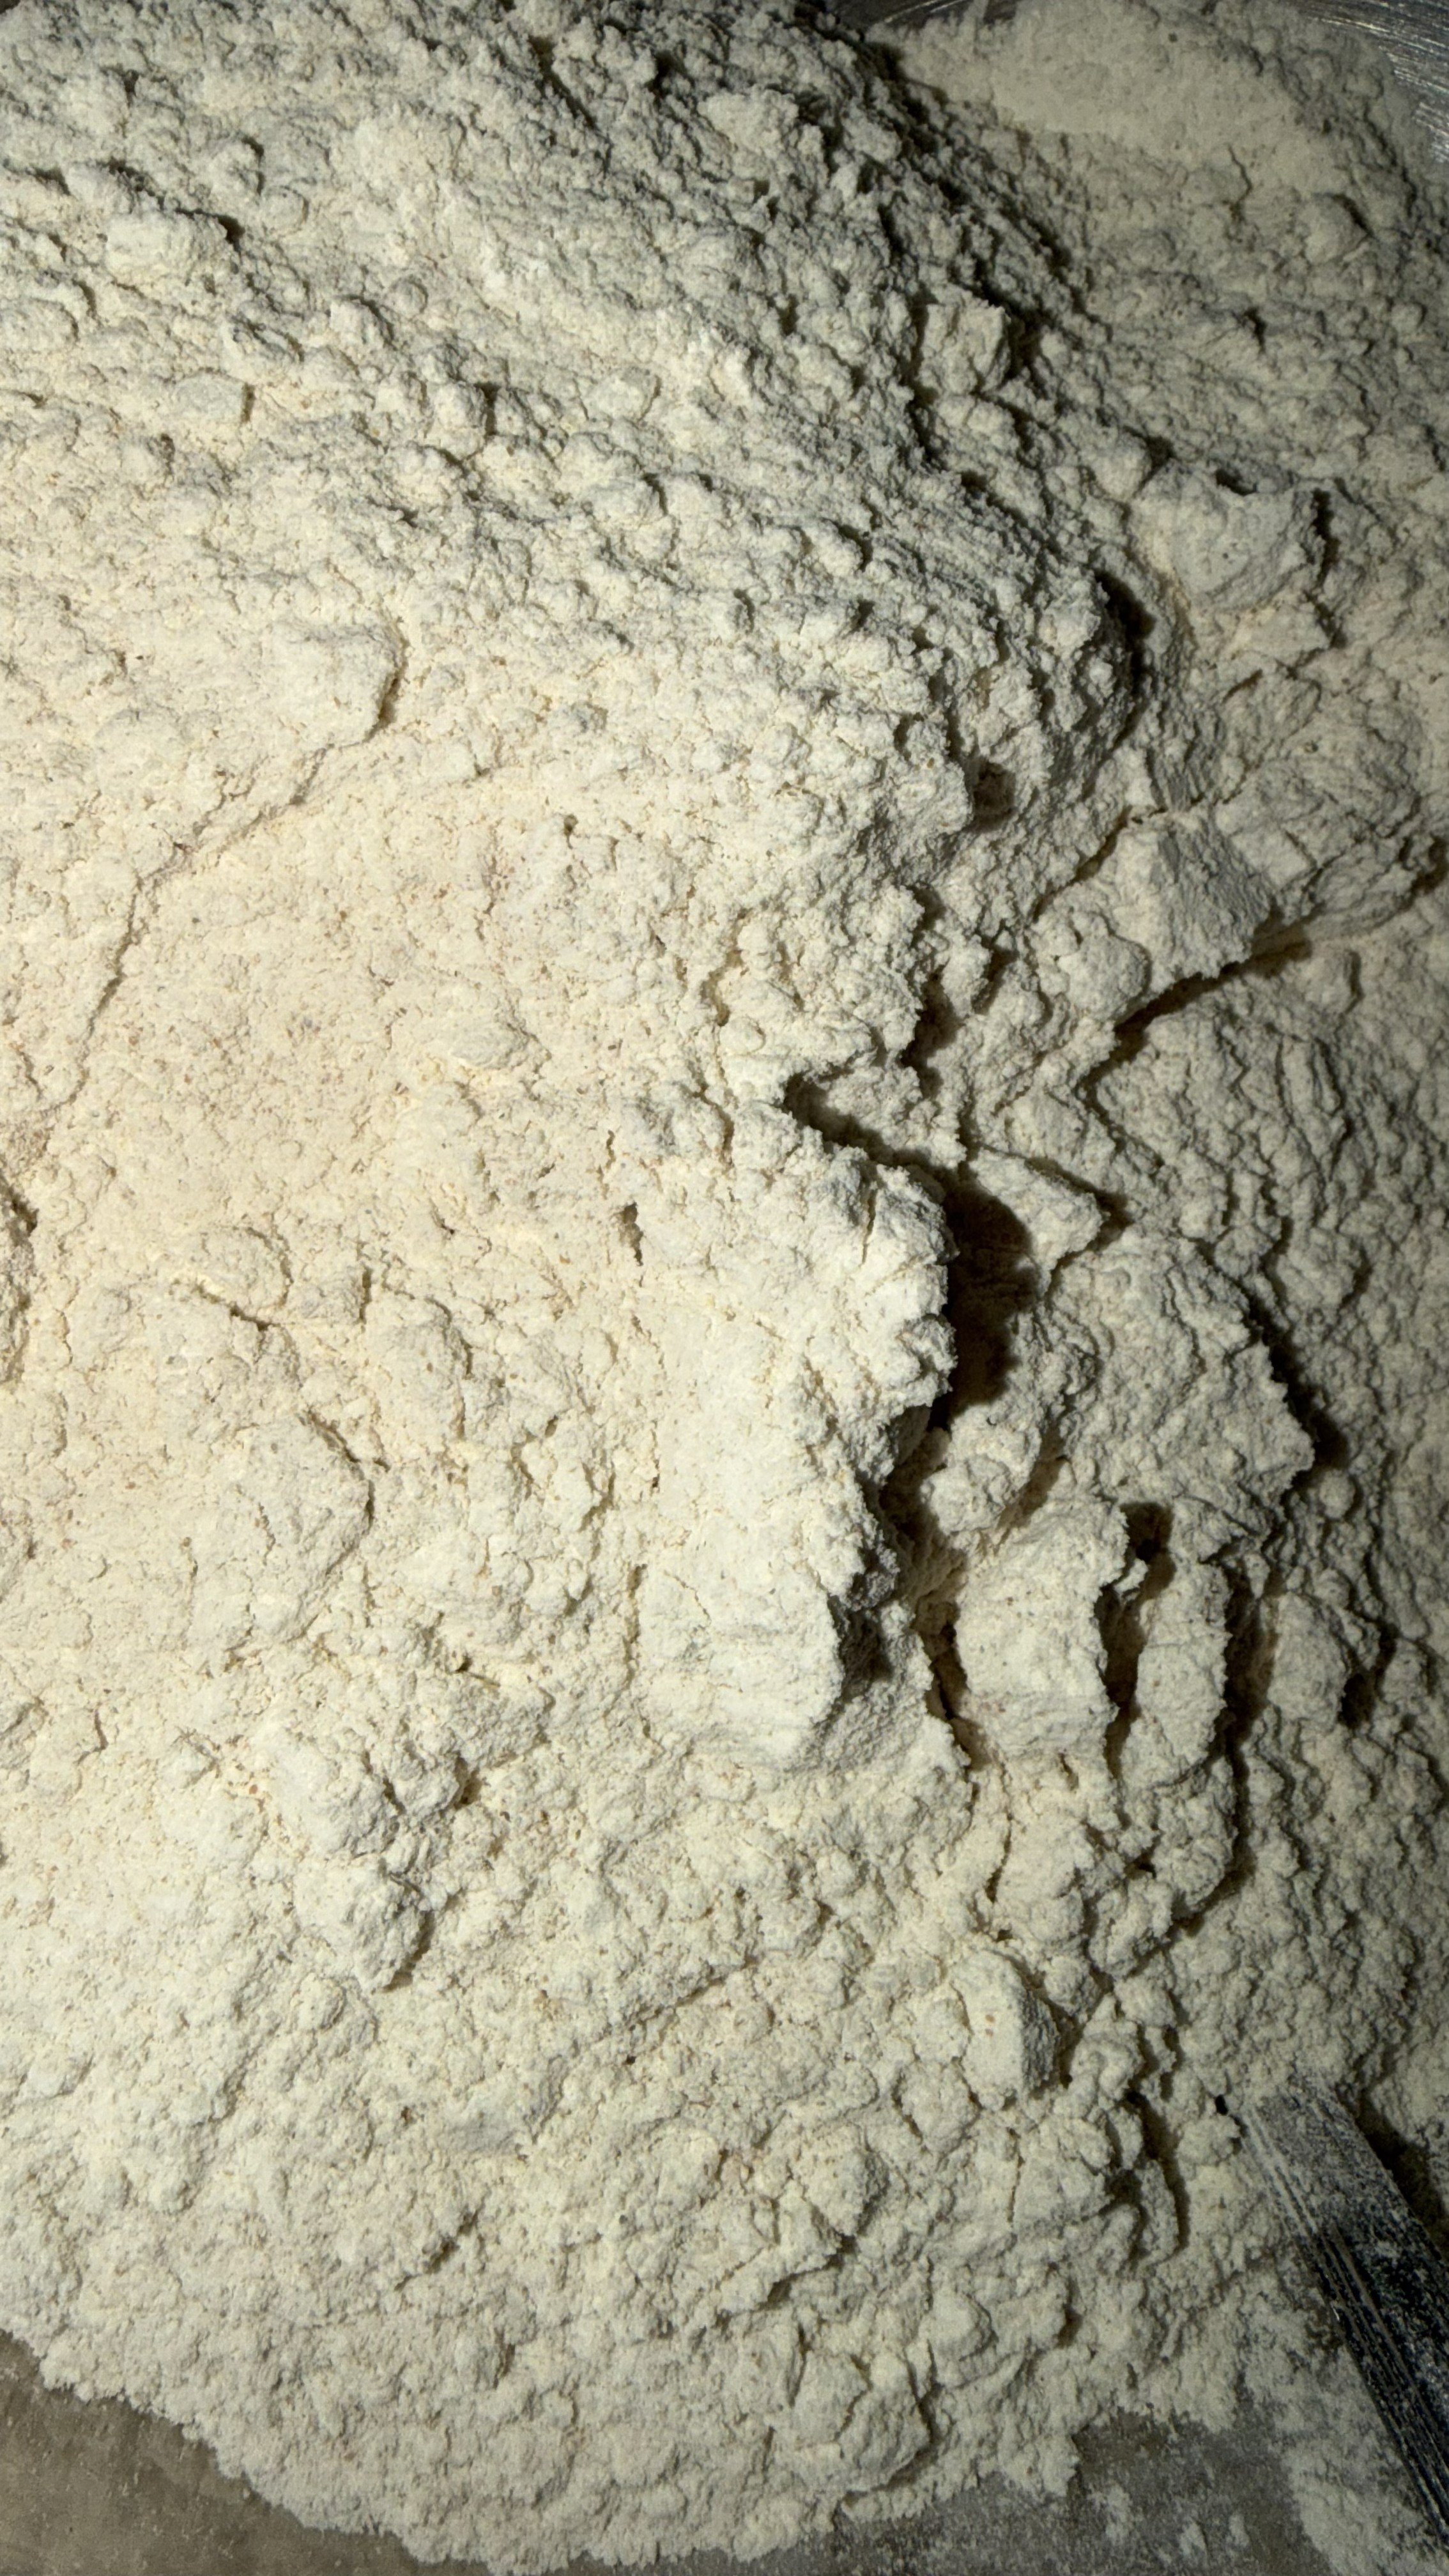
You can mix this dough by hand or with a stand mixer. I usually use my mixer, especially when I’m making larger batches, but lately I’ve found that mixing by hand works really well too and I prefer it.
I often make three loaves at a time so I can keep one, freeze one, and have another for gifting.
In a large bowl, or the bowl of your stand mixer, combine:
- bread flour
- whole wheat flour
- rye flour
- milk powder
- salt
- optional whole flax seeds
- optional orange zest
Then add:
- active sourdough starter
- cooled tangzhong
- milk
- water
- honey
- very soft butter
If mixing by hand
Use your hand to squeeze, pinch, and fold everything together until no dry flour remains and the butter is incorporated.
The dough may feel sticky and messy at first. That’s completely normal.
You do not need to knead it until perfectly smooth at this stage.
Cover and let it rest for 30 minutes before your first stretch and fold.
If using a stand mixer
Mix on low speed until all the ingredients are incorporated and no dry flour remains.
Then mix on low to medium-low for a few minutes, just until the dough begins to look smoother and develop some strength.
You do not need to fully knead it to a strong windowpane at this point, since the stretch-and-folds that follow will continue developing the gluten.
Cover and rest for 30 minutes, then continue with the first stretch and fold.
Step 3: First Stretch and Fold
With a slightly damp hand, grab one side of the dough, stretch it upward and fold it over itself.
Turn the bowl and repeat.
Complete approximately 8 stretch-and-folds (or coil folds) around the dough.
The dough should already feel stronger and smoother than it did after mixing.
Cover and rest for another 30 minutes.
Step 4: Add the Cranberries & Pumpkin Seeds
I prefer adding the inclusions during the second fold.
This gives the dough time to begin developing its gluten structure before the cranberries and seeds are introduced.
- 75 g dried cranberries
- 70 g pumpkin seeds
Scatter approximately half of the cranberries and pumpkin seeds over the dough.
Fold the dough over itself, add the remaining inclusions, and fold again.
Gently work the dough just enough to distribute the inclusions.
Do not aggressively knead them into the dough.
Cover and rest for 30 minutes.
Step 5: Third and Fourth Fold
At this stage, the dough should start to feel:
- stronger
- elastic
- softer and smoother
- capable of holding its shape
- evenly filled with cranberries and seeds
If it still feels unusually loose or weak, give it one additional gentle fold 30 minutes later.
After the final fold, leave the dough undisturbed.
Step 6: Bulk Fermentation
Allow the dough to continue fermenting until it has risen approximately:
40%
This lower bulk target is intentional because the loaf will be shaped, refrigerated overnight, and finish proofing the following day.
Look for:
- noticeable expansion
- a slightly rounded or domed surface
- small fermentation bubbles
- dough that feels lighter and aerated
- a gentle jiggle when the bowl is moved
- a soft, pillowy feel rather than a dense one
Do not wait for the dough to double.
Because this recipe uses 100 g starter, fermentation may move faster. Use the appearance and feel of the dough rather than relying entirely on the clock.
Step 7: Shape
Turn the dough onto your work surface.
Gently press the dough into a rectangle approximately the width of your loaf pan.
Fold the sides slightly inward.
Starting from the short end, roll the dough into a snug log.
Do not roll excessively tightly. You want enough tension to create a tall loaf without compressing all of the fermentation gases.
Pinch the seam closed.
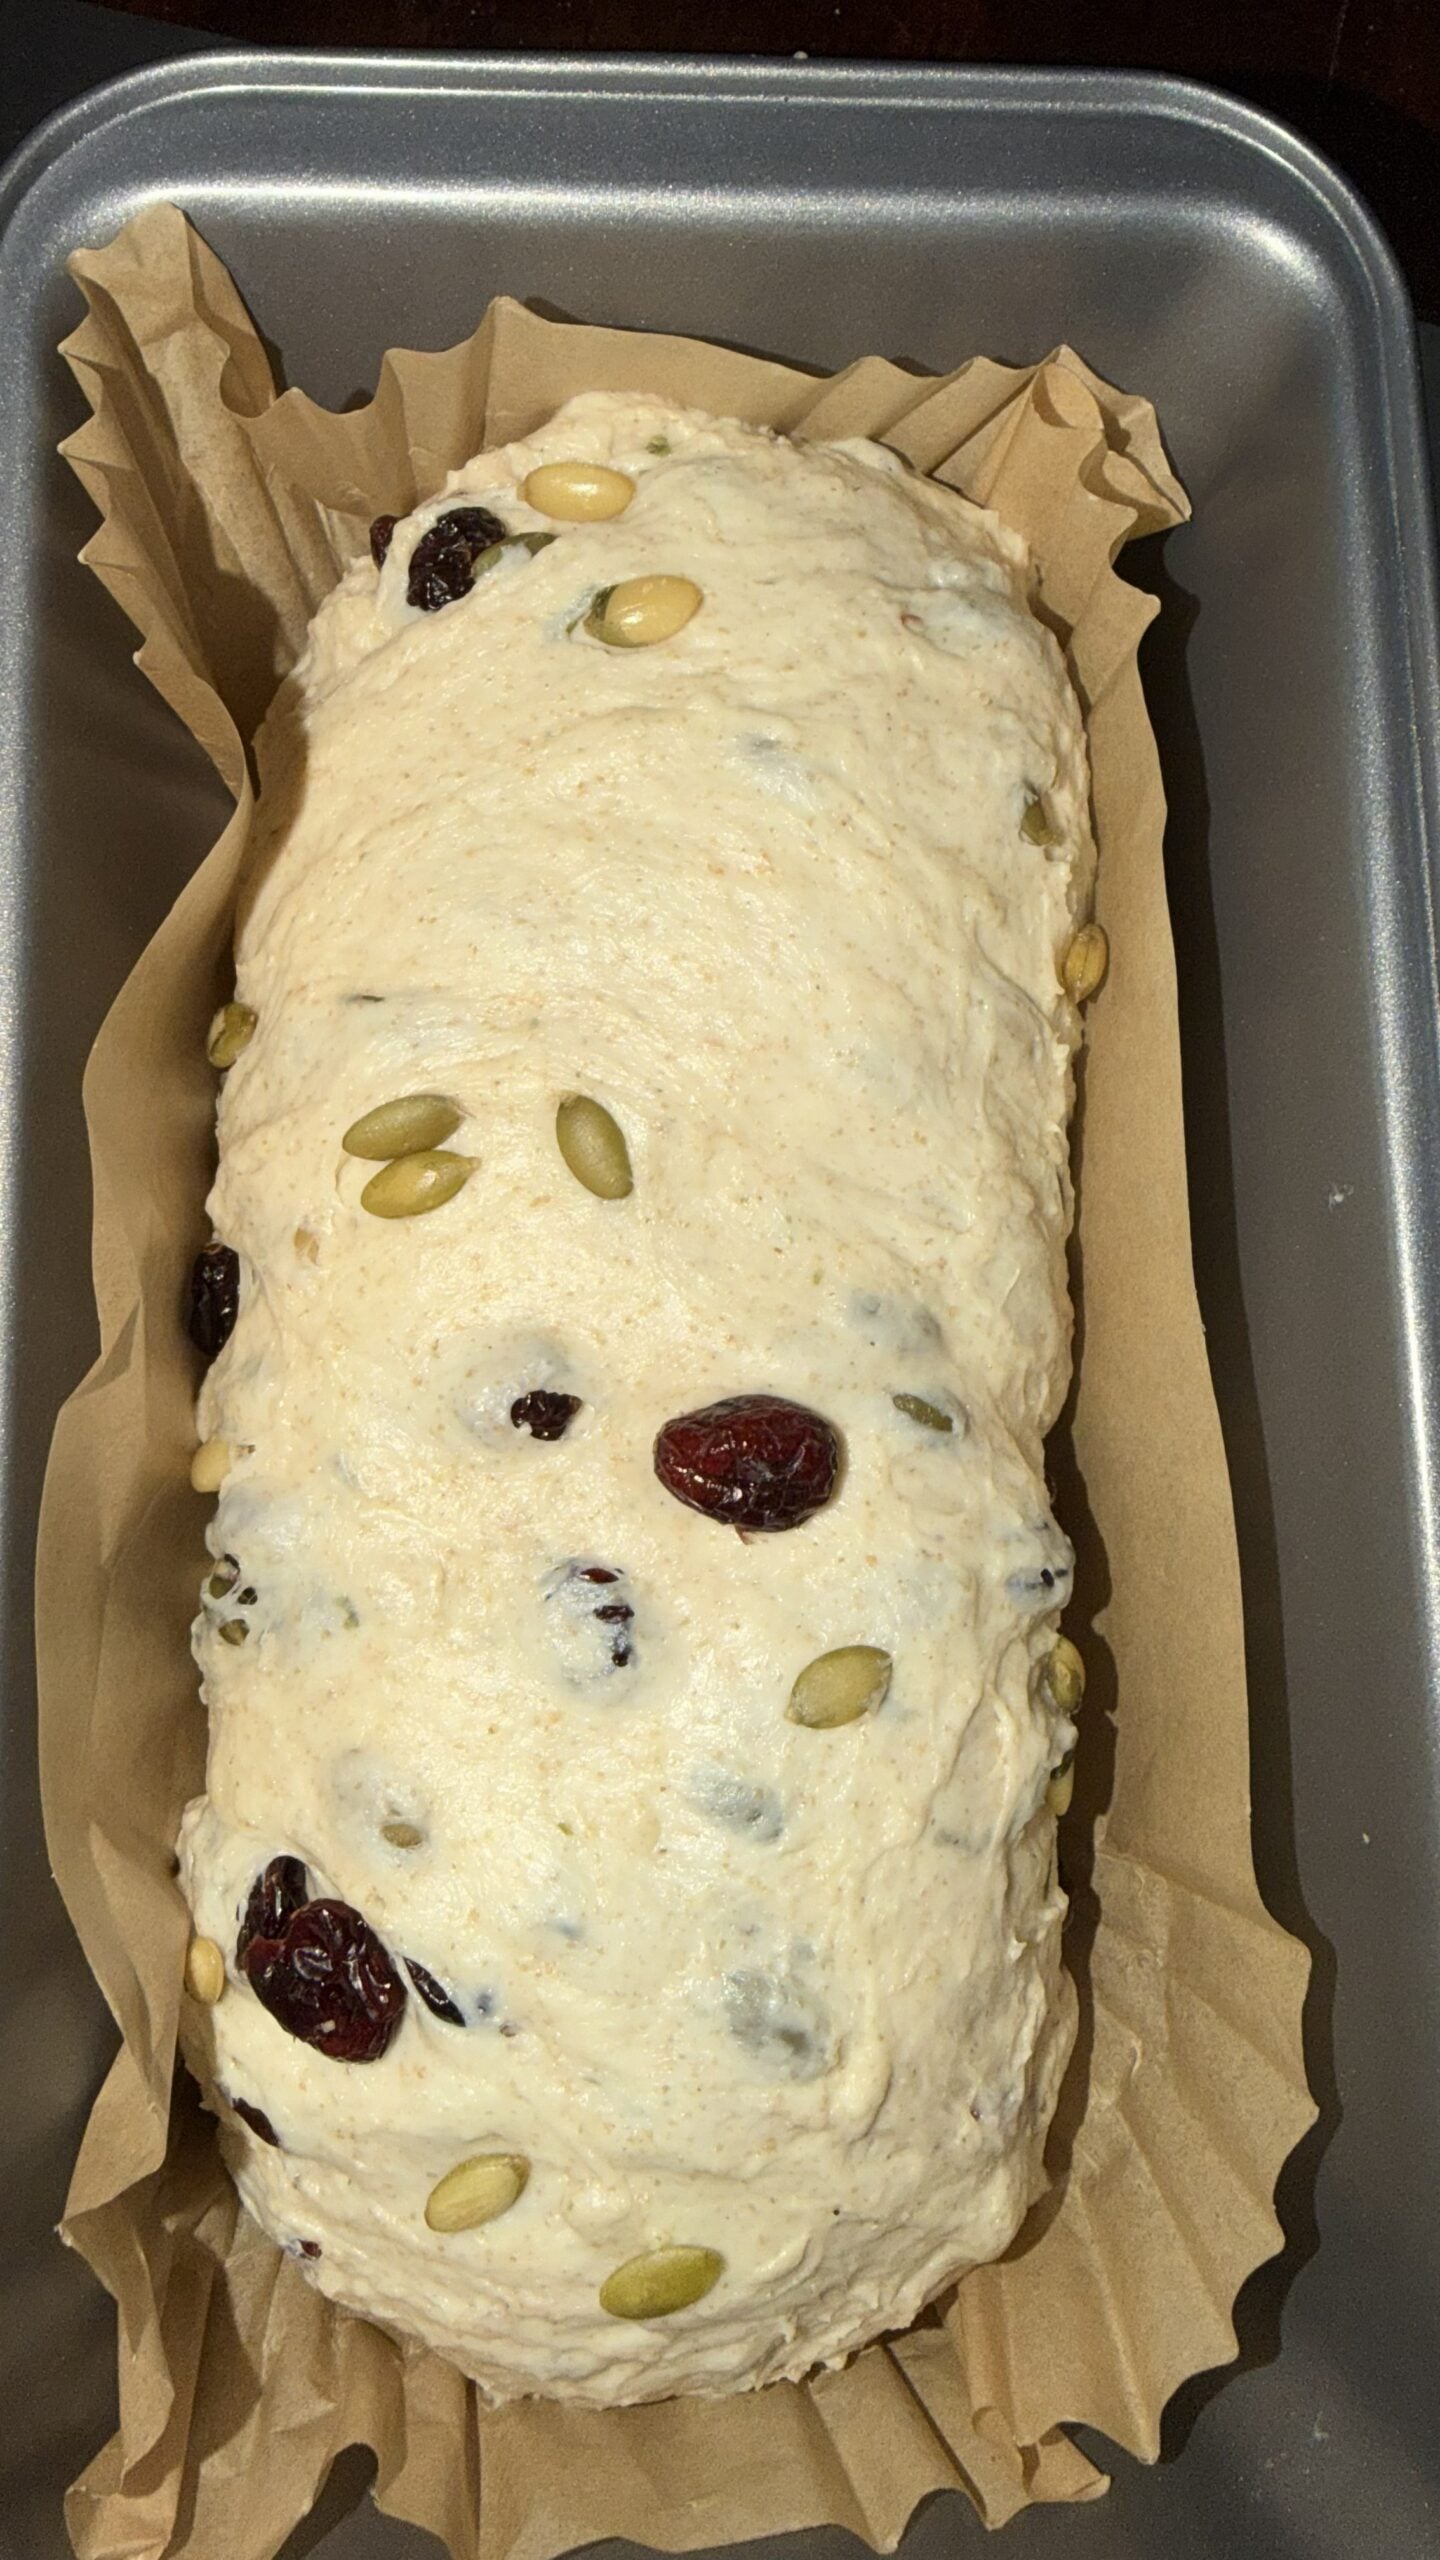
Place the loaf seam-side down in a greased 9 × 5-inch loaf pan or you can use parchment for loaf pans.
Tuck any exposed cranberries into the dough so they are less likely to burn.
Step 8: Refrigerate Overnight
Cover the loaf/pans well so the surface cannot dry out.
Place them directly into the refrigerator overnight.
I prefer refrigerating the dough already shaped in the pans because the following day all you need to do is bring the loaves out and allow them to finish proofing.
Step 9: Final Proof the Next Day
Remove the pan from the refrigerator and leave it covered at room temperature.
Allow the loaf to proof until it is:
- noticeably larger
- very puffy
- soft and pillowy
- visibly aerated
- approximately 1–1½ inches above the rim of the pan at the centre
A very gentle fingertip press should leave an indentation that slowly begins to recover.
With 100 g starter, begin checking it earlier rather than automatically waiting 4–6 hours. Depending on room temperature and starter strength, it could be ready sooner.
Bake according to the dough, not the clock.
Step 10: Bake
Preheat the oven to 375°F / 190°C.
If desired, lightly brush the top of the fully proofed loaf with milk just before baking.
For a softer crust and better oven spring, I like to cover the loaf for the first half of the bake. I place a second loaf pan upside down over the pan to create a covered baking environment.
If you don’t have a second loaf pan, create a loose domed tent with aluminum foil instead. Make sure the foil has enough clearance that it does not touch the rising dough.
Bake:
- Covered for 20–25 minutes
- Remove the pan cover or foil
- Continue baking uncovered for another 20–25 minutes, or until deeply golden and fully baked through
Total baking time will usually be around 45 minutes.
If the top is becoming darker than you want during the uncovered portion, loosely tent it with foil.
Check the internal temperature
Insert an instant-read thermometer into the centre of the loaf, being careful not to place the probe directly into a cranberry.
The bread is done when the centre reaches approximately:
200–205°F / 93–96°C
I usually aim for around 205°F / 96°C
Honey-Butter Finish
As soon as the loaf comes out of the oven, lift it from the pan using the parchment paper and place it on a cooling rack. If you did not use parchment, leave the loaf in the pan for about 10 minutes before carefully removing it.
While the bread is still hot, stir the melted butter and honey together until smooth, then lightly brush a thin layer over the top of the loaf. Allow the bread to cool completely on a wire rack before slicing.
Let It Cool Before Cutting It
Do as I say, not necessarily as I do. 😂
I sliced my first loaf while it was still hot because my family loves warm bread out of the oven.
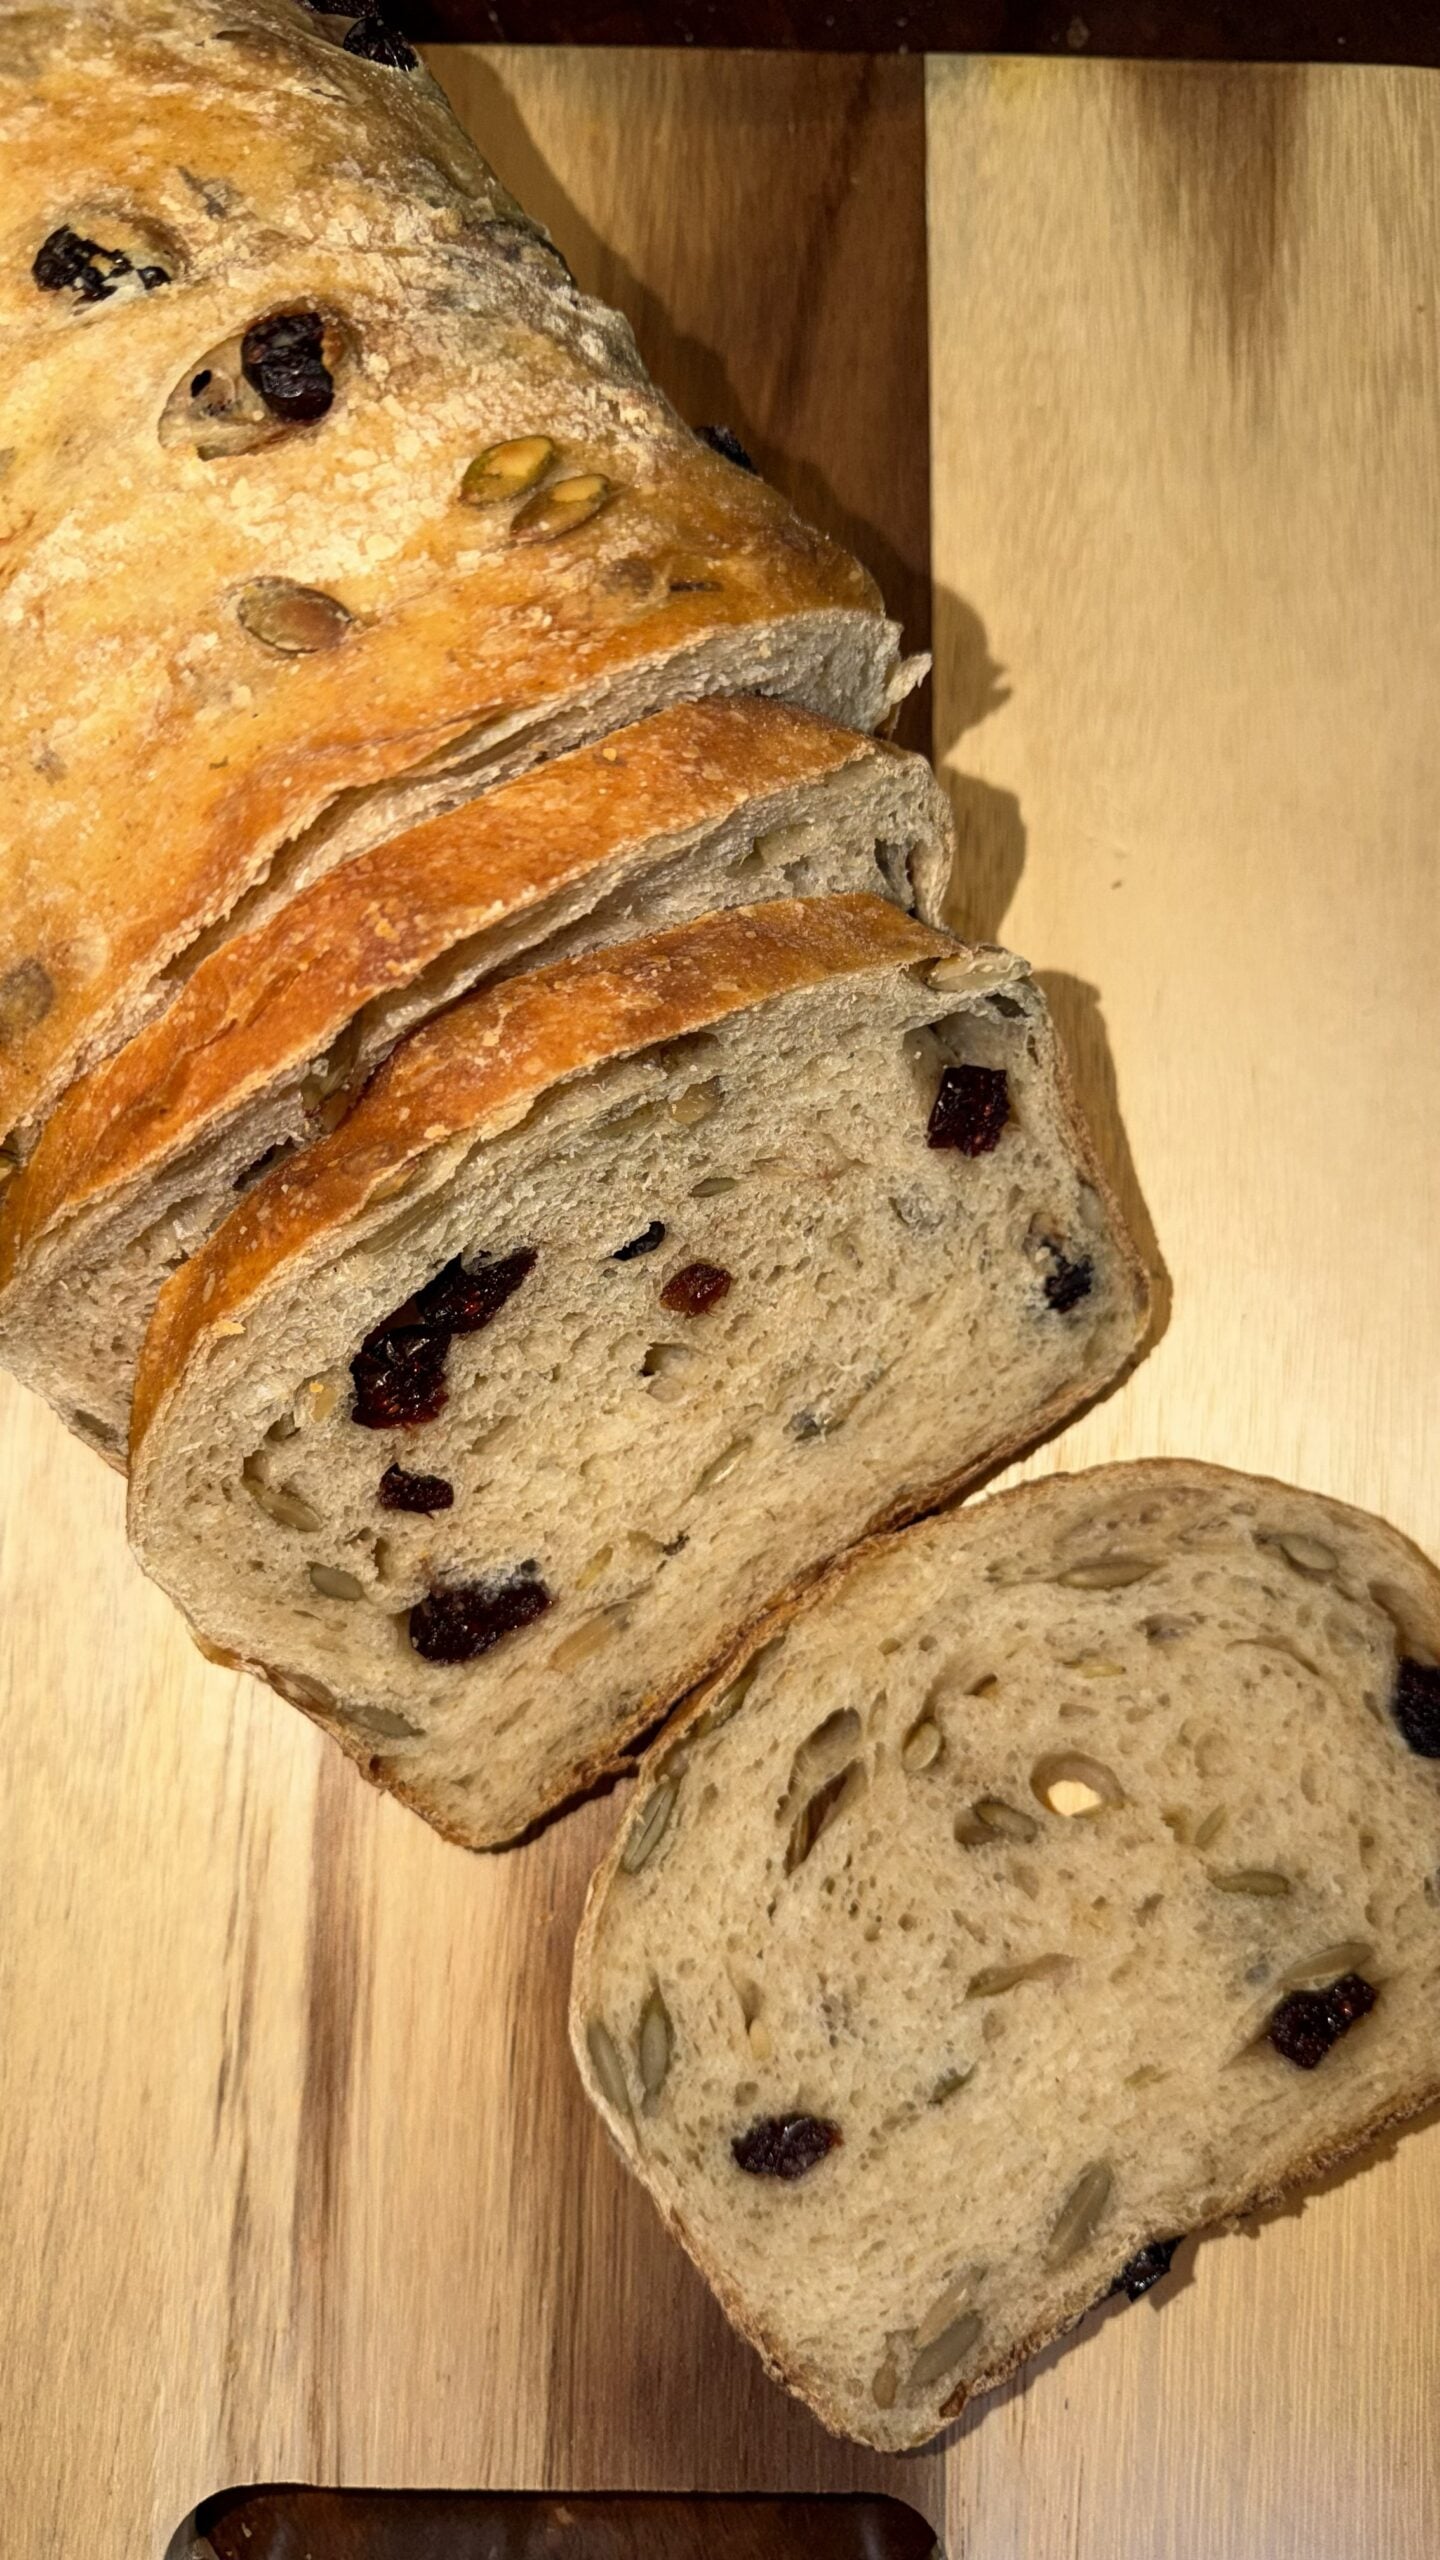
Freshly baked enriched bread is still setting as it cools, and slicing it too soon can compress or smear the crumb and make a properly baked loaf look gummy.
For the cleanest sandwich slices, let the loaves cool for at least 2 hours before cutting.
Do I Need to Soak the Cranberries?
Not if your dried cranberries are already soft and pliable.
I prefer using them directly from the package because it keeps the dough hydration more predictable.
If your cranberries are unusually dry or hard, soak them in warm water for 5–10 minutes, drain extremely well, and thoroughly pat them dry before adding them.
Salted or Unsalted Pumpkin Seeds?
I actually developed my first batch using toasted salted pumpkin seeds because that was what I had in the house and I wanted to use them up.
And they worked beautifully.
I simply reduced the salt in the dough to compensate.
For the published recipe, though, I recommend unsalted pumpkin seeds. They give you much better control over the overall salt level.
If you only have salted pepitas, don’t let that stop you. I’ve included the adjustment below.
What to Make With Cranberry Pumpkin Seed Sourdough
And obviously, we have to start with the sandwich that inspired it:
Tuna salad.
But this bread would also be incredible for:
- turkey and aged cheddar
- turkey, brie and greens
- chicken salad
- grilled cheese
- cream cheese
- butter and honey
- almond or peanut butter
- breakfast toast
- French toast
- Thanksgiving leftovers
- turkey and cranberry sandwiches
- It also makes excellent toast.
My Favorite Products & Ingredients for
Soft Sourdough Sandwich Bread
These are some of the ingredients and tools I use most often when making soft sourdough sandwich bread. You don’t need every item on this list, but these are the ones that make my baking easier and help me get consistently soft, well-risen loaves.
Affiliate disclosure: Some links in this section may be affiliate links, which means I may earn a small commission if you make a purchase through them at no additional cost to you. As an Amazon Associate, I earn from qualifying purchases.
Ingredients I Keep on Hand
- Bread flour – My main flour for sandwich bread because it gives the dough enough strength to rise well while still producing a soft crumb.
- Whole wheat flour – I often add a smaller amount for extra flavour and nutrition without making the loaf too heavy.
- Rye flour – A little goes a long way. I love adding a small amount for deeper flavour.
- Milk powder – One of my favourite additions for soft sandwich bread. It adds richness and helps create a tender crumb.
- Honey – My preferred sweetener for sandwich breads. It adds flavour and a gentle sweetness without needing refined sugar in the dough.
- Unsalted butter – Adds richness and helps keep the crumb soft.
- Whole milk – I like using milk as part of the liquid for a softer, richer loaf.
- Dried cranberries – For this loaf, look for soft, plump cranberries. Check the ingredient label if you want to avoid added refined sugar.
- Pumpkin seeds / pepitas – I recommend unsalted toasted pepitas so you can control the salt in the dough yourself.
Baking Tools I Use
- Digital kitchen scale – Probably the most important sourdough tool in my kitchen. Weighing ingredients gives much more consistent results than measuring by volume.
- 9 × 5-inch loaf pan – This is the size I developed this recipe for.
- Parchment paper – I line my loaf pans with parchment so I can lift the bread out immediately after baking.
- Second loaf pan for covering – I turn another loaf pan upside down over the bread for the first 20–25 minutes of baking. It works like a little covered baking chamber.
- Aluminum foil – If you don’t have a second pan, make a loose domed foil tent instead.
- Instant-read thermometer – Especially useful for enriched sourdough breads. I bake this loaf until the centre reaches about 200–205°F / 93–96°C.
- Dough scraper – Helpful for dividing, shaping, and moving soft dough.
- Pastry brush – Perfect for brushing on the honey-butter finish while the loaf is still hot.
- Cooling rack – I remove sandwich bread from the pan immediately and cool it on a rack so moisture doesn’t collect around the bottom crust.
- Stand mixer – Completely optional. I’ve been enjoying mixing these loaves by hand lately, but if I’m making three loaves at once for freezing or gifting, I usually use my mixer.
A Note About What You Actually Need
You definitely don’t need a kitchen full of specialty sourdough equipment to make a beautiful sandwich loaf. A bowl, your hands, a loaf pan, parchment paper, and a kitchen scale can get you very far.
But if you bake sourdough regularly, the products above are the ones I personally find useful enough to reach for again and again.
If you’ve been looking for a Cranberry Pumpkin Seed Sourdough Sandwich Bread that is soft, sliceable, and still full of sourdough flavour, this is the loaf to try. The cranberries add just enough sweetness, the pumpkin seeds bring a savoury crunch, and the blend of flours gives the bread more depth than a standard white sandwich loaf. It’s just as good toasted with butter as it is filled with tuna, turkey, chicken salad, or your favourite sandwich fillings, and it’s one of those breads I’ll be making again and again.
If you make this recipe, leave a comment and let me know how it turned out. And don’t forget to save or share this post so you can come back to it the next time you’re baking sourdough sandwich bread.
Frequently Asked Questions
Can I make this without milk powder?
Yes. The bread will still work without it. Milk powder contributes additional dairy solids and helps enrich the loaf, but it is not essential to fermentation. No need to adjust any ingredients in the loaf. Milk Powder is optional.
Can I use only bread flour?
You can, but you will lose some of the flavour that makes this loaf distinctive. I specifically like the combination of bread flour, whole wheat and rye. It will be delicious either way. 🙂
Can I add flax seeds?
Yes, and that’s one variation I want to test.
Because flax absorbs water, I would not simply add a large quantity without adjusting the dough. For an initial test, I’d keep the amount modest.
Can I make it with unsalted pumpkin seeds?
Yes. Reduce the dough salt as described above.
Can I skip the overnight refrigerator fermentation?
You can finish proofing and bake the bread the same day, but the timing will change. For this particular recipe, I prefer the overnight schedule because it fits naturally into sourdough baking and gives you freshly baked sandwich bread the following day.
Why didn't my bread rise in four hours?
Sourdough does not operate on a fixed clock.
Starter strength, dough temperature, room temperature, ingredient temperature, enrichment and fermentation history all affect how quickly a loaf rises.
Look at the dough first and the clock second. Feel free to comment below and I will gladly help the best I can. 🙂
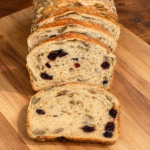
Soft Cranberry Pumpkin Seed Sourdough Sandwich Bread
Equipment
- 9 × 5-inch loaf pan
- Parchment paper
- Stand mixer
- Second loaf pan to use as a cover during baking If you don’t have a second loaf pan, you can create a loose domed foil tent instead.
Ingredients
Tangzhong
- 20 g bread flour
- 100 g whole milk
Main Dough
- 280 g bread flour
- 60 g whole wheat flour
- 20 g rye flour
- 100 g active sourdough starter 100% hydration
- 145 g milk
- 30 g water
- 40 g honey
- 15 g milk powder
- 8 g fine sea salt if using unsalted pumpkin seeds (or 7g if using salted)
- 40 g unsalted butter very soft
- all of the cooled tangzhong
Inclusions
- 75 g dried cranberries
- 70 g unsalted pumpkin seeds/pepitas toasted
Optional Inclusions:
- 10 g Whole Flax Seeds
- 3 g Finely Grated Orange Zest
Optional Honey-Butter Finish
- 8 g butter melted
- 6 g honey
Instructions
Prepare the sourdough starter
- Use 100 g active sourdough starter at or near peak.For a same-day levain build, you can feed:- 25 g mature starter- 50 g water- 50 g bread flourLet rise until doubled, bubbly, and well aerated.For an overnight levain, I often use a 1:10:10 feeding ratio instead.
Make the tangzhong
- Whisk 20 g bread flour and 100 g whole milk together until smooth.Microwave method: Microwave in 30-second intervals, whisking well after each interval, until thick and pudding-like, usually 60–90 seconds total.Stovetop method: Cook over medium-low heat, whisking constantly, until thick and smooth.The tangzhong should reach approximately 150–160°F / 65–71°C.Let cool before adding it to the dough.
Mix the dough
- In a large bowl or stand mixer bowl, combine:- bread flour- whole wheat flour- rye flour- milk powder- salt- optional flax seeds- optional orange zest
- Add:- active sourdough starter- cooled tangzhong- whole milk- water- honey- very soft butter
- By hand: Squeeze, pinch, and fold the dough until no dry flour remains and the butter is incorporated.Stand mixer: Mix on low until combined, then continue on low to medium-low for a few minutes until the dough begins to smooth and strengthen.Cover and rest for 30 minutes.
First stretch and fold
- With a slightly damp hand, stretch one side of the dough upward and fold it over the centre.Rotate the bowl and repeat until you have completed approximately 6–8 folds.Cover and rest for 30 minutes.
Add the cranberries and pumpkin seeds
- During the second fold, gently stretch the dough and scatter approximately half of the cranberries and pumpkin seeds over it.Fold the dough over itself, add the remaining inclusions, and fold again.Gently work them in just until evenly distributed.Do not aggressively knead the inclusions into the dough.Cover and rest for 30 minutes.
Third and optional fourth fold
- Perform another gentle set of stretch-and-folds or coil folds.The dough should begin to feel smoother, stronger, elastic, and better able to hold its shape.If it still feels loose or weak, give it one additional fold 30 minutes later.After the final fold, leave the dough undisturbed.
Bulk ferment
- Allow the dough to bulk ferment until it has increased approximately 30–40% in volume.Look for dough that is:- noticeably puffier- slightly domed- showing small bubbles- lighter and more aerated- gently jiggly when the bowl is moved- soft and pillowy rather than denseDo not wait for the dough to double.Bulk fermentation begins when the starter is first mixed into the dough, so the stretch-and-fold period is part of the total bulk fermentation.
Shape
- Turn the dough onto your work surface.Gently press it into a rectangle approximately the width of your 9 × 5-inch loaf pan.
- Fold the sides slightly inward.
- Starting from the short end, roll into a snug log without compressing all of the fermentation gases.Pinch the seam closed.
- Place seam-side down in a greased or parchment-lined loaf pan.Tuck exposed cranberries into the dough so they are less likely to burn.
Refrigerate overnight
- Cover the loaf well so the surface does not dry out.
- Refrigerate the shaped loaf overnight, approximately 8–12 hours.
Final proof
- The next day, remove the loaf from the refrigerator and leave it covered at room temperature.Proof until the loaf is:- noticeably larger- very puffy- soft and pillowy- visibly aerated- approximately 1–1½ inches above the rim of the pan at the centreA gentle fingertip press should leave an indentation that slowly begins to recover.Use the dough as your guide rather than relying only on the clock.
Bake
- Preheat the oven to 375°F / 190°C.If desired, lightly brush the top with milk.
- Cover the loaf with a second loaf pan turned upside down. If you do not have a second pan, use a loose domed foil tent that does not touch the dough.
- Bake:- Covered at 375°F / 190°C for 20–25 minutes- Remove the cover- Reduce the oven to 350°F / 177°C- Bake uncovered for another 20–25 minutesIf the loaf is browning too quickly, loosely tent it with foil.The loaf is done when the centre reaches approximately 200–205°F / 93–96°C. I usually aim for about 205°F / 96°C.
Add the honey-butter finish
- Stir together:- 8 g melted butter- 6 g honeyIf the loaf was baked in parchment, lift it immediately from the pan and place it on a cooling rack.While the loaf is still hot, brush a thin layer of honey butter over the top.If you did not use parchment, brush the loaf while still in the pan, wait about 10 minutes, then carefully remove it.
Cool
- Allow the loaf to cool on a wire rack for at least 2 hours before slicing.Cutting enriched bread while it is still hot can compress the crumb and make it appear gummy even when it is properly baked.